
Dandy-Do Cookies

There is something undeniably nostalgic about a classic dandy do cookie recipe. These treats belong to a cherished category of vintage kitchen staples that rely on simple pantry ingredients and a bit of stovetop magic rather than a hot oven. Known by various names across different regions, the “Dandy Do” is characterized by its rich, fudge-like consistency and the satisfying chew of oats. It is the kind of treat that many of us remember waiting impatiently for as it cooled on wax paper on the kitchen counter, promising a perfect blend of chocolate and peanut butter in every bite.
What makes this vintage cookie recipe so enduring is its accessibility and the speed with which it comes together. Whether you are craving a late-night snack or need a quick dessert for a potluck, these no-bake cookies deliver a sophisticated flavor profile despite their humble preparation method. By mastering the brief boiling stage and choosing the right ingredients, you can recreate this timeless favorite with the perfect balance of moisture and structure that defines a true Dandy Do.
Why This Recipe Is a Keeper
- No Oven Required: Since these are no-bake cookies, they are perfect for hot summer days when you want a sweet treat without heating up the entire house.
- Pantry Staples: You likely already have everything you need in your kitchen, from cocoa powder and sugar to peanut butter and oats, making this a great last-minute option.
- Perfect Texture: This classic dandy do cookie recipe results in a cookie that is soft and fudgy rather than dry or crumbly, offering a deeply satisfying mouthfeel.
- Quick Preparation: From the moment you turn on the stove to the moment you drop the last spoonful onto the paper, the active work takes less than fifteen minutes.
Ingredients You’ll Need
The success of these cookies depends on the chemical reaction between the sugars, fats, and liquids during the boiling process. Each ingredient plays a specific role in ensuring the cookies set properly while remaining tender. Using high-quality cocoa and fresh peanut butter will significantly enhance the final flavor profile of your batch.
- Granulated Sugar: This provides the sweetness and, once boiled with the liquids, creates the structural “syrup” that holds the oats together as the cookies cool.
- Unsalted Butter: Butter adds a necessary richness and helps create a smooth, glossy texture in the chocolate base. Using unsalted allows you to control the savory balance.
- Whole Milk: The liquid component needed to dissolve the sugar. Whole milk provides the best fat content for a creamy, fudge-like result.
- Unsweetened Cocoa Powder: This gives the cookies their deep chocolate flavor. Sifting it beforehand can help prevent small clumps from forming in the pot.
- Creamy Peanut Butter: Acting as both a flavoring and a stabilizer, peanut butter adds protein and healthy fats that help the cookies firm up.
- Quick-Cooking Oats: Unlike old-fashioned rolled oats, quick oats have a smaller texture that integrates perfectly into the fudge, ensuring the cookies aren’t too “toothsome” or difficult to chew.
- Vanilla Extract: A splash of high-quality vanilla rounds out the flavors, bridging the gap between the salty peanut butter and the bitter cocoa.
Simple Swaps and Variations
While the classic dandy do cookie recipe is nearly perfect in its original form, there are several ways to adapt it to your preferences or what you have available in the cupboard.
- Nut Butter Alternatives: If you have a peanut allergy or simply prefer a different flavor, almond butter or sunflower seed butter works as an excellent 1:1 replacement for the peanut butter.
- Add Crunch: While creamy peanut butter is standard, using extra-crunchy peanut butter adds a delightful texture without changing the chemistry of the cookie.
- Coconut Twist: For a more tropical profile, replace half a cup of the oats with shredded sweetened or unsweetened coconut. This adds a chewy, nutty element that pairs beautifully with chocolate.
- Salted Caramel Style: Add a generous pinch of flaky sea salt to the top of each cookie immediately after scooping them onto the wax paper to elevate the chocolate peanut butter cookies into a gourmet treat.
How to Make a Classic Dandy Do Cookie Recipe
Preparation is key when making these cookies because the final steps happen very quickly once the mixture reaches the correct temperature. Make sure your wax paper or parchment paper is laid out on a flat surface before you even turn on the stove.
Step 1: Combine the Base Ingredients
In a heavy-bottomed saucepan, combine your sugar, butter, milk, and cocoa powder. Place the pot over medium heat and stir constantly as the butter melts and the sugar begins to dissolve. It is important to use a heavy pot to ensure even heat distribution, which prevents the sugar from scorching at the bottom. Continue stirring until the mixture is completely smooth and the cocoa is fully incorporated into the liquid, creating a dark, glossy chocolate syrup.
Step 2: Achieve a Full Rolling Boil
This is the most critical stage of the vintage cookie recipe. Increase the heat slightly until the mixture reaches a full rolling boil—this means the bubbles are vigorous and cannot be stirred down. Start your timer the moment it reaches this stage and boil for exactly 60 to 90 seconds. This timing allows the sugar to reach the “soft ball” stage, which is necessary for the cookies to set firmly later. Boiling for too short a time will result in gooey cookies, while boiling too long can make them dry and crumbly.
Step 3: Incorporate the Flavoring and Oats
Remove the saucepan from the heat immediately after the timer goes off. Quickly stir in the peanut butter and vanilla extract until the mixture is uniform and the peanut butter has melted into the chocolate. Once smooth, pour in the quick-cooking oats. Use a sturdy spatula to fold the oats into the liquid until every flake is thoroughly coated in the chocolate-peanut butter mixture. You want to work efficiently here before the sugar starts to cool and crystallize.
Step 4: Scoop and Set the Cookies
Using a tablespoon or a small cookie scoop, drop rounded portions of the mixture onto your prepared wax paper. You can make them as large or small as you like, but a standard two-tablespoon size is traditional. Allow the cookies to sit undisturbed at room temperature for at least 30 minutes. As they cool, the fats and sugars will solidify, creating that iconic no-bake cookies texture. They are ready to eat once they are firm to the touch and easily peel away from the paper.
Pro Tips for the Best Results
- Use Quick Oats: Always reach for quick-cooking oats rather than old-fashioned rolled oats. Rolled oats are too large and won’t soften enough in the hot liquid, leading to a dry, overly chewy cookie.
- Timing is Everything: Use a digital timer for the boiling step. A few seconds can be the difference between a cookie that stays soft and one that turns into a sandy mess.
- Check the Weather: Believe it or not, high humidity can prevent these cookies from setting properly. If it’s a very rainy day, you may need to boil the mixture for an extra 15 seconds.
- Work Quickly: Once the pot is off the heat, the mixture starts to set. Have all your add-ins measured out and ready to go so you aren’t scrambling while the chocolate cools.
- Sift the Cocoa: If your cocoa powder is lumpy, sift it into the sugar before adding the liquid. This ensures a perfectly smooth fudge base without any bitter chalky pockets.
Troubleshooting Common Problems
Why Are My Cookies Too Gooey?
If your cookies refuse to firm up even after an hour, the mixture likely didn’t reach a high enough temperature. This usually happens if the timer started before a true “rolling boil” was achieved. You can still save them by placing the tray in the refrigerator to help them set, or you can use the gooey mixture as a delicious topping for vanilla ice cream.
Why Did My Cookies Turn Out Crumbly?
Crumbly cookies are usually the result of over-boiling. If the sugar mixture is cooked too long, it moves toward the “hard crack” stage, which makes the finished product brittle. Another culprit could be using too many oats. Ensure you are measuring your oats level with the cup to maintain the correct ratio of liquid to dry ingredients.
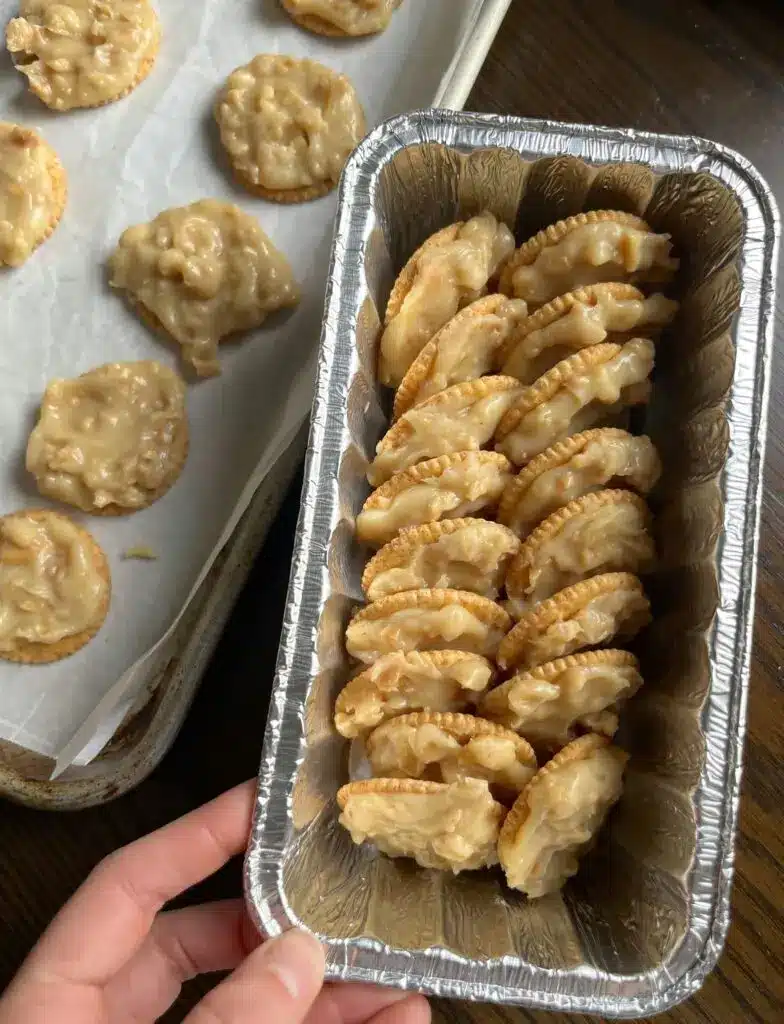
How to Serve Dandy Do Cookies
These chocolate peanut butter cookies are incredibly versatile and fit into almost any casual occasion. Because they are sturdy once set, they are excellent for packing into lunchboxes or taking on a hike for a quick energy boost. Their rich flavor makes them a natural companion to a cold glass of milk or a hot cup of coffee.
Presentation Ideas
For a festive touch, you can arrange the cookies on a vintage platter to lean into the “old-fashioned” charm of the recipe. If you are serving them at a party, consider placing each cookie in a small paper cupcake liner. This makes them easy for guests to grab without getting chocolate on their fingers and adds a professional look to your dessert spread.
Creative Pairings
While perfect on their own, these cookies can also be part of a larger dessert experience. Try crumbling a leftover Dandy Do over a bowl of Greek yogurt for a decadent breakfast, or sandwiching a scoop of salted caramel ice cream between two cookies for an improvised ice cream sandwich. The combination of salty and sweet makes them pair well with sharp cheeses or tart fruits like raspberries.
Storage and Make-Ahead
One of the best things about this classic dandy do cookie recipe is how well the cookies hold up over time. They actually tend to develop a deeper flavor the day after they are made, as the oats fully hydrate and the cocoa mellows.
Storing Leftovers
Store your cookies in an airtight container at room temperature for up to five days. To keep them from sticking together, place a sheet of parchment paper between each layer. If your kitchen is particularly warm, you can store them in the refrigerator to keep them firm, though they are best enjoyed at room temperature for the softest texture.
Freezing Instructions
These cookies freeze exceptionally well. Place the set cookies in a freezer-safe bag or container with layers separated by wax paper. They will stay fresh for up to three months. When you are ready to eat one, simply let it thaw on the counter for about 15 minutes. They can even be eaten straight from the freezer if you enjoy a very firm, cold treat!
Final Thoughts
The classic dandy do cookie recipe is more than just a quick dessert; it is a testament to the idea that you don’t need fancy equipment or expensive ingredients to create something truly delicious. By following the simple steps of melting, boiling, and stirring, you can produce a batch of easy stovetop treats that will please kids and adults alike. Whether you are making these for the first time or revisiting a childhood favorite, the reliable combination of chocolate, peanut butter, and oats is sure to make these a permanent fixture in your baking—or non-baking—rotation.
Frequently Asked Questions
Can I use old-fashioned oats instead of quick oats?
While you can technically use old-fashioned rolled oats, the texture will be significantly different. Rolled oats are much heartier and won’t soften as quickly in the warm chocolate mixture, which can result in a “dry” or overly chewy cookie. If you only have rolled oats, you can pulse them in a blender a few times to break them down into smaller pieces before adding them to the pot.
Why do I need to boil the mixture for exactly 60 seconds?
The boiling time is the most important part of this vintage cookie recipe. It acts as a simplified way of reaching the “soft ball” candy stage. If you boil for less than a minute, the sugar won’t bond with the fats and liquids properly, leaving you with a puddle. If you boil for two minutes or more, the sugar will become too hard, resulting in a cookie that crumbles when you take a bite.
Can I make these cookies vegan?
Yes, this recipe is quite easy to adapt for a vegan diet. You can replace the butter with a plant-based butter alternative or coconut oil, and substitute the whole milk with a creamy plant milk like oat milk or soy milk. The process remains exactly the same. Just ensure your cocoa powder and peanut butter are also vegan-certified to maintain the integrity of the no-bake cookies.
My cookies are too soft; can I fix them?
If your cookies didn’t set as firmly as you’d like, the easiest fix is to pop them into the refrigerator. Cold temperatures will help the fats and sugars solidify. If they are still too soft after chilling, it likely means they weren’t boiled long enough. In that case, you can use the mixture as a “fudge sauce” or even roll the soft dough into small balls and coat them in crushed nuts or cocoa powder to make truffles.
Is it possible to reduce the sugar in this recipe?
Sugar is not just a sweetener in this classic dandy do cookie recipe; it is a structural ingredient. Reducing the sugar significantly can prevent the cookies from setting properly. If you want to reduce the sweetness, consider using a darker cocoa powder or a natural, unsweetened peanut butter rather than reducing the actual granulated sugar in the syrup base.
Dandy-Do Cookies

A nostalgic no-bake treat that perfectly balances the crunch of cornflakes with the creamy sweetness of peanut butter. These quick and easy cookies are a family favorite for any occasion.
- 1 cup sugar
- 1 cup light corn syrup
- 1 cup creamy peanut butter
- 6 cups cornflakes cereal
- 1In a large saucepan, combine the sugar and corn syrup. Bring the mixture to a boil over medium heat, stirring occasionally.
- 2Remove the saucepan from the heat immediately after it reaches a boil.
- 3Stir in the peanut butter until the mixture is smooth and fully combined.
- 4Gently fold in the cornflakes until they are evenly coated with the peanut butter mixture.
- 5Drop by rounded tablespoonfuls onto wax paper or parchment paper.
- 6Allow the cookies to cool and set completely before serving.
Keywords: no-bake cookies, peanut butter treats, cornflake cookies, easy desserts, dandy-do


