
Butternut Cookies

There is something undeniably nostalgic about a cookie that relies on the simple, honest harmony of high-quality butter and toasted nuts. This best homemade butternut cookie recipe captures that vintage bakery essence, delivering a treat that is remarkably crisp on the edges with a tender, melt-in-your-mouth center. Unlike standard sugar cookies, these are defined by a deeper, almost toffee-like undertone that comes from the careful browning of the butter and the inclusion of finely chopped nuts. They are the kind of old-fashioned cookie recipe that reminds you why the classics never truly go out of style, offering a sophisticated flavor profile that appeals to both children and adults alike.
The beauty of this recipe lies in its texture. By focusing on the “butternut” profile—a combination of rich dairy fats and earthy pecans or walnuts—you create a cookie that feels substantial yet delicate. Whether you are looking for a new addition to your holiday baking rotation or simply want a reliable easy holiday treats option that pairs perfectly with a cup of afternoon coffee, these cookies deliver. They don’t rely on flashy frostings or over-the-top mix-ins; instead, they celebrate the golden, toasted flavors that only come from patient baking and quality ingredients. This guide will walk you through the technical nuances that ensure your cookies come out perfectly golden every single time.
Why You’ll Love This Recipe
- Perfect Texture Balance: These cookies offer a satisfying snap at the first bite followed by a soft, buttery crumb, achieving the holy grail of crisp butter cookies.
- Deep Flavor Profile: By using a mix of sugars and toasted nuts, the recipe develops a complex, caramelized flavor that tastes much more intricate than its simple ingredient list suggests.
- Excellent Shelf Life: Because of the high butter content and low moisture, these cookies stay fresh and crisp for days, making them ideal for gifting or mailing.
- Straightforward Technique: Despite the gourmet results, the method follows a logical flow that even a novice baker can master, requiring no specialized equipment beyond a standard mixer.
Ingredients You’ll Need
To achieve the specific flavor and structure of the best homemade butternut cookie recipe, each ingredient must be selected for its functional role. From the fat content in the butter to the protein in the flour, everything works together to create that signature “butternut” crunch.
- Unsalted Butter: This provides the primary flavor and the “short” texture of the cookie. Using unsalted allows you to control the seasoning precisely, ensuring the sweetness isn’t overshadowed.
- Granulated and Light Brown Sugar: The granulated sugar encourages crisping and browning, while the brown sugar adds a hint of moisture and a molasses-like depth that mimics toffee.
- Finely Chopped Nuts: Typically pecans or walnuts, these provide the “nut” in butternut. When chopped very fine, they distribute evenly, ensuring every bite has a nutty crunch without the cookie falling apart.
- All-Purpose Flour: This provides the structural framework. It has just enough protein to hold the cookie together while maintaining a delicate, sandy crumb.
- Egg: A single large egg acts as the emulsifier, binding the fats and liquids together to prevent the cookies from becoming too crumbly or greasy.
- Vanilla and Almond Extract: While vanilla provides a warm base, a tiny drop of almond extract enhances the natural flavor of the nuts, making the cookies taste professional and bright.
- Baking Soda: This helps the cookies spread slightly and encourages the Maillard reaction, which is responsible for that beautiful golden-brown color.
Variations and Smart Swaps
- The Nut Swap: If you aren’t a fan of pecans, you can easily use toasted hazelnuts or walnuts. For a nut-free version that still tastes “toasty,” try toasted sunflower seeds or even a tablespoon of toasted milk powder.
- Spice It Up: While the classic version is pure butter and nut, adding a half-teaspoon of cinnamon or a pinch of nutmeg can transform these into a warm, autumnal treat.
- Chocolate Dipped: For a more decadent presentation, dip half of each cooled cookie into melted dark chocolate. The bitterness of the cocoa perfectly balances the sweet, buttery dough.
- Salted Caramel Twist: Sprinkle a few flakes of sea salt over the cookies immediately after they come out of the oven to highlight the caramel notes in the brown sugar.
How to Make the Best Homemade Butternut Cookie Recipe
Step 1: Toast and Prep the Nuts
The first step to a successful toasted walnut cookies experience is to actually toast your nuts before they ever enter the dough. Place your chopped pecans or walnuts in a dry skillet over medium heat, tossing frequently for 3 to 5 minutes until they smell deeply fragrant and look slightly darker. This process draws out the natural oils and ensures the nuts remain crunchy inside the dough rather than becoming soft. Once toasted, let them cool completely before finely mincing them; if they are too warm, they can melt the butter in your dough prematurely.
Step 2: Cream the Butter and Sugars
In a large bowl, beat the softened butter with both the granulated and brown sugars. You want to cream them for at least 3 minutes until the mixture is pale, light, and fluffy. This step is crucial because it incorporates tiny air bubbles into the fat, which helps the cookies rise and creates a delicate texture. If you under-mix at this stage, your cookies may end up dense and greasy rather than light and crisp. Scrape down the sides of the bowl to ensure every bit of sugar is fully integrated into the butter.
Step 3: Emulsify with Eggs and Aromatics
Add the egg, vanilla extract, and almond extract to the creamed mixture. Beat on medium speed until the dough looks glossy and smooth. This is the stage where the emulsion is formed. If the mixture looks curdled or separated, continue beating for another minute until it comes together. The almond extract is a “secret ingredient” in many old-fashioned cookie recipe versions, as it provides a floral backnote that makes the butter taste even richer.
Step 4: Incorporate Dry Ingredients and Nuts
Slowly add the flour, baking soda, and salt to the wet ingredients, mixing on the lowest speed possible. Over-mixing the flour will develop gluten, which results in a tough, bread-like cookie rather than a tender one. Stop mixing as soon as you see no more streaks of white flour. Finally, fold in your toasted, finely chopped nuts by hand using a spatula. The dough should be thick, fragrant, and slightly tacky to the touch.
Step 5: Chill the Dough for Stability
While it is tempting to bake immediately, this best homemade butternut cookie recipe benefits immensely from a 30-minute chill in the refrigerator. Chilling the dough solidifies the butter, which prevents the cookies from spreading too thin in the oven. It also gives the flour time to hydrate and the flavors time to meld. If the dough is too warm when it hits the oven, the cookies will lose their shape and become oily puddles rather than neat, mounded rounds.
Step 6: Bake Until Golden and Set
Scoop rounded tablespoons of dough onto a parchment-lined baking sheet, leaving about two inches of space between each. Bake at 350°F (175°C) for 10 to 12 minutes. You are looking for the edges to be a distinct golden brown while the centers still appear slightly soft. The cookies will continue to firm up on the hot baking sheet once removed from the oven. This “carry-over cooking” is the secret to achieving that perfect contrast between a crunchy rim and a tender middle.
Pro Tips for Success
- Tip: Use room temperature eggs. A cold egg can cause the creamed butter to seize up, breaking your emulsion and resulting in an uneven bake.
- Tip: Measure your flour by weight if possible. If using cups, fluff the flour first and spoon it into the measuring cup to avoid packing it down, which leads to dry, crumbly cookies.
- Tip: Fine-tune your nut chop. You want the nuts to be smaller than a pea but larger than a grain of sand. This ensures they provide texture without making the dough difficult to scoop.
- Tip: Don’t skip the parchment paper. It provides a consistent surface for the cookies to grip, leading to a more uniform spread and preventing the bottoms from browning too quickly.
- Tip: Let them cool completely. These cookies develop their signature “snap” only after they have cooled to room temperature. Resist the urge to eat them while they are still warm and soft!
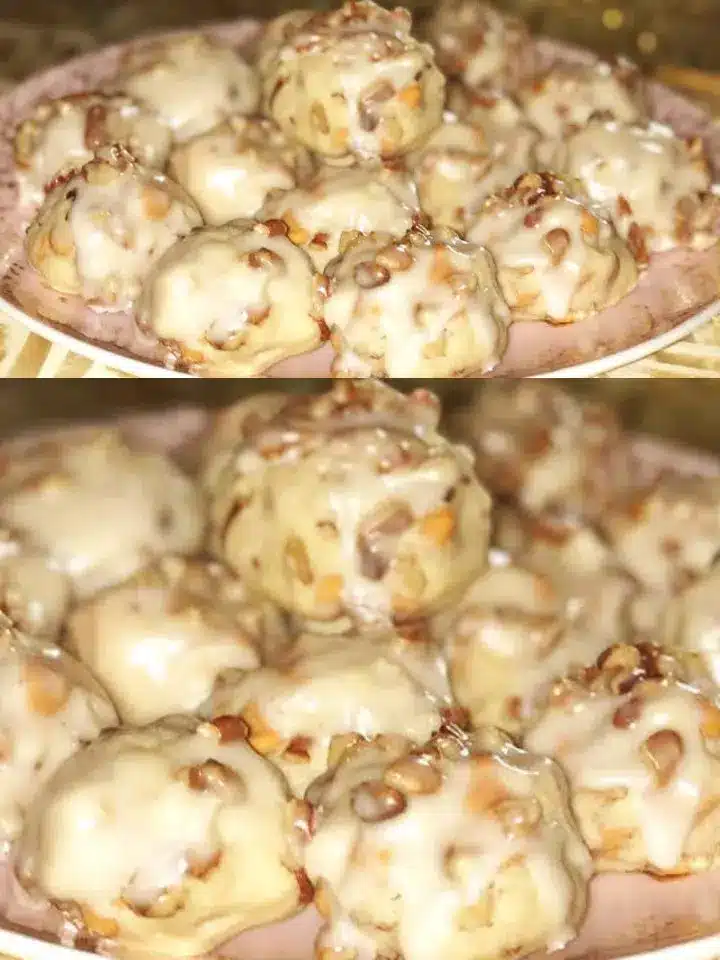
How to Serve Your Homemade Cookies
Serving the best homemade butternut cookie recipe is all about highlighting their simple elegance. These cookies are traditional “tea biscuits” in style, meaning they are designed to be enjoyed alongside a warm beverage. They are sturdy enough for dunking into a cold glass of milk, yet sophisticated enough to be served on a silver platter at a formal afternoon tea.
Presentation Ideas
If you are serving these at a gathering, consider arranging them in a circular pattern on a wooden serving board. Their rustic, golden-brown hue looks beautiful against natural textures. For a festive touch, you can lightly dust them with powdered sugar just before serving, which adds a snowy appearance that contrasts beautifully with the dark toasted nuts visible on the surface.
Pairing Suggestions
Pair these cookies with a strong black tea like Earl Grey or a nutty coffee roast. The tannins in the tea and the acidity in the coffee help cut through the richness of the butter, refreshing your palate for the next bite. For a dessert course, serve two cookies alongside a scoop of vanilla bean or butter pecan ice cream for a truly indulgent “butternut” experience.
Storage and Make-Ahead
Storing Leftovers
Once completely cooled, store your cookies in an airtight container at room temperature. They will remain fresh and crisp butter cookies for up to 5 days. Avoid storing them in the same container as softer cookies (like brownies or soft ginger snaps), as the moisture from the softer treats will migrate to the butternut cookies and make them soggy.
Freezing Instructions
These cookies freeze exceptionally well. You can freeze the baked cookies for up to 3 months in a freezer-safe bag. Alternatively, you can freeze the raw dough balls. When you are ready to bake, simply place the frozen dough onto a baking sheet and add 2 to 3 minutes to the total baking time. This is a fantastic way to have fresh, homemade treats available at a moment’s notice.
Final Thoughts
Mastering the best homemade butternut cookie recipe is a rewarding experience for any home baker. It’s a recipe that doesn’t hide behind frosting or fillings, instead relying on the quality of its components and the precision of its technique. By taking the time to toast your nuts and cream your butter properly, you create a cookie that feels like a handcrafted gift. These cookies are a testament to the fact that the most satisfying flavors are often the most traditional ones. We hope this recipe becomes a staple in your kitchen, bringing a bit of buttery, nutty joy to your next baking session.
Frequently Asked Questions
Can I use salted butter instead of unsalted?
Yes, you can use salted butter, but you should reduce the added salt in the recipe by half. Keep in mind that different brands of salted butter have varying salt levels, so using unsalted butter and adding your own salt is the best way to ensure the best homemade butternut cookie recipe tastes exactly as intended without being overly salty.
Why did my cookies spread too much and become flat?
Excessive spreading usually happens for two reasons: the butter was too soft (or melted) when you started, or the dough wasn’t chilled long enough. If your kitchen is very warm, the butter can lose its structure. Ensure your butter is “room temperature,” meaning it should be cool to the touch and hold an indentation when pressed, but not be greasy or shiny.
Can I make these cookies vegan?
While the primary flavor comes from dairy butter, you can substitute it with a high-quality vegan butter stick (avoid tub margarines). Use a flax egg or a commercial egg replacer for the binder. Note that the texture may be slightly less crisp, as vegan fats have different melting points, but the toasted walnut cookies flavor will still be delicious.
What is the best way to chop the nuts?
For this specific recipe, a food processor is helpful but a sharp chef’s knife is better for control. You want a “fine dice” rather than a “meal.” If you process them too long, they will turn into nut butter. Hand-chopping ensures you get small, distinct pieces that provide the signature crunch without making the dough oily.
How do I know exactly when the cookies are done?
The “visual cue” is the most important factor. Look for the edges to turn a deep, golden amber while the center remains pale and slightly puffed. If the center looks “wet” or shiny, give them another minute. If the center is already browned, they may be slightly overbaked and will be very hard once they cool completely.
Soft Spiced Butternut Cookies

These soft, cake-like cookies use roasted butternut squash puree and warm autumn spices for a delightful seasonal treat.
- 1 cup butternut squash puree
- 1/2 cup unsalted butter, softened
- 1 cup granulated sugar
- 1 large egg
- 1 tsp vanilla extract
- 2 cups all-purpose flour
- 1 tsp baking powder
- 1 tsp baking soda
- 1 tsp ground cinnamon
- 1/2 tsp ground nutmeg
- 1/4 tsp salt
- 1Preheat oven to 350°F (175°C) and line a baking sheet with parchment paper.
- 2In a large bowl, cream together the butter and sugar until light and fluffy.
- 3Beat in the squash puree, egg, and vanilla until smooth.
- 4In a separate bowl, whisk together the flour, baking powder, baking soda, cinnamon, nutmeg, and salt.
- 5Gradually fold the dry ingredients into the wet mixture until just combined.
- 6Drop rounded tablespoons of dough onto the baking sheet, spaced 2 inches apart.
- 7Bake for 10-12 minutes or until edges are set and lightly browned.
- 8Cool on the pan for 5 minutes before transferring to a wire rack.
Keywords: butternut squash, cookies, dessert, fall baking, spiced cookies, vegetarian dessert


