
Peanut Butter Rice Krispies Treats

There is something deeply nostalgic about a tray of cereal treats sitting on a kitchen counter, but these peanut butter rice krispies treats take that childhood memory and give it a sophisticated, salty-sweet upgrade. Unlike the standard version, which relies solely on the sweetness of marshmallows, this recipe introduces the rich, nutty depth of creamy peanut butter to create a snack that is more satisfying and flavorful. The result is a bar that remains soft and chewy for days, offering that signature crunch we all love paired with a velvety finish that melts in your mouth.
Making a batch of these treats is one of the most rewarding ways to spend fifteen minutes in the kitchen. Because this is a no-bake dessert, it is an ideal project for warm days when you want to avoid turning on the oven or for those busy afternoons when you need a quick win. By following a few simple technical steps—like managing your heat levels and choosing the right ratio of ingredients—you can ensure your treats are never hard or dry, but instead perfectly gooey and packed with peanut flavor. This is the kind of recipe that bridges the gap between a simple snack and a decadent dessert, making it a favorite for both kids and adults alike.
Why This Recipe Is a Keeper
- Perfect Texture Balance: By combining melted marshmallows with plenty of creamy peanut butter, these treats achieve a unique “soft-crunch” texture that stays pliable much longer than traditional cereal bars.
- Quick and Convenient: This is a quintessential no-bake dessert that requires minimal equipment and zero oven time, making it perfect for last-minute gatherings or potlucks.
- Salty-Sweet Harmony: The addition of salt and vanilla enhances the natural nuttiness of the peanut butter, cutting through the sugar of the marshmallows for a more balanced flavor profile.
- Ultimate Crowd-Pleaser: These are among the most easy kid-friendly snacks you can make, yet they have enough depth of flavor to satisfy grown-up cravings at any party or bake sale.
Ingredients You’ll Need
The beauty of this recipe lies in its simplicity. With just a handful of pantry staples, you can create a high-quality treat that tastes significantly better than any store-bought alternative. Each ingredient plays a specific role in ensuring the bars are structurally sound yet tender to the bite.
- Crisp Rice Cereal: This provides the essential structural foundation and that iconic airy crunch. For the best results, ensure your cereal is fresh and the box hasn’t been open for too long.
- Mini Marshmallows: These act as the “glue” for the treats. Mini marshmallows are preferred because they melt faster and more evenly than the jumbo variety, reducing the risk of overcooking the mixture.
- Creamy Peanut Butter: This is the star of the show. Using a standard creamy peanut butter ensures a smooth, emulsified mixture that coats every single piece of cereal evenly.
- Unsalted Butter: Butter adds richness and helps the marshmallows melt into a silky consistency. Using unsalted butter allows you to control the exact amount of seasoning in the final bar.
- Vanilla Extract and Sea Salt: These might seem like minor additions, but they are critical for depth. Vanilla provides a floral backnote, while a pinch of salt makes the peanut flavor truly pop.
Easy Ways to Change It Up
While these peanut butter rice krispies treats are incredible in their simplest form, they also serve as a fantastic canvas for various additions and dietary adjustments. You can easily customize them based on what you have in your pantry or the specific occasion you are celebrating.
- Chocolate Topped: Transform these into something resembling a “Scotcheroo” by melting a mixture of chocolate chips and butterscotch chips to spread over the top once the bars are pressed into the pan.
- Extra Crunch: If you prefer more texture, swap out half of the creamy variety for crunchy peanut butter or fold in a handful of chopped roasted peanuts during the final mixing stage.
- Honey Sweetened: For a different floral note, you can replace a small portion of the marshmallow volume with a tablespoon of honey, which pairs beautifully with the nuttiness of the peanuts.
- Pretzels and Toffee: For a “kitchen sink” style treat, replace one cup of the rice cereal with crushed pretzels or toffee bits to lean into the salty-sweet experience.
How to Make Peanut Butter Rice Krispies Treats
Step 1: Gently Melt the Butter and Marshmallows
Begin by melting your butter in a large heavy-bottomed pot over low heat. Once the butter is completely liquid, add in the marshmallows. It is vital to keep the heat low during this stage; if marshmallows are heated too quickly or at too high a temperature, the sugar structures will harden, resulting in a treat that is difficult to chew. Stir the marshmallows constantly with a silicone spatula until they are nearly melted, leaving just a few small lumps visible before moving to the next step.
Step 2: Incorporate the Peanut Butter and Flavorings
Once the marshmallows have reached a thick, melty consistency, stir in the creamy peanut butter, vanilla extract, and a pinch of salt. Continue to stir over low heat until the mixture is completely smooth and the peanut butter is fully integrated into the marshmallow base. You should see a glossy, tan-colored sauce that smells intensely fragrant. Remove the pot from the heat immediately after this state is achieved to prevent the mixture from seizing or becoming too sticky.
Step 3: Fold in the Crisp Rice Cereal
Pour the rice cereal into the pot with the peanut butter mixture. Using a large spatula, use a folding motion to coat the cereal. Work quickly but gently; you want to ensure every morsel of cereal is enveloped in the marshmallow treats glue without crushing the delicate puffs. Make sure to scrape the bottom of the pot to incorporate any pooled liquid. This step is best done while the mixture is still warm, as it will begin to set as it cools, making it harder to stir.
Step 4: Press Into the Pan and Set
Transfer the mixture into a prepared baking pan lined with parchment paper. This is the most critical technical moment: use the back of a buttered spatula or a piece of wax paper to gently spread the mixture into the corners. Do not press down firmly. If you pack the cereal too tightly, the bars will be dense and hard. A light touch ensures that air remains between the cereal pieces, keeping the no-bake dessert light and airy. Let the treats sit at room temperature for at least 30 to 60 minutes to fully set before slicing.
Pro Tips for Success
- Use Fresh Marshmallows: This is the single most important tip for soft marshmallow treats. Older marshmallows that have started to get tough or sticky will not melt properly and will lead to a rock-hard final product.
- The “Light Touch” Rule: When putting the mixture into the pan, imagine you are just tucking them in for a nap. Pressing down hard to make the top perfectly flat is a common mistake that ruins the texture.
- Butter Your Tools: To prevent a sticky mess, lightly coat your spatula and even your hands with a small amount of butter or non-stick spray before handling the warm cereal mixture.
- Low Heat is Key: Never try to rush the process by turning the stove to medium. Low and slow melting ensures the sugar stays soft and gooey rather than turning into hard candy.
- Salt Matters: Don’t skip the salt! Peanut butter needs that extra hit of sodium to balance the sugar in the marshmallows and the cereal.
How to Serve Peanut Butter Rice Krispies Treats
Serving these treats is as simple as slicing them into squares, but a little extra attention to presentation can make them feel special. For a clean cut, use a sharp chef’s knife and wipe it down with a damp cloth between slices. This prevents the sticky marshmallow from dragging and tearing the bars, leaving you with sharp, professional-looking edges. You can cut them into large, indulgent bakery-style blocks or smaller, bite-sized cubes for a party platter.
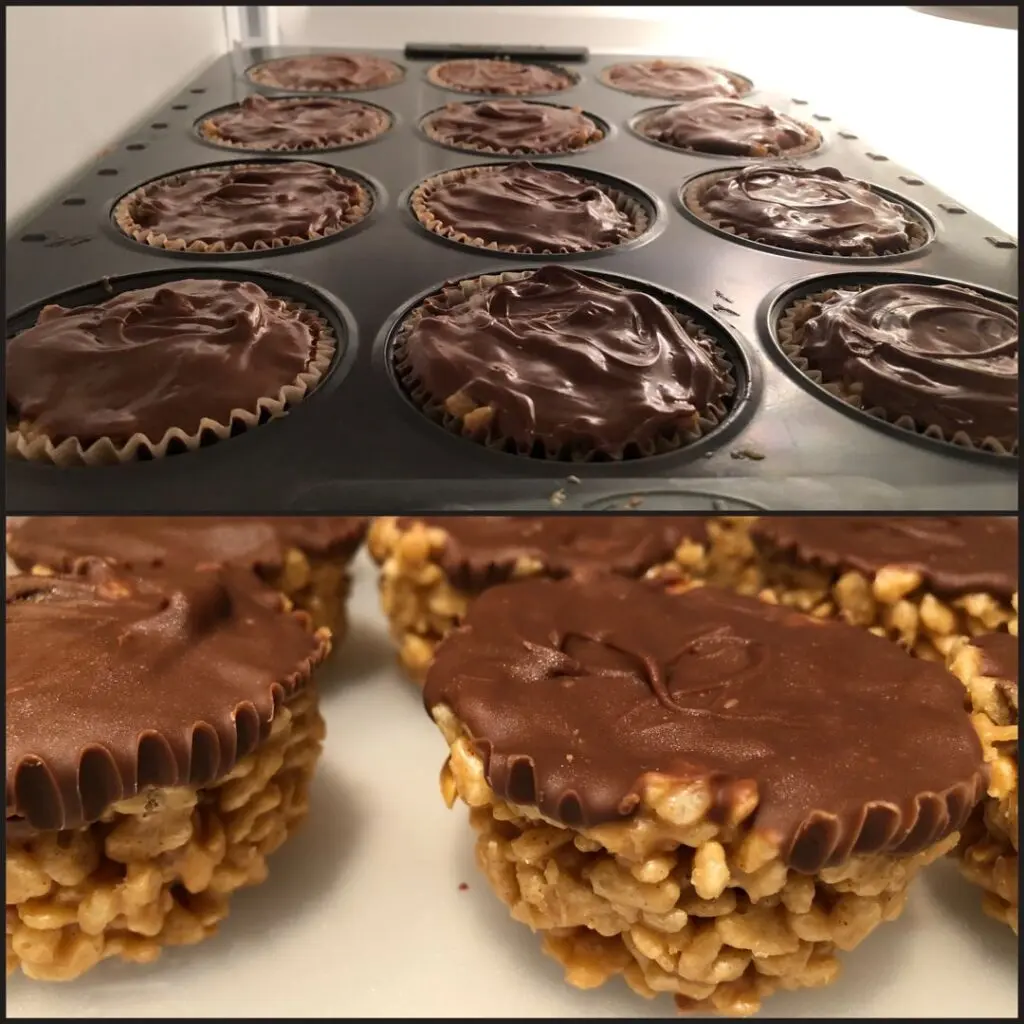
If you want to dress them up, consider a light drizzle of melted semi-sweet chocolate or a sprinkle of flaky sea salt over the top. They are fantastic served alongside a cold glass of milk or a hot cup of coffee, which helps cut through the richness of the peanut butter. These also make wonderful easy kid-friendly snacks for lunchboxes or after-school treats, as they hold their shape well at room temperature and don’t require any special handling once they are set.
Storage and Make-Ahead
Storing Leftovers
To keep your peanut butter rice krispies treats fresh, store them in an airtight container at room temperature. They are best enjoyed within 2 to 3 days, as the cereal will eventually begin to lose its crunch. If you need to stack them in the container, place a sheet of parchment paper or wax paper between the layers to prevent them from fusing together into one giant block.
Freezing
While these are best fresh, you can freeze them for up to six weeks. Wrap individual squares tightly in plastic wrap and then place them in a heavy-duty freezer bag. When you’re ready to eat, let them thaw at room temperature for about 15 minutes. Avoid thawing them in the microwave, as this can cause the marshmallows to melt and become a sticky mess.
Making It Ahead
Because these treats need time to set, they are a perfect make-ahead option. You can easily prepare them the night before you need to serve them. Just be sure to keep the pan covered tightly with plastic wrap once they have cooled to prevent the edges from drying out and becoming crunchy.
Final Thoughts
Mastering the peanut butter rice krispies treats is a rite of passage for any home cook who loves a reliable, crowd-pleasing dessert. By focusing on high-quality creamy peanut butter and using a gentle hand during the melting and pressing stages, you can create a snack that far exceeds the sum of its parts. These treats are proof that you don’t need a long list of ingredients or hours in the kitchen to produce something truly delicious. Whether you’re making them for a bake sale, a holiday, or just a Tuesday afternoon, they are guaranteed to disappear quickly.
Frequently Asked Questions
Can I use natural peanut butter for this recipe?
It is generally better to use a standard commercial creamy peanut butter rather than the “natural” varieties that require stirring. Natural peanut butter tends to be more oily and can separate when heated with marshmallows, which might lead to a greasy treat that doesn’t set properly. If you do use natural PB, ensure it is extremely well-stirred and smooth before adding it to the pot.
Why did my treats turn out hard and crunchy?
Hard treats are usually the result of two things: high heat or over-packing. If the marshmallows are melted over high heat, the sugar gets too hot and turns into a hard-crack state. Additionally, if you pressed the mixture into the pan too firmly, you squeezed out all the air pockets, resulting in a dense, tough bar. Always use low heat and a very light touch when spreading the mixture.
Can I use large marshmallows instead of mini ones?
Yes, you can use large marshmallows, but you will need to watch them more closely. Because they are bigger, they take longer to melt, which increases the time the mixture spends over the heat. To help them along, you can cut the large marshmallows into smaller pieces with kitchen shears before adding them to the butter, which will help them melt more evenly and quickly.
How do I keep the treats from sticking to my hands?
The mixture is incredibly sticky while warm. The best trick is to lightly grease your hands with butter or a flavorless oil before you press the mixture into the pan. Alternatively, you can use a piece of parchment paper or the wrapper from your stick of butter to push the cereal into the corners of the pan without it sticking to you at all.
Can I make these treats gluten-free?
Standard rice cereal is often made with malt flavoring, which contains barley and is not gluten-free. To make these peanut butter rice krispies treats safe for those with gluten sensitivities, look for a specific gluten-free crisp rice cereal at the grocery store. Most other ingredients—butter, marshmallows, and peanut butter—are naturally gluten-free, but always double-check your labels to be certain.
Peanut Butter Rice Krispies Treats

These chewy Peanut Butter Rice Krispies Treats are the ultimate no-bake snack, combining creamy peanut butter with melted marshmallows for a perfect salty-sweet balance.
- 6 cups crisp rice cereal
- 1 cup creamy peanut butter
- 1 package (10 oz) marshmallows
- 3 tablespoons unsalted butter
- 1 teaspoon vanilla extract
- 1/4 teaspoon salt
- 1Grease a 9x9 inch baking pan or line with parchment paper.
- 2In a large pot, melt the butter over low heat.
- 3Add the marshmallows and stir constantly until completely melted and smooth.
- 4Remove from heat and stir in the peanut butter, vanilla extract, and salt until well combined.
- 5Gently fold in the rice cereal until every piece is evenly coated.
- 6Press the mixture into the prepared pan using a buttered spatula or wax paper; do not pack too firmly.
- 7Allow to cool completely at room temperature for at least 30 minutes before slicing into squares.
Keywords: peanut butter, rice krispies treats, no-bake dessert, easy snacks, kids recipes


