
Sugar Snails

There is something inherently nostalgic about pulling a tray of fresh, golden pastries out of the oven, especially when they are shaped into the whimsical, tight spirals known as sugar snails. These treats occupy the perfect middle ground between a morning bun and a classic brioche roll, offering a crisp, caramelized exterior that yields to a soft, pillowy center. While they might look like they belong in a high-end European pâtisserie, the best sugar snail pastry recipe is surprisingly achievable for the home baker, relying on a few foundational techniques and high-quality pantry staples to create a professional-grade result.
Mastering this recipe is less about complexity and more about understanding the rhythm of the dough. By focusing on the temperature of your ingredients and the patience required for a proper rise, you can transform humble flour and sugar into a sweet yeast dough that is rich, aromatic, and incredibly satisfying to tear apart. Whether you are serving these for a weekend brunch or a quiet afternoon coffee, these pastries are designed to impress both in appearance and flavor profile.
Why This Recipe Is a Keeper
- Textural Contrast: The combination of a soft, enriched interior and a crunch from the pearl sugar or granulated coating provides a sensory experience that standard rolls lack.
- Customizable Canvas: While the base is perfection, this best sugar snail pastry recipe serves as an excellent foundation for adding citrus zests, warm spices, or even a hint of cardamom for a Scandinavian twist.
- Make-Ahead Friendly: You can easily prepare the dough the night before, allowing for a slow cold ferment that actually improves the flavor and makes the morning bake-off a breeze.
- Pantry Staples: There are no obscure ingredients required here; the magic happens through European pastry techniques applied to everyday items like butter, milk, and flour.
Ingredients You’ll Need
Before you begin mixing, it is essential to have your ingredients at the correct temperatures. Using room temperature eggs and slightly warm milk ensures that your yeast remains active and the butter incorporates smoothly into the sweet yeast dough without clumping.
- All-Purpose Flour: This provides the necessary structure. Look for a brand with a moderate protein content to ensure the snails are sturdy enough to hold their shape but remain tender.
- Active Dry Yeast: This is the engine of the recipe. Ensure it is fresh by blooming it in warm milk; it should become foamy and fragrant within a few minutes.
- Whole Milk: The fat content in whole milk contributes to the richness of the crumb. It should be warm to the touch (around 110°F) but not hot enough to kill the yeast.
- Unsalted Butter: Using high-quality butter is key. It adds the characteristic flavor and creates golden brown spirals that stay moist for days.
- Granulated Sugar: Not only does this sweeten the dough, but it also aids in the browning process during baking, creating those beautiful caramelized edges.
- Egg Yolks: Adding extra yolks instead of whole eggs provides a deeper golden color and a richer, more “short” texture to the finished pastry.
- Vanilla Bean Paste or Extract: This adds an essential aromatic layer that complements the buttery notes of the dough.
- Pearl Sugar: Often used as a topping, pearl sugar doesn’t melt in the oven, providing a delightful crunch and a professional aesthetic.
Easy Ways to Change It Up
- Citrus Zest: Rub fresh orange or lemon zest into the sugar before rolling it into the dough to add a bright, fragrant lift to the heavy butter notes.
- Spiced Variation: Incorporate a teaspoon of ground cinnamon or a pinch of nutmeg into the filling for a flavor profile that leans closer to a traditional morning bun.
- Chocolate Snails: Finely grate dark chocolate over the buttered dough before rolling it into spirals for a subtle, melty surprise in every bite.
- Glazed Finish: If you prefer a softer exterior, skip the pearl sugar and brush the warm pastries with a simple vanilla bean glaze immediately after they exit the oven.
How to Make the Best Sugar Snail Pastry Recipe
Step 1: Bloom the Yeast and Mix the Base
Start by combining your warm milk with a tablespoon of sugar and the active dry yeast. Let it sit until it becomes frothy, which signals the yeast is alive and ready to work. Once active, whisk in the egg yolks and vanilla. In a large bowl or the bowl of a stand mixer, combine the remaining sugar and flour. Slowly pour the liquid mixture into the dry ingredients while mixing on low speed until a shaggy dough forms. This initial mixing stage is crucial for hydrating the flour evenly.
Step 2: Incorporate the Butter and Knead
This is where the sweet yeast dough gains its luxurious texture. With the mixer running, add the softened butter one tablespoon at a time. Wait until each piece is fully incorporated before adding the next. Once all the butter is in, increase the speed to medium and knead for about 8 to 10 minutes. The dough should become smooth, elastic, and slightly tacky but should pull away cleanly from the sides of the bowl. This development of gluten is what allows the snails to rise high and light.
Step 3: The First Rise
Transfer the dough to a lightly greased bowl and cover it with a damp cloth or plastic wrap. Place it in a warm, draft-free spot and let it rise until it has doubled in size. Depending on the temperature of your kitchen, this can take anywhere from 60 to 90 minutes. Do not rush this step; the first rise is when the yeast develops flavor and the structure of the dough stabilizes.
Step 4: Roll and Shape the Spirals
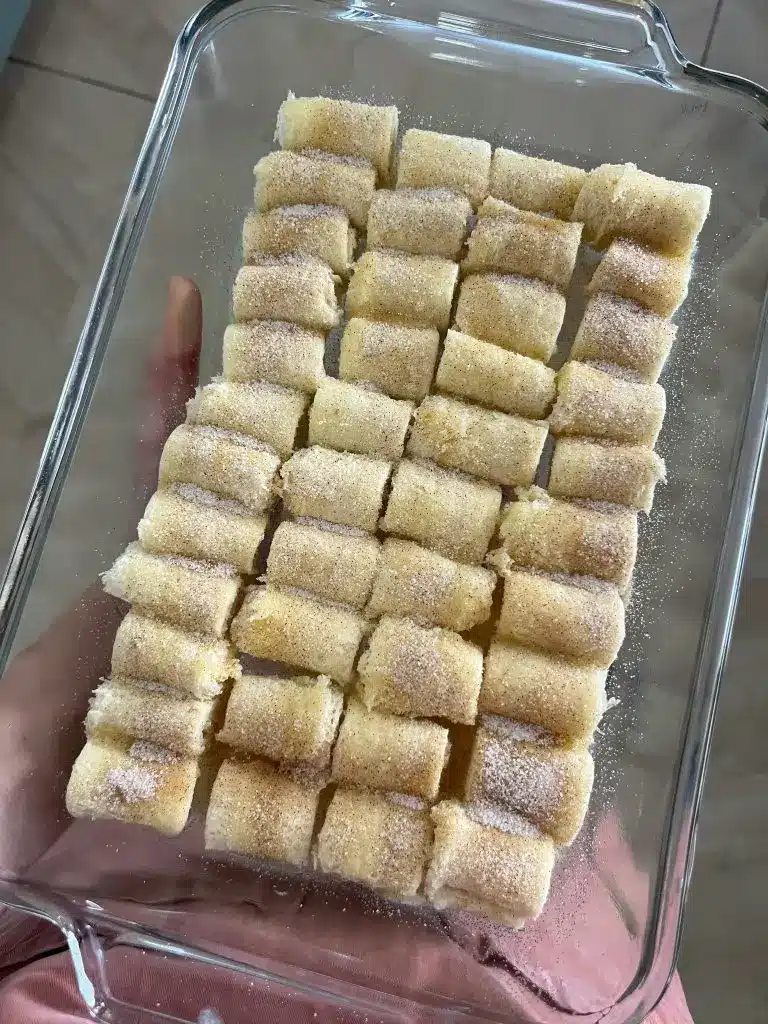
Gently punch down the risen dough to release excess gas. On a lightly floured surface, roll the dough out into a large rectangle, roughly 1/4 inch thick. Spread a thin layer of softened butter across the surface and sprinkle generously with sugar. Roll the dough tightly from the long edge to create a log. Use a sharp knife or unscented dental floss to cut the log into 1.5-inch thick slices. These will become your golden brown spirals.
Step 5: Final Proofing
Place the cut spirals onto a parchment-lined baking sheet, leaving ample space between them as they will expand significantly. Cover them lightly and let them rise a second time for about 45 minutes. They should look puffy and “marshmallowy.” This second proof is essential for ensuring the center of the snail isn’t dense or doughy after baking.
Step 6: Bake to Golden Perfection
Preheat your oven to 350°F. Brush the tops of the snails with a light egg wash and sprinkle with pearl sugar. Bake for 20 to 25 minutes, or until the pastries are a deep golden brown and the sugar has begun to caramelize around the base. The aroma in your kitchen should be intoxicatingly sweet and yeasty. Let them cool on the pan for 5 minutes before transferring them to a wire rack.
Pro Tips for the Best Results
- Tip: Use a kitchen scale for your measurements. Baking is a science, and the ratio of flour to fat is what determines the success of this best sugar snail pastry recipe.
- Tip: Ensure your butter is “plastic” or pliable. It should be soft enough to indent with a finger but not so soft that it is greasy or melting.
- Tip: Don’t over-flour your work surface. Excess flour can get rolled into the spirals, making the final pastry dry and tough rather than tender.
- Tip: For the cleanest cuts, use a piece of flavorless dental floss. Slide it under the log, cross it over the top, and pull quickly to slice through without squishing the layers.
- Tip: Check your oven temperature with a thermometer. Many ovens run hot, which can cause the outside of the snail to burn before the interior is fully set.
Troubleshooting Common Problems
Why Didn’t My Dough Rise?
The most common culprit is the temperature of the milk. If it’s too hot (above 120°F), it will kill the yeast. If it’s too cold, the yeast will stay dormant. Additionally, ensure your yeast isn’t expired. You can test your yeast by mixing it with a little warm water and sugar; if it doesn’t bubble in 10 minutes, it’s time to buy a new jar.
Why Are My Pastries Dry?
Over-baking is the primary reason for dry pastries. Because these contain a high amount of sugar and fat, they continue to cook for a minute or two after being removed from the oven. Pull them out when they are just golden brown. Another reason could be adding too much flour during the kneading process; the dough should remain slightly tacky.
How to Serve Your Sugar Snails
Serving these pastries at the right time is half the battle. While they are technically edible once cooled, they are at their absolute peak when served slightly warm, about 15 minutes after they leave the oven. This allows the butter to settle but keeps the crumb incredibly soft.
Pairing Suggestions
A strong, dark roast coffee or a bitter espresso provides a perfect balance to the sweetness of the sugar coating. If you are serving these as a dessert, a dollop of lightly sweetened crème fraîche or a side of fresh berries can cut through the richness of the sweet yeast dough.
Garnishing for Presentation
If you didn’t use pearl sugar, a light dusting of powdered sugar just before serving can add a refined touch. For a more indulgent presentation, drizzle a bit of warm honey or maple syrup over the golden brown spirals to emphasize the caramelized texture of the outer layers.
Storage and Make-Ahead Guidance
Storing Leftovers
These pastries are best enjoyed on the day they are made. However, if you have leftovers, store them in an airtight container at room temperature for up to two days. To revive them, place them in a 300°F oven for 5 minutes or microwave for 10 seconds to soften the butter in the dough.
Freezing and Reheating
You can freeze the baked snails for up to a month. Wrap them individually in plastic wrap and then place them in a freezer bag. Thaw at room temperature and warm in the oven before serving. Alternatively, you can freeze the shaped, unbaked snails. When ready to bake, let them thaw and rise in the refrigerator overnight before proceeding with the final proof and bake instructions.
Final Thoughts
While modern baking often focuses on quick results, the best sugar snail pastry recipe rewards those who appreciate the slower process of working with yeast and enriched doughs. The result is a pastry that feels special—a handcrafted treat that offers more depth and better texture than anything you could find in a standard grocery store. By mastering these European pastry techniques, you’re not just making a snack; you’re creating a centerpiece for a memorable breakfast or a sophisticated dessert that guests will be asking for again and again.
Frequently Asked Questions
Can I use bread flour instead of all-purpose flour?
Yes, you can use bread flour, but keep in mind that it has a higher protein content. This will result in a chewier, more bread-like texture. If you prefer a more delicate, tender pastry, all-purpose flour is the better choice for this specific homemade morning buns style treat. If using bread flour, you may need to add an extra tablespoon of milk as it absorbs more liquid.
How do I know if my dough has been kneaded enough?
The best way to check is the “windowpane test.” Tear off a small piece of dough and gently stretch it between your fingers. If you can stretch it thin enough to see light through it without it tearing, the gluten is sufficiently developed. If it snaps quickly, keep kneading for another few minutes. Proper kneading is what ensures your snails won’t collapse.
Can I make these without a stand mixer?
Absolutely! While a stand mixer makes incorporating the butter much easier, you can knead this dough by hand. It will take about 15 minutes of vigorous kneading. When adding the butter, it will be messy at first, and the dough will seem to fall apart. Keep working it on the counter, and eventually, the fat will emulsify into the flour, resulting in a beautiful sweet yeast dough.
Why did my snails unravel during baking?
This usually happens if the roll wasn’t tight enough or if the “tail” of the dough wasn’t tucked securely under the spiral. When shaping, try to maintain a firm tension as you roll the log. You can also lightly press the end of the dough into the side of the snail to help it stick. Using an egg wash also acts as a bit of “glue” during the baking process.
Is it possible to use instant yeast instead of active dry?
Yes, you can substitute instant yeast in a 1:1 ratio. The main difference is that instant yeast does not require blooming in liquid first. You can mix it directly into the dry ingredients. However, blooming active dry yeast is often preferred in enriched doughs like this one to ensure the yeast is strong enough to lift the heavy butter and egg content.
Classic Sugar Snails

Sugar Snails are delightful, crispy pastry spirals coated in a sweet cinnamon-sugar mixture. They are incredibly easy to make using puff pastry and are perfect as a sweet snack, breakfast treat, or light dessert.
- 1 sheet puff pastry, thawed but cold
- 2 tablespoons unsalted butter, melted
- 1/3 cup granulated sugar
- 1 tablespoon ground cinnamon
- 1 pinch salt
- 1Preheat your oven to 400°F (200°C) and line a large baking sheet with parchment paper.
- 2In a small bowl, combine the granulated sugar, ground cinnamon, and a pinch of salt.
- 3Lay the puff pastry sheet flat on a lightly floured surface and brush the entire surface with melted butter.
- 4Sprinkle the cinnamon-sugar mixture evenly over the buttered pastry, leaving a tiny border at the edges.
- 5Starting from one of the long sides, roll the pastry up tightly into a log shape.
- 6Using a sharp or serrated knife, cut the log into slices approximately 1 inch thick.
- 7Place the snails onto the prepared baking sheet and bake for 12 to 15 minutes, or until they are puffed and golden brown.
- 8Allow to cool slightly on the pan before serving warm.
Keywords: Sugar Snails, Cinnamon Pastry, Puff Pastry, Easy Dessert, Sweet Snack


