
Igloo Bites

The world of snacking has undergone a massive transformation with the rise of crunchy freeze dried candy snacks. If you have ever wondered what happens when you take your favorite chewy, gummy, or sticky treats and remove every ounce of moisture, the result is nothing short of magical. Instead of a dense chew that sticks to your teeth, you are left with a light, airy, and intensely flavorful morsel that shatters with a satisfying crunch. These freeze dried candy treats have taken social media by storm for a reason: they offer a completely new sensory experience that makes old-school candy feel exciting again.
Making your own homemade space candy is surprisingly straightforward if you have the right equipment. The process relies on sublimation, turning ice directly into vapor, which causes the sugars in the candy to expand and “puff” into a honeycomb-like structure. Whether you are looking to create unique party favors, a long-lasting pantry snack, or simply want to experiment with textures, this guide will show you how to achieve that perfect, brittle snap every single time.
Why You’ll Love This Recipe
- Intensified Flavor: Because the water is removed, the sugary, fruity notes of the candy become concentrated, making crunchy freeze dried candy snacks taste even bolder than the originals.
- Addictive Texture: The transformation from chewy to airy is incredible; it creates a “melt-in-your-mouth” sensation that is far more satisfying than traditional hard candy.
- Long Shelf Life: When stored correctly in airtight packaging, these treats can last for years without losing their signature crunch or flavor profile.
- Perfect for Gifting: Their unique appearance and professional-quality crunch make them a hit at birthdays, holidays, or as a conversation-starting snack for friends.
Ingredients You’ll Need
To get the best results, you need to choose candies that respond well to the freeze-drying process. High-sugar, chewy candies with a bit of moisture content tend to puff up the most dramatically.
- Bite-Sized Chewy Candies: Classic fruit-flavored rounds (like Skittles) are the gold standard because their shells crack open to reveal a giant, airy center.
- Gummy Rings or Bears: These expand significantly, often doubling or tripling in size, resulting in a dehydrated sweets experience that is light as a feather.
- Saltwater Taffy: One of the most impressive transformations; taffy turns from a jaw-exercising chew into a giant, brittle puff that resembles a meringue.
- Marshmallows: Small dehydrated marshmallows become extra crisp, perfect for snacking or adding to hot cocoa for a more intense crunch.
- Caramel-Filled Chocolates: While chocolate itself doesn’t change much, the caramel inside will bubble and burst, creating a “volcano” effect of crunchy sweetness.
Variations and Smart Swaps
Sour Power Variation: If you love a zingy kick, use sour-coated gummies or sour fruit chews. The freeze-drying process concentrates the citric acid, making the sour flavor punchier and more vibrant.
The Chocolate Crunch: While pure chocolate doesn’t freeze dry well because of the fat content, candies that have a wafer or cookie center covered in chocolate work beautifully, adding a dry, crisp snap to the layers.
Fruit and Candy Fusion: For a slightly “healthier” twist, mix your crunchy freeze dried candy snacks with freeze-dried strawberry slices or mango chunks to balance the sugar with natural tartness.
How to Make Crunchy Freeze Dried Candy Snacks
Step 1: Prep the Trays and Space the Candy
Start by lining your freeze-dryer trays with parchment paper or silicone mats to prevent any sugar from sticking. Place your candies in a single layer, ensuring there is plenty of space between each piece. Because candies like taffy and gummies can expand to three times their original size, overcrowding will result in one giant, fused block of candy rather than individual crunchy freeze dried candy snacks.
Step 2: Set the Machine to Candy Mode
Most modern home freeze dryers have a specific “Candy Mode” or “Fast Mode.” Unlike fruits or meats, candy usually requires a higher temperature (around 135°F to 150°F) to encourage the sugars to melt slightly and expand before the vacuum seals the structure. If your machine doesn’t have a preset, you may need to manually adjust the warming plate settings to ensure the candy “puffs” correctly.
Step 3: Run the Freeze Dry Cycle
Once the trays are loaded, start the cycle. For candy, the process is much faster than for standard food preservation, often taking only 2 to 4 hours depending on the candy type. The machine will create a vacuum and apply gentle heat. Watch through the porthole if possible; it is fascinating to see the freeze dried candy treats swell up and burst through their shells or skins.
Step 4: Check for Dryness and Cool Down
When the cycle finishes, the candy should feel completely dry and warm to the touch. Pick up a piece and break it; there should be no “give” or chewiness in the center. If it feels soft, it needs more time in the vacuum. Once perfected, let them sit for just a minute to reach room temperature before immediate packaging to prevent them from absorbing moisture from the air.
Pro Tips for Success
- Tip: Avoid high-fat candies. Items with a lot of chocolate, peanut butter, or oil will not freeze dry properly because fat does not contain water to be removed.
- Tip: Slice larger gummies in half. Exposing the moist interior of a gummy bear or peach ring helps it expand more evenly and ensures the center is fully dried.
- Tip: Keep the room humidity low. If you live in a humid climate, crunchy freeze dried candy snacks will begin to absorb moisture and become sticky almost immediately after leaving the machine.
- Tip: Warm the trays first. If your machine allows, pre-warming the trays can help the candy start expanding the moment the vacuum pump kicks in.
How to Serve Crunchy Freeze Dried Candy Snacks
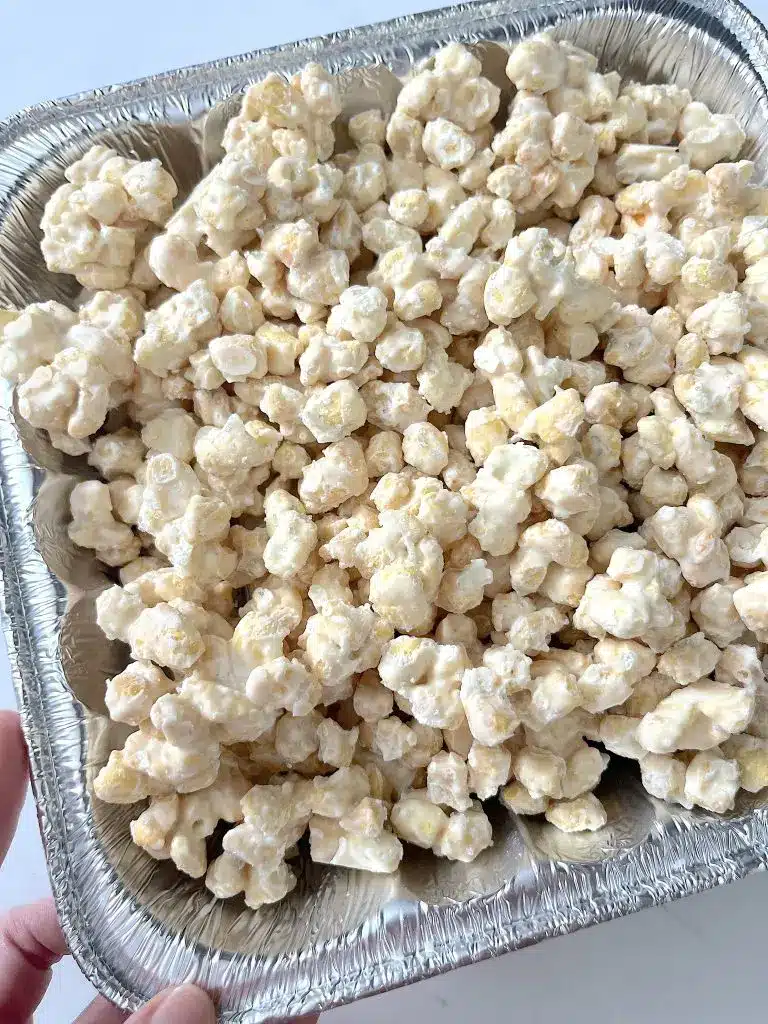
These snacks are perfect for grazing right out of the bag, but they also make incredible toppings. Crush up freeze-dried Skittles or taffy and sprinkle them over vanilla bean ice cream for a “sparkling” texture contrast. They also work brilliantly as a garnish for milkshakes or even as a colorful addition to a dessert charcuterie board.
For parties, serve them in small individual bowls so guests can try a variety of textures. Because they are so light, a small amount goes a long way. They are also a favorite for “space-themed” kids’ parties, where you can market them as homemade space candy that astronauts might eat in orbit.
Storage and Make-Ahead
Storing Leftovers
Moisture is the enemy of the crunch. You must store your crunchy freeze dried candy snacks in an airtight container, such as a glass mason jar with a tight-sealing lid. For long-term storage, use Mylar bags with an oxygen absorber to keep them fresh and brittle for months or even years.
Making It Ahead
Since these treats are designed for long-term shelf stability, you can easily make them weeks in advance of an event. Just ensure they are sealed the moment they come out of the freeze dryer. Do not leave them sitting on the counter, as they will lose their signature crunchy freeze dried candy snacks texture within an hour in most environments.
Final Thoughts
Experimenting with crunchy freeze dried candy snacks is one of the most rewarding ways to use a home freeze dryer. It turns familiar, everyday sweets into an avant-garde culinary experience that appeals to both kids and adults. Once you experience the shatter of a freeze-dried gummy or the airy melt of a piece of taffy, it’s hard to go back to the standard chewy versions. Just remember to keep them sealed tight and have fun testing out which candies in your pantry yield the most impressive results!
Frequently Asked Questions
Can I make these in a regular freezer?
No, unfortunately, a standard household freezer cannot create crunchy freeze dried candy snacks. The process requires a vacuum pump to remove the air and lower the boiling point of water, as well as a controlled heating element to sublimate the ice. A regular freezer will only make the candy cold and hard, but it will not change the structure or remove the moisture.
Why did my candy turn out sticky instead of crunchy?
Sticky candy is usually the result of one of two things: either the cycle was not long enough and there is still residual moisture in the center, or the candy was exposed to humid air for too long after the cycle ended. Always check that the candy is brittle all the way through before turning off the machine and store it in an airtight container immediately.
Can you freeze dry chocolate bars?
Pure chocolate does not work well in a freeze dryer because it is composed mostly of fats (cocoa butter) rather than water. Since freeze drying only removes water, the chocolate remains unchanged. However, candies that have a small amount of chocolate surrounding a porous center, like malt balls or chocolate-covered marshmallows, can still be successful.
How long do these candies last?
When stored in a vacuum-sealed Mylar bag with an oxygen absorber, crunchy freeze dried candy snacks can technically stay good for 25 years. For everyday snacking, if kept in a high-quality airtight jar, they will remain perfectly crunchy for several weeks to a few months.
Is the nutritional value different from regular candy?
The nutritional content of crunchy freeze dried candy snacks remains essentially the same as the original candy. While the water is removed, the sugar, calories, and carbohydrates remain concentrated in the remaining structure. Because they are so light, it is easy to eat more than you intended, so keep an eye on portion sizes!
Festive Igloo Bites

These adorable Festive Igloo Bites are the ultimate winter appetizer. Made with sharp white cheddar cheese and buttery crackers, they are as fun to build as they are to eat. Perfect for holiday parties or a whimsical snack for the kids.
- 12 round buttery crackers
- 8 oz white cheddar cheese, cut into 1-inch cubes
- 4 oz cream cheese, softened
- 1/4 teaspoon garlic powder
- Fresh chives, finely chopped for garnish
- 1In a small bowl, whip the cream cheese with garlic powder until smooth.
- 2Place one cracker on a flat surface. Using a small amount of cream cheese as "glue", secure a cheese cube to the center of the cracker.
- 3Carefully trim the corners of the cheese cube with a paring knife to create a slightly rounded dome shape.
- 4Spread a thin layer of cream cheese over the cheese cube, then use a toothpick to score lines into the cream cheese to resemble ice blocks.
- 5Place a small rectangular piece of cheese at the front to act as the igloo entrance.
- 6Repeat with remaining ingredients and serve chilled.
Keywords: Igloo Bites, winter appetizer, party snacks, cheese crackers, holiday food, snack ideas


