
Cheesy Onion Crisps

There is something undeniably addictive about the combination of sweet, caramelized onions and salty, toasted cheese. This easy cheesy onion crisps recipe delivers that perfect flavor profile in a snackable, crunchy form that rivals any store-bought chip. Unlike traditional fried onion rings that can be heavy or greasy, these crisps are baked to a delicate golden brown, allowing the natural sugars in the onion to meld with a savory cheese crust. Whether you are looking for a unique party appetizer or a savory snack to munch on during movie night, these golden-brown rounds offer a satisfying snap and a deep punch of umami in every bite.
This recipe is surprisingly simple to master, requiring just a handful of pantry staples and very little active prep time. By using a clever layering technique on a baking sheet, you can transform humble vegetables into gourmet-style parmesan onion bites that are naturally gluten-free and incredibly versatile. The magic happens in the oven, where the cheese melts into a lacy, crispy lattice that anchors the tender onion slices, creating a low carb appetizer that appeals to both keto enthusiasts and snack lovers alike.
Why You’ll Love This Recipe
- Addictive Texture: These crisps offer a unique “shatter” crunch from the baked cheese that perfectly complements the softened, sweet onion centers for a multi-layered sensory experience.
- Keto-Friendly Snacking: Because this recipe relies on cheese rather than flour or breadcrumbs for its structure, it serves as one of the most satisfying keto onion snacks you can make at home.
- Minimal Cleanup: Prepared entirely on a single parchment-lined baking sheet, this recipe keeps your kitchen tidy while delivering high-impact flavor with very little effort.
- Completely Customizable: The base recipe is a blank canvas, allowing you to easily swap seasonings or cheese types to match your specific cravings or the theme of your dinner party.
Ingredients You’ll Need
To achieve the perfect balance of crunch and flavor, selecting the right ingredients is key. While the list is short, the quality and preparation of these few items will determine whether your crisps are merely good or truly spectacular.
- Sweet Onions: Varieties like Vidalia or Walla Walla are ideal because they have a higher sugar content and lower sulfur, which leads to a milder, sweeter flavor when baked.
- Parmesan Cheese: Use finely grated Parmesan (preferably freshly grated) as it melts into a consistent, lacy crust that provides the structural “snap” for the crispy onion rounds.
- Garlic Powder: This adds a layer of savory depth that enhances the onion flavor without the moisture or bite of fresh minced garlic.
- Smoked Paprika: A small pinch provides a beautiful copper color and a subtle hint of wood-fired flavor that cuts through the richness of the cheese.
- Dried Oregano or Thyme: These earthy herbs provide a fragrant finish that makes the crisps feel more like a sophisticated hors d’oeuvre.
- Freshly Cracked Black Pepper: The sharp bite of black pepper balances the sweetness of the caramelized onions and the saltiness of the Parmesan.
Variations and Smart Swaps
Spice It Up: If you enjoy a bit of heat, consider adding a pinch of cayenne pepper or crushed red pepper flakes to the cheese mixture before baking. This creates a “hot honey” vibe when paired with the sweetness of the onions.
Different Cheese Bases: While Parmesan is the king of crispiness, you can experiment with a blend of Sharp Cheddar or Asiago. Just ensure at least half the mixture is a hard, dry cheese to maintain the structural integrity of the parmesan onion bites.
Everything Bagel Style: For a trendy twist, skip the individual herbs and coat your cheese-onion rounds with everything bagel seasoning. The sesame seeds and dried garlic bits add even more texture and a classic savory profile.
Vegan Adaptation: You can create a plant-based version by using a high-quality vegan Parmesan alternative. Look for brands that are oil-and-starch based, as they tend to melt and crisp up better than nut-only varieties.
How to Make This Easy Cheesy Onion Crisps Recipe
Step 1: Prep and Slice the Onions
The secret to a uniform crunch is the thickness of your onion slices. Start by peeling your sweet onions and slicing them into very thin rounds, approximately 1/8-inch thick. Using a mandoline slicer is highly recommended here to ensure every piece is identical. If the slices are too thick, the onion will remain watery and soften the cheese; if they are too thin, they may burn before the cheese has a chance to fully crisp. Once sliced, gently separate the rings or keep them as small “disks” depending on your preference for size.
Step 2: Create the Seasoned Cheese Base
In a small bowl, whisk together your finely grated Parmesan, garlic powder, smoked paprika, and dried herbs. Mixing the spices directly into the cheese ensures that every bite is evenly seasoned. On a baking sheet lined with high-quality parchment paper (do not use foil, as the cheese will stick), create small mounds of the cheese mixture, roughly a tablespoon each. Flatten them slightly with the back of a spoon to create a “nest” for the onion slices.
Step 3: Assemble and Bake to Golden Perfection
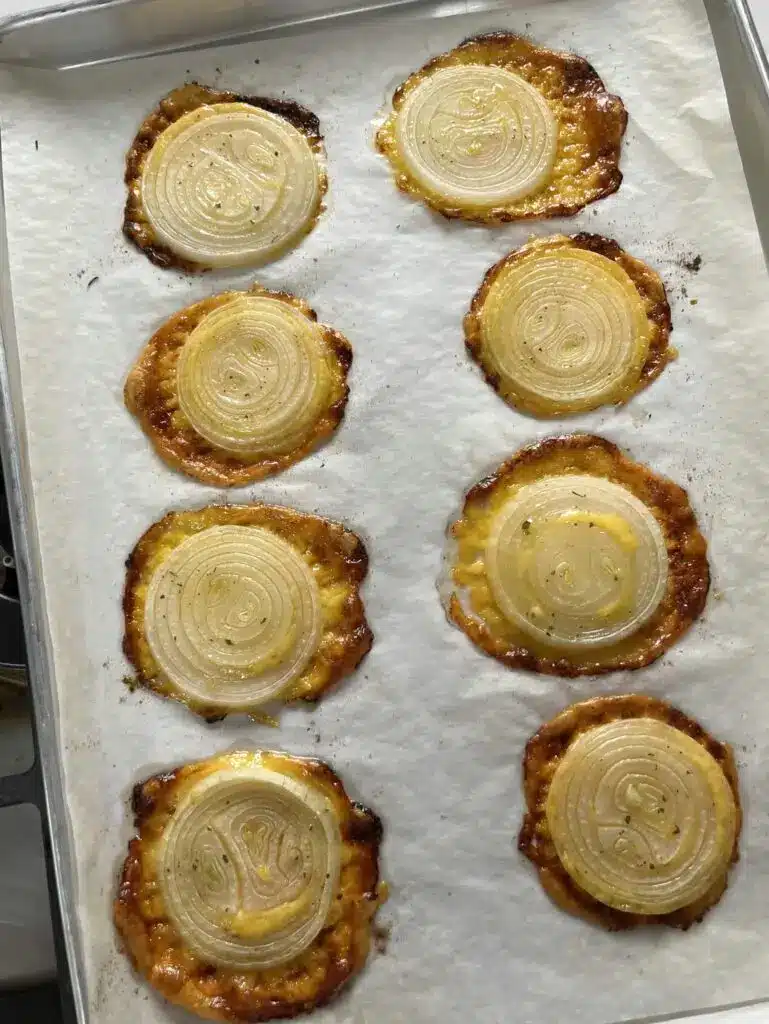
Place one or two onion rounds on top of each cheese mound, then lightly sprinkle a tiny bit more cheese over the top to “lock” the onion in place. Slide the tray into a preheated oven at 400°F (200°C). Watch closely as they bake; you are looking for the cheese to melt, bubble, and eventually turn a deep golden brown around the edges. This usually takes about 10 to 12 minutes. The smell of toasted cheese and sweet onions will fill your kitchen when they are nearing readiness.
Step 4: The Critical Cooling Phase
This is the most important step for achieving a low carb appetizer with a real snap. When you first remove the tray from the oven, the crisps will still be soft and pliable. Do not try to move them immediately. Let them sit on the hot baking sheet for at least 5 to 7 minutes. As the temperature drops, the cheese proteins solidify, turning the melted puddles into rigid, crunchy crisps. Once they are firm to the touch, gently lift them with a spatula and transfer them to a wire rack to finish cooling.
Pro Tips for Success
- Avoid Moisture: If your onions seem particularly juicy after slicing, pat them dry with a paper towel. Excess moisture is the enemy of a crispy onion rounds result.
- Use a Silicone Mat or Parchment: Never bake these directly on a metal pan. The cheese needs a non-stick surface to release cleanly once it has hardened.
- Don’t Overcrowd: Give each crisp at least an inch of space. If they touch, they will steam each other instead of crisping, resulting in a chewy rather than crunchy texture.
- Freshly Grated is Best: Pre-shredded cheese in green cans or plastic bags often contains cellulose (an anti-caking agent) which prevents the cheese from melting and bonding together smoothly.
- Watch the Edges: Parmesan can go from golden to burnt very quickly. Start checking the oven at the 8-minute mark to ensure you catch them at the peak of flavor.
How to Serve Easy Cheesy Onion Crisps
While this easy cheesy onion crisps recipe is fantastic on its own, it truly shines when paired with a dipping sauce. A cool, creamy garlic aioli or a zesty buttermilk ranch provides a beautiful contrast to the warm, salty crunch of the crisps. For a more sophisticated presentation, serve them alongside a spicy tomato jam or a balsamic reduction drizzle.
Beyond being a standalone snack, these crisps make excellent garnishes. Try resting one on top of a bowl of French Onion Soup for a “double onion” experience, or crumble them over a Caesar salad instead of traditional croutons. They also add a wonderful textural element when served on a charcuterie board, providing a salty, crunchy vessel for soft cheeses like brie or goat cheese.
Storage and Make-Ahead
Storing Leftovers
If you happen to have any leftovers, store them in an airtight container at room temperature. It is vital to ensure they are completely cool before sealing the lid, as any residual warmth will create steam and turn the crisps soggy. They are best enjoyed within 24 to 48 hours.
Reheating for Extra Crunch
If your crisps have lost their snap due to humidity, you can easily revive them. Place them back on a baking sheet in a 350°F oven for 2 to 3 minutes. This will melt the fats slightly and allow them to re-crisp as they cool down again.
Final Thoughts
Mastering this easy cheesy onion crisps recipe is a game-changer for anyone who loves bold flavors and satisfying textures. It proves that you don’t need a long list of ingredients to create something that feels special and gourmet. By focusing on the simple chemistry between sweet onions and sharp Parmesan, you can whip up a batch of keto onion snacks that satisfy every salty craving. Give this recipe a try the next time you need a quick appetizer that is sure to impress, and enjoy the magical transformation of simple onions into golden, lacy perfection.
Frequently Asked Questions
Can I use red onions instead of sweet onions?
Yes, you can use red onions, though the flavor profile will be slightly different. Red onions have a sharper, more peppery bite and less sugar than sweet onions, so they won’t caramelize quite as deeply. However, they provide a beautiful purple hue that looks stunning against the golden cheese.
Why did my onion crisps turn out soggy?
Sogginess is usually caused by one of three things: slicing the onions too thick, removing them from the oven too early, or not allowing them to cool completely on the baking sheet. Ensure your slices are paper-thin and that the cheese is a deep golden brown before you pull them out of the oven.
Is this recipe suitable for a Gladstone or Air Fryer?
You can definitely make these in an air fryer! Set the air fryer to 375°F and line the basket with a small piece of parchment paper. Cook in small batches for about 5-7 minutes. Be careful, as the fan in some air fryers can blow the light onion slices off the cheese mounds; you may need to pin them down with a small toothpick or wait until the cheese starts to melt before adding the onion.
Can I make these ahead of time for a party?
While these are best served fresh, you can make them a few hours in advance. Keep them in a single layer on a cooling rack at room temperature. Avoid refrigerating them, as the moisture in the fridge will immediately soften the cheese and ruin the “crisp” factor of your parmesan onion bites.
What is the best cheese to use if I don’t like Parmesan?
If Parmesan is too sharp for your palate, Gruyère or Manchego are excellent alternatives. Both are hard cheeses that melt beautifully and create a crisp texture. Avoid very soft cheeses like mozzarella or fresh provolone, as they contain too much moisture and will remain chewy rather than becoming crunchy.
Cheesy Onion Crisps

These Cheesy Onion Crisps are the ultimate savory snack. Combining the sharpness of cheddar with the sweet, pungent bite of minced onions, these baked delights are crispy on the edges and packed with flavor. They are incredibly easy to make and perfect for serving at parties or enjoying as a quick vegetarian snack.
- 2 cups sharp cheddar cheese, shredded
- 1/2 cup yellow onion, very finely minced
- 1/4 cup all-purpose flour
- 1/2 tsp garlic powder
- 1/4 tsp smoked paprika
- 1/8 tsp ground black pepper
- 1Preheat your oven to 375°F (190°C). Line a large baking sheet with parchment paper or a silicone baking mat to prevent sticking.
- 2In a medium mixing bowl, combine the shredded cheddar cheese, finely minced onion, flour, garlic powder, paprika, and black pepper.
- 3Toss the mixture thoroughly with a fork until the cheese strands are evenly coated in the flour and spices.
- 4Place small mounds (approximately 1 level tablespoon each) onto the prepared baking sheet, spacing them at least 2 inches apart as they will spread while baking.
- 5Bake for 8 to 10 minutes, or until the edges are golden brown and the centers are bubbling.
- 6Remove from the oven and let the crisps sit on the baking sheet for at least 5 minutes. This cooling period is crucial for them to firm up and become crispy.
- 7Transfer to a wire rack to cool completely before serving.
Keywords: onion crisps, cheese crackers, baked cheese, savory snacks, homemade crackers, keto-friendly snack


