
Old-Fashioned Washboard Cookies

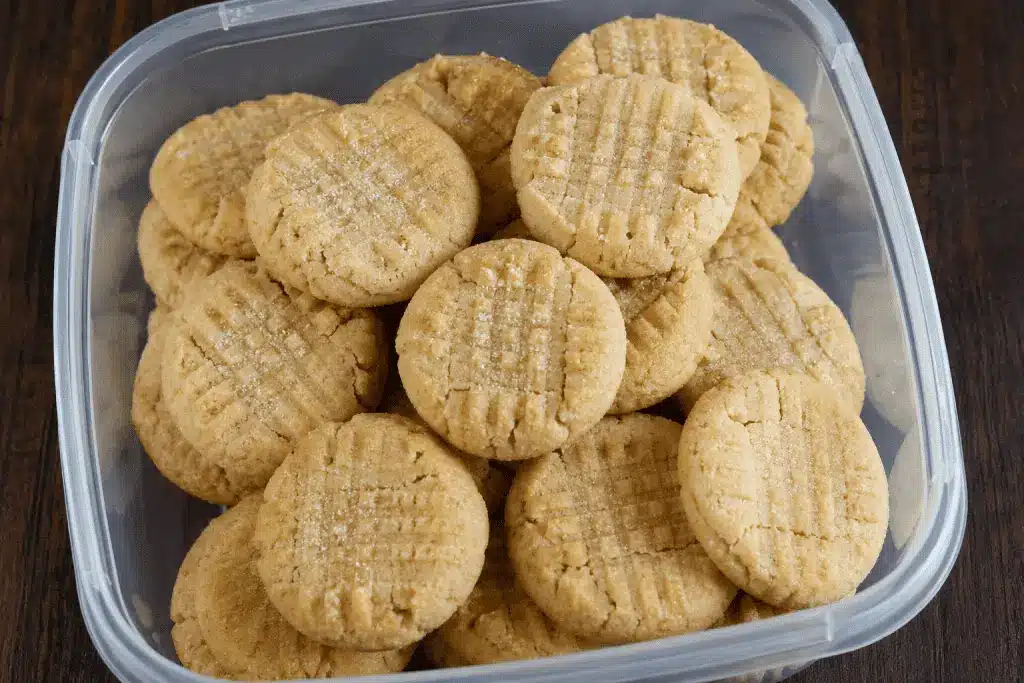
There is something undeniably magical about stepping back into a grandmother’s kitchen through the scent of browning sugar and toasted coconut. The old fashioned washboard cookies recipe is a quintessential example of a “heritage” treat, a simple yet deeply satisfying cookie that has been passed down through generations. These cookies aren’t about flashy decorations or complex fillings; instead, they celebrate the honest, comforting flavors of brown sugar, vanilla, and a hint of coconut, all wrapped in a texture that manages to be both crisp and tender. The name itself evokes a bygone era, referring to the distinct ridges pressed into the dough that mimic the surface of a vintage laundry washboard.
Making these cookies is an exercise in culinary nostalgia that rewards you with a unique sensory experience. Unlike modern cookies that often lean toward being overly soft or doughy, these vintage cookie recipes focus on a specific crumb—one that is sturdy enough to hold its shape but light enough to melt away as you eat. Whether you are looking to recreate a childhood memory or simply want a reliable, delicious treat to fill your cookie jar, this recipe offers a perfect balance of simplicity and charm. It is a wonderful project for bakers of all levels, providing a tactile and rewarding process that results in a beautiful, ridged cookie perfect for dipping into a cold glass of milk or a hot cup of coffee.
Why You’ll Love This Recipe
- Nostalgic Appeal: This old fashioned washboard cookies recipe brings a sense of history to your kitchen, offering a taste of traditional American home baking that feels timeless and comforting.
- Unique Texture: Thanks to the combination of shortening and brown sugar, these cookies possess a delightful “snap” while remaining tender on the inside, a hallmark of heritage desserts.
- Simple Ingredients: You likely already have everything you need in your pantry, making this an accessible recipe for a spontaneous afternoon of baking without a trip to the store.
- Fun Technique: Pressing the ridges into the dough with a fork is a satisfying, hands-on step that makes these cookies visually distinct and fun for children to help with.
Ingredients You’ll Need
The beauty of this old fashioned washboard cookies recipe lies in its humble ingredient list. Each component serves a specific purpose in building the flavor profile and the structural integrity of the cookie. By understanding what each ingredient brings to the bowl, you can ensure your cookies turn out perfectly every single time.
- Vegetable Shortening: This is the secret to the cookie’s specific texture. Shortening has a higher melting point than butter, which prevents the cookies from spreading too much and helps preserve those iconic washboard ridges.
- Brown Sugar: The high molasses content in brown sugar provides a deep, caramel-like sweetness and contributes to the slightly chewy center of the cookie.
- Egg: A single large egg acts as the primary binder, providing structure and richness to the dough while helping it emulsify during the creaming process.
- Vanilla Extract: Use a high-quality pure vanilla to enhance the warmth of the brown sugar and round out the overall flavor profile of the dough.
- All-Purpose Flour: This provides the necessary protein structure. Be sure to measure your flour correctly to avoid a dry or crumbly cookie.
- Baking Soda and Cream of Tartar: This classic leavening duo works together to give the cookies a slight lift and a subtle tang that balances the sweetness.
- Shredded Coconut: Finely shredded coconut adds a wonderful chew and a tropical nuttiness that is a traditional hallmark of many easy brown sugar cookies from the early 20th century.
- Salt: A pinch of salt is essential to sharpen the other flavors and ensure the sweetness isn’t one-dimensional.
Variations and Smart Swaps
- Nutty Crunch: If you aren’t a fan of coconut, you can easily swap it out for finely chopped walnuts or pecans. This maintains the textural interest while shifting the flavor toward a more earthy, nutty profile.
- Spiced Washboard Cookies: Add a teaspoon of ground cinnamon or a half-teaspoon of ground ginger to the dry ingredients for a warm, autumnal twist on the original recipe.
- Chocolate Dipped: Once the cookies are completely cooled, dip half of each cookie into melted dark or semi-sweet chocolate. This adds a modern touch to these heritage desserts and pairs beautifully with the coconut.
- Citrus Zest: Add the zest of one orange or lemon to the sugar while creaming. The bright citrus oils cut through the richness of the shortening and add a refreshing top note to the flavor.
How to Make Old Fashioned Washboard Cookies
Step 1: Cream the Shortening and Sugar
Start by combining your room-temperature shortening and brown sugar in a large mixing bowl. Using an electric mixer or a sturdy wooden spoon, beat them together until the mixture is light, fluffy, and well-combined. This creaming process is vital because it incorporates tiny air bubbles into the fat, which will later expand in the oven to create a light texture. Once the mixture is airy, add the egg and vanilla extract, beating again until the batter is smooth and pale in color. Ensure you scrape down the sides of the bowl to incorporate every bit of the sugar.
Step 2: Blend the Dry Ingredients
In a separate medium-sized bowl, whisk together your all-purpose flour, baking soda, cream of tartar, and salt. Whisking ensures that the leavening agents are evenly distributed throughout the flour, preventing any metallic-tasting pockets in your finished cookies. Gradually add this dry mixture to the creamed ingredients, mixing on a low speed or by hand. You want to mix just until the white streaks of flour disappear. Over-mixing at this stage can develop too much gluten, leading to a tough cookie rather than a tender one.
Step 3: Fold in the Texture
Once the base dough has formed, gently fold in the shredded coconut (or your choice of nuts). At this point, the dough should be thick, slightly tacky, but manageable enough to roll into balls. If the dough feels too soft—which can happen on warm days—you may want to chill it in the refrigerator for about 20 to 30 minutes. This makes the rolling process much easier and helps the cookies hold their shape during the initial minutes of baking.
Step 4: Roll and Shape the Dough
Preheat your oven and line your baking sheets with parchment paper or silicone mats. Scoop out small portions of dough and roll them between your palms into balls about the size of a large walnut. Space them at least two inches apart on the prepared sheets. Now comes the namesake step: take a fork and press it firmly into the top of each ball, flattening it slightly. Pull the fork toward you to create those long, parallel ridges that look like an old washboard. This isn’t just for looks; the increased surface area helps the edges get wonderfully crisp.
Step 5: Bake Until Golden
Slide the sheets into the center of the oven and bake until the edges are just beginning to turn a light golden brown. The centers might still look slightly soft, but they will firm up as they cool on the hot baking sheet. Avoid over-baking, as the brown sugar in this old fashioned washboard cookies recipe can go from perfectly caramelized to burnt quite quickly. Let the cookies rest on the sheet for five minutes before transferring them to a wire rack to cool completely.
Pro Tips for Success
- Tip: Use a cookie scoop to ensure every dough ball is the same size. This guarantees that all your cookies bake at the same rate, preventing some from burning while others remain raw.
- Tip: If the fork sticks to the dough while creating the ridges, dip the tines of the fork into a bit of extra flour or granulated sugar between each cookie.
- Tip: For the best flavor, use fresh brown sugar. If your sugar has hardened, place it in a bowl with a damp paper towel and microwave it for 20 seconds to restore its moisture and soft texture.
- Tip: Don’t skip the cream of tartar. Even though it’s a small amount, it provides a specific “old-fashioned” crumb and a slight acidity that makes these easy brown sugar cookies stand out.
- Tip: Cooling on the baking sheet for those first few minutes is crucial. It allows the structure to set so the cookies don’t break when you move them to the cooling rack.
How to Serve Washboard Cookies
These cookies are incredibly versatile and fit perfectly into several different serving scenarios. For a classic afternoon treat, serve them on a vintage platter alongside a variety of teas. Their sturdy nature makes them excellent “dunking” cookies, standing up well to Earl Grey or a rich Darjeeling without immediately falling apart.
If you are serving them as part of a larger dessert spread, consider pairing them with a simple bowl of vanilla bean ice cream or a fruit compote. The caramelized flavor of the old fashioned washboard cookies recipe complements the tartness of roasted berries or sautéed apples beautifully. They also make a fantastic addition to holiday cookie tins, as their unique appearance provides a nice visual contrast to round sugar cookies or dark chocolate brownies. Because they are relatively flat and sturdy, they stack easily and travel well for potlucks or as homemade gifts for neighbors and friends.
Storage and Make-Ahead
Storing Leftovers
These cookies store remarkably well, which is one of the reasons they became such a staple in heritage baking. Keep them in an airtight container at room temperature for up to one week. To keep them crisp, you can place a small piece of parchment paper between layers. If you find they have softened too much, a few minutes in a 300°F oven will crisp them right back up.
Freezing Instructions
You can freeze the baked cookies for up to three months. Wrap them tightly in plastic wrap and then place them in a freezer-safe zip-top bag. Alternatively, you can freeze the unbaked dough balls. Flash-freeze them on a baking sheet for an hour, then transfer to a bag. When you’re ready to bake, you can press the ridges and bake them directly from frozen, just adding an extra minute or two to the total bake time.
Final Thoughts
Mastering this old fashioned washboard cookies recipe is like holding a piece of culinary history in your hands. It reminds us that the most memorable treats don’t require expensive ingredients or complicated gadgets—just a few pantry staples and a little bit of time. The combination of the toasted coconut, the deep warmth of the brown sugar, and that signature ridged texture creates a cookie that is as satisfying to look at as it is to eat. We hope this recipe finds a permanent place in your baking rotation, bringing a touch of vintage charm to your modern kitchen and delighting everyone who takes a bite.
Frequently Asked Questions
Why are they called washboard cookies?
They are named for their visual resemblance to a traditional washboard used for scrubbing clothes. By pressing the tines of a fork into the dough and dragging them slightly, bakers create a series of parallel ridges. Historically, this wasn’t just decorative; it allowed the cookie to bake more evenly and provided a satisfyingly crisp texture on the exterior.
Can I use butter instead of shortening?
While you can use butter, the texture will change significantly. Butter has a lower melting point and contains water, which means the cookies will spread more and the ridges will be less defined. Shortening is what gives these vintage cookie recipes their characteristic “short” crumb and helps them maintain that iconic shape. If you must use butter, ensure it is very cold and consider chilling the dough for at least an hour before baking.
My cookies came out flat. What happened?
If your cookies spread too much, it is usually due to the dough being too warm or the shortening being over-creamed. Another common culprit is placing dough balls onto a hot baking sheet from a previous batch. Always let your baking sheets cool completely between batches to ensure the fat in the dough doesn’t melt before the oven has a chance to set the structure.
Do I have to use coconut?
No, coconut is a traditional addition but it is not strictly necessary for the structural success of the recipe. If you prefer a smoother cookie, you can omit it entirely. However, the coconut adds a layer of chewiness that many people associate with the authentic old fashioned washboard cookies recipe. If you dislike the texture of coconut, try substituting it with very finely ground oats or nuts.
Can I make these cookies gluten-free?
Yes, you can substitute the all-purpose flour with a high-quality 1:1 gluten-free flour blend that contains xanthan gum. Because these cookies rely heavily on the fat and sugar for their structure rather than a complex gluten network, they adapt quite well to gluten-free swaps. Just be sure to let the dough rest for 10 minutes after mixing to allow the alternative flours to hydrate properly.
Old-Fashioned Washboard Cookies

These vintage Old-Fashioned Washboard Cookies are a nostalgic, crispy treat featuring a signature ridged pattern. Made with brown sugar and shredded coconut, they provide a delightful crunch and a hint of caramelized sweetness that pairs perfectly with afternoon tea or a cold glass of milk.
- 1 cup unsalted butter, softened
- 1 cup light brown sugar, packed
- 1 cup granulated sugar
- 2 large eggs
- 1 teaspoon vanilla extract
- 3 1/2 cups all-purpose flour
- 1 teaspoon baking soda
- 1 teaspoon baking powder
- 1/2 teaspoon salt
- 1 cup sweetened shredded coconut
- 1In a large mixing bowl, cream together the softened butter, brown sugar, and granulated sugar until the mixture is light and fluffy.
- 2Add the eggs one at a time, beating well after each addition, then stir in the vanilla extract.
- 3In a separate medium bowl, whisk together the flour, baking soda, baking powder, and salt.
- 4Gradually add the dry ingredients to the wet ingredients, mixing until a stiff dough forms.
- 5Fold in the shredded coconut until evenly distributed.
- 6Cover the dough and refrigerate for at least 1 hour to make it easier to handle.
- 7Preheat your oven to 350°F (175°C) and line two large baking sheets with parchment paper.
- 8Roll the chilled dough into small cylinders or logs, about 1 inch long and 1/2 inch thick.
- 9Place the logs on the prepared baking sheets and press down firmly with the tines of a fork to create the traditional "washboard" ridges.
- 10Bake for 10-12 minutes, or until the edges are golden brown.
- 11Allow the cookies to cool on the baking sheet for 5 minutes before transferring to a wire rack to cool completely.
Keywords: washboard cookies, vintage cookies, old fashioned recipes, coconut cookies, brown sugar cookies, traditional baking


