
Loaded Cheesy Pocket Tacos

Finding a meal that balances satisfying textures with bold, savory flavors is the ultimate goal for any home cook, and this loaded cheesy pocket tacos recipe delivers exactly that. Unlike a traditional open-faced taco that can be messy to eat, these pockets wrap everything you love about Mexican-inspired cuisine—seasoned beef, melty cheese, and hearty fillings—inside a perfectly crisp, handheld flour tortilla. Every bite offers a contrast between the golden-brown, toasted exterior and the gooey, savory center, making it a hit for both kids and adults who want a bit more substance than a standard taco night provides.
The beauty of this dish lies in its clever construction; by folding the tortillas into secure “pockets,” you lock in the juices from the meat and the steam from the melting cheese. This technique ensures that every morsel is infused with the warm spices of your taco seasoning, while the addition of beans and corn provides a satisfying “loaded” feel. Whether you are looking for a fun easy weeknight dinner or a crowd-pleasing appetizer for game day, these crispy taco pockets are approachable, quick to prepare, and incredibly rewarding to eat.
Why You’ll Love This Recipe
- Mess-Free Portability: Because the fillings are sealed inside a folded tortilla, you don’t have to worry about ingredients falling out the back, making them a great option for casual dining or busy families.
- Superior Texture: Pan-searing the pockets in a light layer of oil or butter creates a shatteringly crisp shell that contrasts beautifully with the soft, melted cheese inside.
- High Customizability: This loaded cheesy pocket tacos recipe acts as a perfect canvas for whatever you have in your pantry, allowing you to swap proteins or add extra vegetables with ease.
- Speedy Preparation: By using simple techniques and high-impact seasonings, you can have a full tray of these ground beef taco recipes ready to serve in under thirty minutes.
Ingredients You’ll Need
The success of these pockets depends on using ingredients that provide both structural integrity and a punch of flavor. We focus on a blend of savory proteins, creamy binders, and crisp tortillas to ensure every pocket holds together perfectly during the searing process.
- Ground Beef: A lean ground beef (80/20 or 90/10) works best here, providing enough fat for flavor without making the pockets overly greasy or soggy.
- Flour Tortillas: Large, soft flour tortillas are essential because they are flexible enough to fold into pockets without tearing, unlike corn tortillas which tend to crack.
- Shredded Cheese Blend: A combination of sharp cheddar and Monterey Jack offers the perfect balance of bold flavor and superior meltability for that “cheesy” factor.
- Black Beans and Corn: These “loaded” additions add bulk, fiber, and a slight sweetness that cuts through the savory spices of the meat.
- Taco Seasoning: A robust blend of cumin, chili powder, and garlic powder ensures the beef is deeply flavored and aromatic.
- Aromatics (Onion and Garlic): Sautéing fresh onion and garlic with the beef builds a foundation of savory depth that pre-packaged seasonings can’t achieve alone.
- Binder (Optional Sour Cream or Salsa): Adding a small amount of salsa or sour cream to the meat mixture helps hold the “loaded” ingredients together inside the pocket.
Variations and Smart Swaps
- Protein Alternatives: If you prefer a lighter version, swap the ground beef for ground turkey or shredded rotisserie chicken. Both absorb the taco seasonings beautifully while maintaining the structural integrity of the pocket.
- Vegetarian Pocket: Skip the meat entirely and use a double portion of black beans and sautéed bell peppers. Adding some crumbled cotija cheese alongside the melted jack cheese adds a nice salty bite.
- Spice Level Adjustments: To give these pockets a kick, fold in diced jalapeños or a spoonful of chipotle peppers in adobo sauce to the meat mixture before sealing.
- Nacho Style: Add a small smear of refried beans to the tortilla before adding the beef and cheese to create a “double-decker” flavor profile inside the pocket.
How to Make This Loaded Cheesy Pocket Tacos Recipe
Step 1: Brown the Beef and Build Flavor
Start by heating a large skillet over medium-high heat. Add the ground beef and finely diced onions, breaking the meat apart with a wooden spoon as it cooks. You want to cook the beef until it is no longer pink and the onions have become translucent and slightly sweet. Once browned, drain any excess fat to ensure your loaded cheesy pocket tacos recipe stays crispy rather than oily. Stir in the minced garlic and your taco seasoning, letting them toast for a minute until the kitchen becomes fragrant.
Step 2: Incorporate the Loaded Fillings
Reduce the heat to medium and add the rinsed black beans, corn, and a splash of water or salsa to the skillet. This moisture helps the spices coat every single ingredient and prevents the filling from becoming too dry. Stir everything together and let it simmer for 3 to 5 minutes. The goal is for the liquid to evaporate, leaving behind a thick, savory mixture that will stay put once folded into the tortillas. Taste and adjust the salt as needed before removing the pan from the heat.
Step 3: Fold and Assemble the Pockets
To ensure the tortillas are pliable, warm them for a few seconds in the microwave or on a dry skillet. Place a generous sprinkle of cheese in the center of a tortilla, followed by a scoop of the beef mixture, and another layer of cheese on top. To create the “pocket,” fold the sides of the tortilla toward the center, then fold the top and bottom over to create a rectangular or square package. The cheese acts as a “glue” during the cooking process, helping to seal the edges shut.
Step 4: Sear to Crispy Perfection
Wipe out your skillet and add a teaspoon of oil or a small pat of butter over medium heat. Place the taco pockets into the pan seam-side down first. This is a critical step because the heat will melt the cheese and “weld” the tortilla folds together, ensuring the fillings stay inside. Sear for about 2-3 minutes per side until the surface is golden brown and audibly crispy when tapped with a spatula. Repeat with the remaining pockets until all are toasted and the cheese is fully melted.
Pro Tips for Success
- Tip: Don’t Overfill. It is tempting to pack the tortillas, but too much filling will make it impossible to fold them tightly, leading to “blowouts” in the pan. Stick to about 1/3 cup of filling for a standard large tortilla.
- Tip: Use Warm Tortillas. Cold tortillas are brittle and will snap when you try to fold them into pockets. A quick 10-second warm-up makes them much easier to manipulate.
- Tip: The Seam-Side Secret. Always start the searing process with the folded side facing down. The direct contact with the pan sets the shape immediately so you can flip them without worry.
- Tip: Shred Your Own Cheese. Pre-shredded cheese is coated in potato starch to prevent clumping, which can hinder the “gooey” melt. Shredding your own cheese from a block results in a much better texture.
Troubleshooting Common Problems
Why are my taco pockets soggy?
Sogginess usually occurs if the beef mixture has too much liquid or if you didn’t drain the fat after browning. Ensure the filling is relatively “dry” before assembly. Additionally, make sure your pan is hot enough before adding the pockets; a cold pan will cause the tortilla to absorb the oil rather than searing it.
Why won’t my tortillas stay folded?
If the folds are popping open, you may need more cheese near the edges to act as a binder. Alternatively, you can use a heavy spatula to press down on the pockets for the first 30 seconds of searing to “set” the shape into the toasted tortilla.
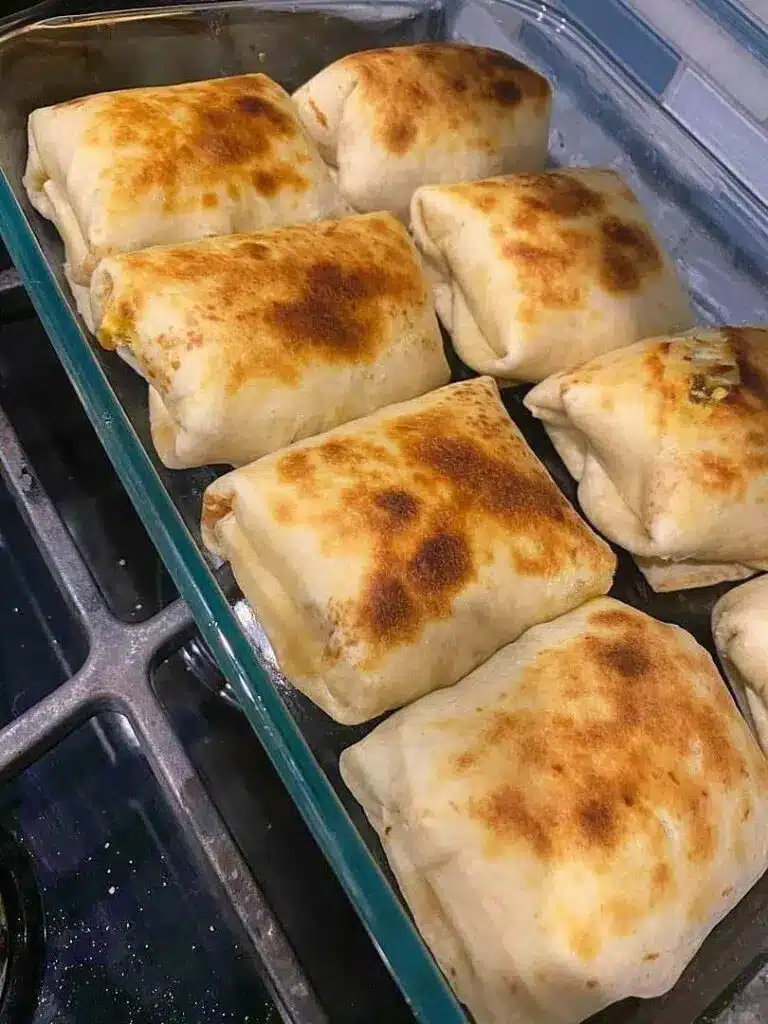
How to Serve Your Loaded Cheesy Pocket Tacos
The beauty of this loaded cheesy pocket tacos recipe is that it carries enough flavor to stand on its own, but the right accompaniments can elevate it to a restaurant-quality meal. Because the pockets are hot and crispy, you want to provide cold, fresh garnishes to balance the temperature and richness.
Garnishes and Toppings
Serve the pockets with a side of cool sour cream, zesty pico de gallo, or a creamy avocado lime crema. Freshly chopped cilantro and a squeeze of lime juice added right before eating provide a burst of acidity that cuts through the melted cheese and savory beef.
Suggested Side Dishes
For a complete easy weeknight dinner, pair these pockets with a side of cilantro lime rice or a simple Mexican street corn salad (elote). If you are serving these as an appetizer, a big bowl of homemade guacamole and salted tortilla chips is always a winning combination.
Storage and Make-Ahead
Storing Leftovers
Leftover taco pockets can be stored in an airtight container in the refrigerator for up to 3 days. Note that the tortillas will lose their crispness while sitting in the fridge, but the flavors will continue to meld and deepen over time.
Reheating for Best Texture
Avoid the microwave if possible, as it will make the tortillas chewy. For the best results, reheat the pockets in a dry skillet over medium heat for 2-3 minutes per side, or place them in an air fryer at 350°F for 4-5 minutes until the shell is re-crisped and the center is hot.
Making It Ahead
You can prepare the loaded beef filling up to 24 hours in advance and keep it in the fridge. When you are ready to eat, simply assemble the pockets and sear them fresh. This makes the loaded cheesy pocket tacos recipe an excellent option for meal prep or busy evenings.
Final Thoughts
This loaded cheesy pocket tacos recipe is more than just a twist on a classic; it is a smarter, crunchier way to enjoy all your favorite taco flavors. By taking a few extra minutes to fold and sear the tortillas, you transform a basic meal into something that feels special and indulgent. The combination of seasoned beef, hearty beans, and that signature crispy shell makes this a reliable addition to your recipe rotation. Give these crispy taco pockets a try next time you want a handheld meal that truly hits the spot.
Frequently Asked Questions
Can I use corn tortillas instead of flour?
While you can use corn tortillas for traditional tacos, they are generally too brittle to fold into these specific “pockets” without breaking. If you must use corn, ensure they are very fresh and steamed until incredibly soft, though flour tortillas are highly recommended for the structural integrity of this loaded cheesy pocket tacos recipe.
Is this recipe freezer-friendly?
Yes! You can assemble the pockets (before searing) and wrap them tightly in plastic wrap and foil. Freeze them for up to 2 months. To cook, let them thaw in the refrigerator overnight and then sear them in a skillet as directed. This makes them a fantastic easy weeknight dinner option to have on standby.
What is the best cheese for the ultimate melt?
For this loaded cheesy pocket tacos recipe, a blend of Monterey Jack and Sharp Cheddar is ideal. Monterey Jack has a high moisture content and melts beautifully, while the Cheddar provides the sharp, salty flavor that defines a great cheesy taco. Pepper Jack is another great option if you want a subtle hint of heat.
How do I keep the pockets from falling apart in the pan?
The secret is two-fold: don’t overstuff the tortilla, and always place them seam-side down in a hot, lightly oiled pan. The heat will immediately begin to melt the cheese and toast the tortilla, effectively “gluing” the folds together. Using a spatula to gently press down during the first few seconds of cooking also helps secure the shape.
Can I bake these instead of pan-searing them?
Absolutely. If you prefer to bake them, brush the outside of the pockets with a little melted butter or oil and place them on a parchment-lined baking sheet. Bake at 400°F for about 12-15 minutes, flipping halfway through, until they are golden and crispy. While they won’t be quite as crunchy as the pan-seared version, they are still delicious and great for cooking a large batch at once.
Loaded Cheesy Pocket Tacos

These Loaded Cheesy Pocket Tacos are a crispy, oven-baked delight featuring a savory blend of black beans, melted cheddar, and zesty spices tucked into a perfectly toasted tortilla pocket.
- 8 small flour tortillas
- 1 can (15 oz) black beans, rinsed and drained
- 1 1/2 cups shredded sharp cheddar cheese
- 1/2 cup corn kernels
- 1/4 cup diced red onion
- 1 tablespoon taco seasoning
- 2 tablespoons olive oil
- 1Preheat oven to 400°F (200°C) and line a baking sheet with parchment paper.
- 2In a mixing bowl, combine black beans, cheese, corn, red onion, and taco seasoning.
- 3Place a scoop of the filling mixture onto one half of each tortilla, then fold the other half over to create a semi-circle pocket.
- 4Place the pockets on the baking sheet and brush the tops lightly with olive oil.
- 5Bake for 12 to 15 minutes or until the edges are golden and the cheese is fully melted.
- 6Let cool for 2 minutes before serving with your favorite toppings.
Keywords: tacos, vegetarian tacos, cheesy tacos, baked tacos, easy dinner, pocket tacos


