
Chocolate Pecan Turtle Clusters

There is something timeless and deeply nostalgic about the combination of crunchy toasted nuts, buttery caramel, and smooth, velvety chocolate. These homemade chocolate pecan turtle clusters capture that classic candy shop magic right in your own kitchen, offering a texture profile that is hard to beat. Unlike mass-produced versions that can often be waxy or overly sweet, making your own allows you to prioritize high-quality ingredients and achieve the perfect balance between salty and sweet.
This recipe is exceptionally approachable, making it a fantastic entry point for those who might feel intimidated by traditional candy making. By focusing on a few simple techniques—like properly toasting the pecans and tempering your chocolate—you can create a homemade holiday candy that looks and tastes like it came from a high-end boutique. Whether you are filling up gift tins or looking for a decadent treat to keep in the fridge, these clusters are a guaranteed crowd-pleaser.
Why You’ll Love This Recipe
- The Perfect Texture: These treats offer a satisfying “snap” from the chocolate, a “crunch” from the toasted pecans, and a “pull” from the soft, chewy caramel center.
- Gifting Potential: Because they look so professional and hold up well at room temperature, they are an ideal choice for gourmet chocolate turtles to give to neighbors, teachers, or coworkers.
- Customizable Ratios: You can choose exactly how much chocolate or caramel goes on each cluster, allowing you to tailor the sweetness to your personal preference.
- No-Bake Simplicity: While there is some light assembly required, this is essentially a no-bake dessert that doesn’t require hours of oven time or complicated kitchen machinery.
Ingredients You’ll Need
The beauty of this recipe lies in its simplicity. Since there are only a few components, the quality of each ingredient will directly impact the final flavor of your pecan turtle candy. Look for the freshest nuts and the highest quality chocolate you can find to ensure a premium result.
- Pecan Halves: Use raw pecan halves rather than pre-toasted ones. Toasting them yourself just before assembly ensures they are fragrant and have the maximum amount of crunch.
- Caramels: You want a high-quality, soft baking caramel. These provide the signature chew that holds the pecans together and provides the buttery sweetness the recipe is known for.
- Chocolate: While milk chocolate is traditional, semi-sweet or dark chocolate works beautifully to balance the sweetness of the caramel. Use a high-quality bar or premium chips for a better melt.
- Heavy Cream: A small splash of cream is often used when melting the caramels to ensure they stay soft and pliable even after the candy has set.
- Sea Salt: A light sprinkle of flaky sea salt on top of the finished homemade chocolate pecan turtle clusters cuts through the richness and enhances the nuttiness of the pecans.
- Vanilla Extract: Adding a touch of pure vanilla to the caramel mixture adds a layer of aromatic depth that elevates the entire flavor profile.
Variations and Smart Swaps
- Nut Substitutions: If you aren’t a fan of pecans, walnuts or cashews make an excellent substitute. Cashew turtles are particularly popular for their creamier, softer crunch.
- Dark Chocolate Sea Salt: For a more sophisticated version, use a 70% dark chocolate and a generous pinch of Maldon sea salt. This version is less sweet and appeals to more mature palates.
- White Chocolate Drizzle: To make the clusters look even more decorative, you can add a secondary drizzle of melted white chocolate over the dark or milk chocolate base.
- Vegan Option: You can create easy caramel pecans that are dairy-free by using coconut milk-based caramels and dairy-free chocolate chips.
How to Make Homemade Chocolate Pecan Turtle Clusters
Step 1: Toast the Pecans for Depth
Toasting the pecans is a non-negotiable step for the best flavor. Arrange the raw pecan halves in a single layer on a baking sheet and toast them in the oven at a low temperature until they become fragrant and slightly darkened. This process releases the natural oils in the nuts, which provides a much deeper “nutty” flavor and ensures they stay crisp even when encased in chewy caramel.
Step 2: Arrange the Clusters
On a parchment-lined baking sheet, arrange the toasted pecans into small groups or “star” patterns. Usually, 3 to 5 pecan halves per cluster are sufficient. By arranging them first, you create a stable base for the caramel to sit on. Make sure there is enough space between each group so the caramel doesn’t run together as you work.
Step 3: Melt and Prepare the Caramel
Gently melt your caramels with a splash of heavy cream and vanilla extract. You can do this in a microwave-safe bowl in short bursts or in a small saucepan over low heat. The goal is a smooth, pourable consistency that is thick enough to hold its shape. If the caramel is too thin, it will run off the pecans; if it is too thick, it will be difficult to bite through once cooled.
Step 4: Layer the Caramel Center
Spoon a dollop of the warm caramel directly onto the center of each pecan cluster. You want enough caramel to touch every nut in the group, essentially acting as the “glue” that binds them together. Allow the caramel to set for several minutes at room temperature or in the fridge until it is firm to the touch before moving on to the chocolate stage.
Step 5: Coat with Rich Chocolate
Melt your chocolate using a double boiler or the microwave until it is completely smooth and glossy. Spoon the chocolate over the top of the set caramel, spreading it slightly so it drips down the sides just enough to partially cover the pecans. This creates the “shell” of your homemade chocolate pecan turtle clusters. While the chocolate is still wet, sprinkle a few grains of sea salt on top for that perfect finishing touch.
Step 6: Final Setting and Cooling
Transfer the baking sheet to the refrigerator to allow the chocolate to fully harden. This usually takes about 30 to 60 minutes. Setting the clusters in a cool environment ensures the chocolate has a nice sheen and doesn’t develop any streaks. Once firm, peel them gently off the parchment paper and they are ready to be served or packed.
Pro Tips for Success
- Tip: Always use parchment paper or a silicone baking mat. Caramel is incredibly sticky, and attempting to make these directly on a metal pan will result in the clusters breaking apart when you try to remove them.
- Tip: Don’t overheat the chocolate. If chocolate gets too hot, it can “seize” or become grainy. Melt it slowly and stir frequently to maintain a smooth texture.
- Tip: Let the caramel set completely before adding the chocolate. If the caramel is still warm or runny, the chocolate will mix into it rather than sitting cleanly on top.
- Tip: Use “halves” rather than “pieces.” Whole pecan halves provide the structural integrity needed to hold the weight of the caramel and chocolate.
- Tip: If your kitchen is very warm, keep the finished candies in the refrigerator until right before serving to prevent the chocolate from softening.
Troubleshooting Common Problems
Why is my caramel too hard to chew?
This usually happens if the caramel was heated to too high a temperature or if not enough liquid (like heavy cream) was added during the melting process. To avoid this, melt the caramel over very low heat and ensure you aren’t “cooking” it further, just softening it. A teaspoon of cream can make a big difference in the final chewiness.
Why won’t my chocolate set?
If your chocolate remains soft or tacky at room temperature, it likely wasn’t tempered or was overheated. To fix this, you can store the clusters in the refrigerator. In the future, try adding a small amount of “seed” chocolate (unmelted chips) to the melted chocolate to help it stabilize as it cools.
Why did the caramel run all over the pan?
If the caramel is too hot when you spoon it onto the pecans, it will be too thin and spread outward. Let the caramel sit for 2 or 3 minutes after melting so it thickens slightly before you begin the assembly process. This allows it to stay in a neat “mound” on top of the nuts.
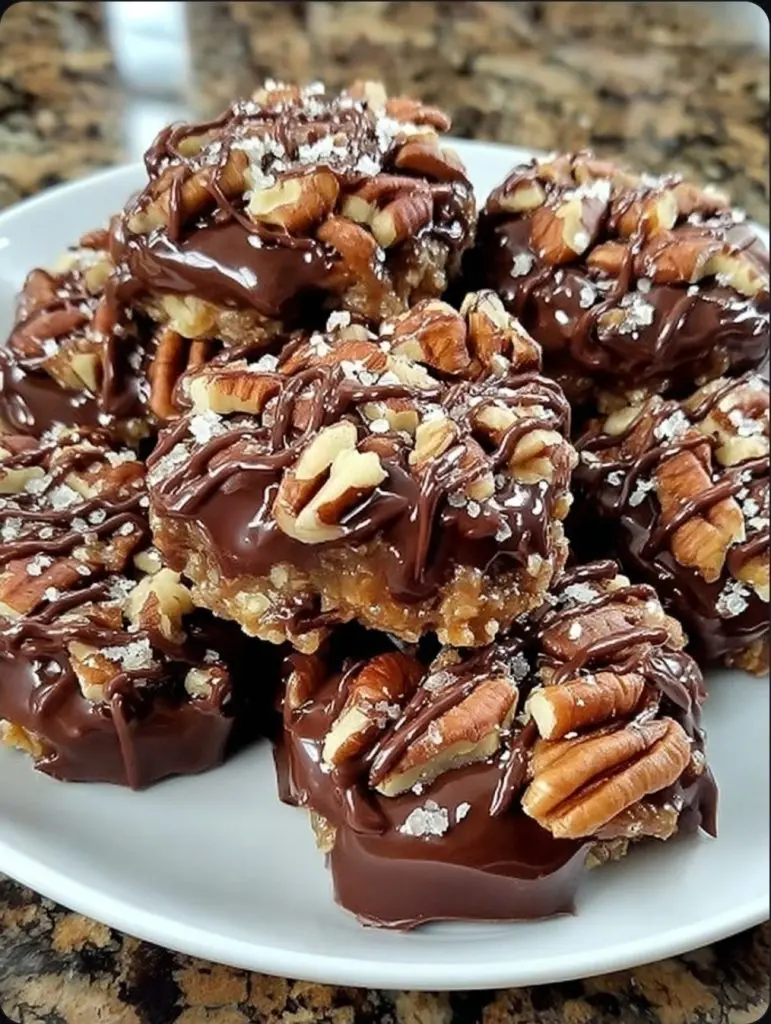
How to Serve Homemade Chocolate Pecan Turtle Clusters
These clusters are a showstopper on their own, but they also fit perfectly into a larger dessert spread. Because they are quite rich, they are best served as individual treats. They look beautiful arranged on a white ceramic platter or a wooden serving board alongside other homemade holiday candy like fudge or peppermint bark.
Pairing Ideas
If you are serving these at a dinner party, they pair exceptionally well with a hot cup of coffee or a dark roast espresso. The bitterness of the coffee cuts through the sugar of the caramel. For a more indulgent pairing, try serving them alongside a glass of port or a creamy stout beer, both of which complement the chocolate and roasted nut flavors.
Gift Presentations
To give these as a gift, place each cluster into a small paper cupcake liner. This prevents them from sticking to each other and makes for a professional “candy box” appearance. You can then stack them in a decorative tin or a clear cellophane bag tied with a festive ribbon.
Storage and Make-Ahead
Storing Leftovers
Store your homemade chocolate pecan turtle clusters in an airtight container. At room temperature, they will stay fresh for about a week, provided your kitchen isn’t too warm. For longer storage, keep them in the refrigerator, where they will maintain their quality for up to three weeks.
Freezing
These candies freeze remarkably well. Place them in a single layer in a freezer-safe bag or container with parchment paper between layers to prevent sticking. They can be frozen for up to three months. When you are ready to eat them, let them thaw in the refrigerator overnight to prevent condensation from forming on the chocolate.
Making It Ahead
Since these need time to set, they are the perfect make-ahead treat. You can easily prepare a large batch two or three days before an event. In fact, many people find that the flavors “settle” and improve after the first 24 hours.
Final Thoughts
Mastering the art of homemade chocolate pecan turtle clusters is a rewarding experience that yields a high-quality treat with very little effort. By taking the time to toast your pecans and selecting a chocolate you truly enjoy, you create a confection that far surpasses any store-bought alternative. These clusters are more than just a sweet snack; they are a celebration of classic flavors and textures that never go out of style. Once you see how easy they are to assemble, they are sure to become a staple in your dessert rotation.
Frequently Asked Questions
Can I use chopped pecans instead of halves?
While you can use chopped pecans, the result will be more of a “bark” or a “drop” than a traditional turtle. Pecan halves provide the classic shape and a more substantial crunch. If you only have pieces, consider mixing them directly into the caramel and chocolate and spreading the mixture thin on a sheet pan to make a turtle-flavored bark instead.
What is the best chocolate for melting?
For the best results, use a high-quality couverture chocolate or a premium baking bar. These contain more cocoa butter than standard chocolate chips, which helps them melt more smoothly and set with a better shine. However, premium chocolate chips will certainly work in a pinch for easy caramel pecans.
How do I prevent the caramel from being too sticky?
Caramel is naturally sticky, but if you find it’s clinging too much to your teeth, you can try boiling the caramel for a very short time to reach a slightly higher “ball stage,” or simply ensure you are using a high-quality brand designed for dipping. Dusting the bottoms of the pecans with a tiny bit of cornstarch can also prevent them from sticking to the liners.
Can I make these without a microwave?
Absolutely. You can use a double boiler (a bowl set over a pot of simmering water) to melt both the caramel and the chocolate. This method is actually preferred by many bakers as it provides more consistent, gentle heat and reduces the risk of scorching the ingredients.
Are these gluten-free?
Generally, the primary ingredients—pecans, chocolate, and caramel—are naturally gluten-free. However, you should always check the labels on your packaged caramels and chocolate to ensure they weren’t processed in a facility with wheat or contain any gluten-based stabilizers. When made with certified ingredients, these are a fantastic gluten-free dessert option.
Chocolate Pecan Turtle Clusters

Rich and gooey homemade turtles made with toasted pecans, chewy caramel, and smooth milk chocolate. These classic treats are the perfect combination of sweet, salty, and crunchy, making them an ideal gift or holiday dessert.
- 2 cups pecan halves, toasted
- 11 oz soft caramels, unwrapped
- 2 tbsp heavy cream
- 1 1/2 cups milk chocolate chips
- 1/2 tsp sea salt
- 1Prepare: Line a large baking sheet with parchment paper or a silicone baking mat.
- 2Arrange Pecans: Group the pecan halves into small clusters of 3 to 5 on the prepared baking sheet, ensuring they are touching.
- 3Melt Caramel: In a microwave-safe bowl, combine the caramels and heavy cream. Microwave in 30-second intervals, stirring between each, until the mixture is completely smooth.
- 4Layer Caramel: Spoon approximately 1 tablespoon of the melted caramel over the center of each pecan cluster, allowing it to act as the "glue" for the nuts.
- 5Melt Chocolate: In a separate microwave-safe bowl, melt the milk chocolate chips in 30-second increments, stirring until silky and smooth.
- 6Top with Chocolate: Spoon a dollop of melted chocolate over the caramel layer of each cluster. Sprinkle with a pinch of sea salt while the chocolate is still wet.
- 7Set: Allow the clusters to sit at room temperature for 1 hour or refrigerate for 30 minutes until the chocolate and caramel have fully set.
Keywords: Chocolate, Pecan, Caramel, Turtle Clusters, Candy, Homemade, Holiday Treats


