
Cherry Crumble Bars

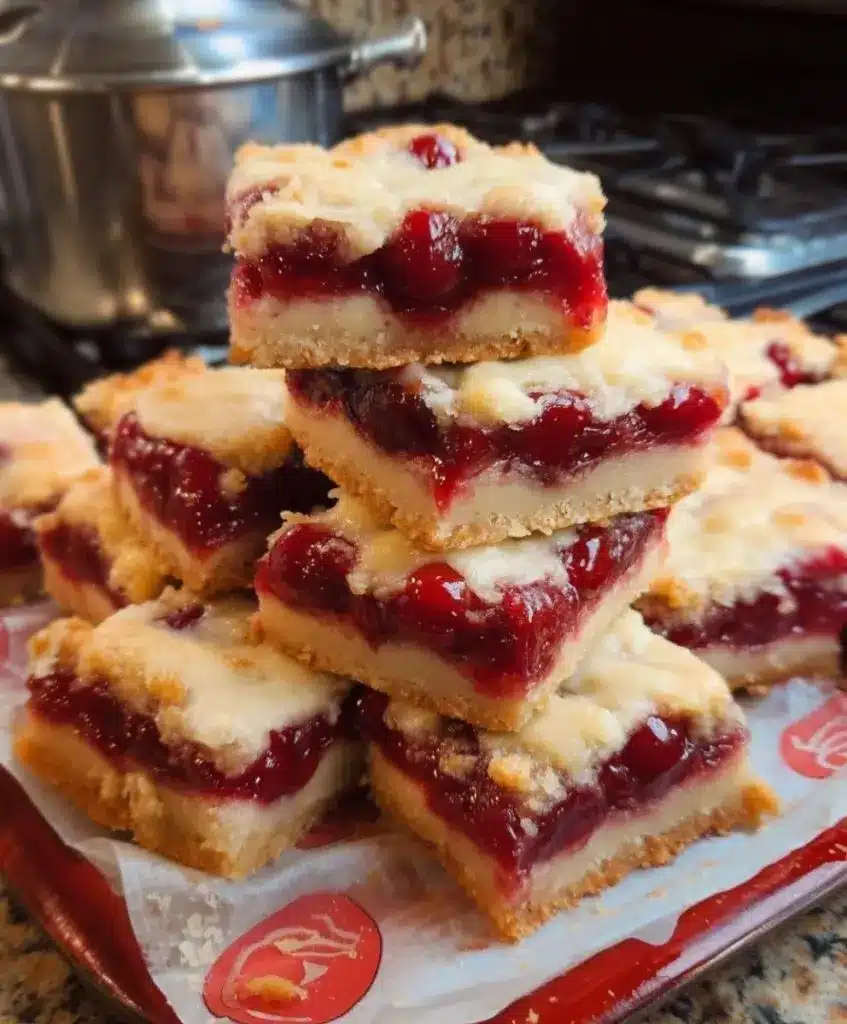
There is something undeniably nostalgic about a fruit-filled bar, especially one that strikes the perfect balance between a crisp, buttery topping and a jammy, tart center. This easy cherry crumble bars recipe is designed for those moments when you crave the deep, comforting flavors of a traditional cherry pie but want the portability and simplicity of a handheld treat. Unlike a delicate pie crust that requires chilling and rolling, these bars utilize a versatile dough that functions as both the sturdy foundation and the golden, pebbled topping. The result is a dessert that feels elevated enough for a backyard gathering yet humble enough for a Tuesday afternoon snack.
The beauty of this recipe lies in its texture and the way the bright acidity of the cherries cuts through the richness of the buttery shortbread crust. By using a few smart techniques to ensure the crust remains crisp under the weight of the fruit, you can achieve a professional-quality result with minimal effort. Whether you are looking to use up a fresh harvest or a high-quality jar of preserved fruit, these fruit dessert bars are a reliable addition to your baking repertoire that will have everyone reaching for a second square.
Why You’ll Love This Recipe
- Textural Contrast: Every bite offers a satisfying transition from the crunchy, oat-flecked crumble on top to the soft, juicy cherry interior and the firm, shortbread-style base.
- Effortless Preparation: This easy cherry crumble bars recipe eliminates the need for complex pastry techniques, making it accessible for novice bakers while still delivering a high-end flavor profile.
- Exceptional Versatility: These bars are incredibly adaptable to the seasons, working beautifully with fresh summer produce or pantry-staple frozen fruit, ensuring you can bake them year-round.
- Crowd-Friendly Portability: Unlike a messy fruit cobbler, these bars set firmly once cooled, making them the ultimate choice for potlucks, picnics, or school bake sales.
Ingredients You’ll Need
To achieve the perfect balance of flavor and structure, each ingredient in these bars plays a specific role. From the choice of fat to the aromatic additions, selecting high-quality components will ensure your finished dessert is nothing short of spectacular.
- All-Purpose Flour: This provides the primary structure for both the base and the crumble, ensuring the bars can hold their shape without being overly dense.
- Unsalted Butter: Cold butter is essential here; it creates tiny pockets of steam during baking, which results in the signature flakiness of the buttery shortbread crust.
- Granulated Sugar: Beyond adding sweetness, the sugar helps to macerate the fruit and contributes to the crisp, caramelized edges of the crumble topping.
- Cherries: The star of the show. You can use sweet or tart varieties, though tart cherries provide a sophisticated contrast to the sweet dough.
- Almond Extract: Often considered the “secret ingredient” in summer baking recipes involving stone fruit, almond extract exponentially enhances the natural floral notes of the cherries.
- Cornstarch: This acts as a thickener for the cherry juices, ensuring the center of the bar becomes a thick, jam-like consistency rather than a runny liquid.
- Lemon Juice: A splash of citrus brightens the entire flavor profile and helps to balance the natural sugars in the fruit filling.
- Old-Fashioned Oats: Adding these to the topping provides an extra layer of crunch and a rustic, wholesome aesthetic that defines a classic crumble.
Variations and Smart Swaps
Mixed Berry Twist: If you find yourself short on cherries, you can easily substitute half of the fruit with blueberries, raspberries, or blackberries for a vibrant, multi-dimensional berry bar.
Gluten-Free Option: To make these bars gluten-friendly, replace the all-purpose flour with a high-quality 1-to-1 gluten-free baking blend and ensure your oats are certified gluten-free.
Chocolate Chip Addition: For a more decadent treat, fold a handful of dark chocolate chips into the crumble topping; the combination of cherry and dark chocolate is a timeless flavor pairing.
Nutty Crunch: Swap half of the oats in the topping for chopped pecans or slivered almonds to add an extra earthy flavor and a more pronounced crunch to every bite.
How to Make This Easy Cherry Crumble Bars Recipe
Step 1: Prepare the Crust and Topping Mixture
In a large mixing bowl, combine your dry ingredients, including the flour, sugar, and a pinch of salt. Using a pastry cutter or two knives, work the cold, cubed butter into the mixture until it resembles coarse crumbs. You want to see some pea-sized bits of butter remaining; these are what create the flaky texture. This single dough mixture will serve as both your base and your topping, which is the key to why this is such an easy cherry crumble bars recipe.
Step 2: Press and Par-Bake the Base
Take about two-thirds of the crumble mixture and press it firmly and evenly into the bottom of a prepared baking pan lined with parchment paper. It is important to press firmly to create a solid buttery shortbread crust that won’t crumble when the bars are sliced. Par-baking the base for a few minutes before adding the fruit helps to “seal” the crust, preventing it from becoming soggy once the juicy cherry filling is added.
Step 3: Simmer the Homemade Cherry Filling
While the base is in the oven, prepare the fruit layer. In a medium saucepan, combine your cherries, sugar, lemon juice, and cornstarch. Heat the mixture gently until the cherries begin to release their juices and the liquid thickens into a glossy, homemade cherry filling. This step ensures that the fruit is perfectly cooked and the filling won’t leak out of the bars after baking. Stir in the almond extract at the very end to preserve its delicate flavor.
Step 4: Layer the Filling and Crumble
Spread the warm cherry mixture evenly over the par-baked crust, leaving a small margin at the very edges if you prefer a crispier border. Take the remaining third of the dough mixture—adding the oats at this stage if you haven’t already—and sprinkle it generously over the cherries. You don’t need to cover the fruit completely; allowing some of the red filling to peek through creates a beautiful, rustic appearance that is a hallmark of the best fruit dessert bars.
Step 5: Bake Until Golden and Bubbly
Return the pan to the oven and bake until the topping is a deep golden brown and the cherry filling is bubbling at the edges. The visual cues are important here; the bubbling indicates that the cornstarch has reached its full thickening power. Once finished, resist the urge to slice them immediately. The bars must cool completely in the pan to allow the filling to set and the crust to firm up, ensuring clean, sharp squares when you finally serve them.
Pro Tips for Success
- Tip: Always use cold butter. If the butter is too soft or melted, the crust will be greasy and dense rather than light and crumbly.
- Tip: Don’t skip the parchment paper. Leaving an overhang on the sides allows you to lift the entire block of bars out of the pan for easier slicing.
- Tip: If using frozen cherries, do not thaw them first. Add them directly to the saucepan, but be aware they may require an extra minute or two to release their juices and thicken.
- Tip: To get the cleanest cuts, refrigerate the bars for at least an hour after they reach room temperature. A cold bar slices much better than a room-temperature one.
- Tip: Feel free to adjust the sugar in the filling based on the sweetness of your cherries. If your fruit is particularly tart, add an extra tablespoon of sugar to balance it out.
- Tip: For an extra-crispy topping, you can lightly press the crumble into the fruit with the back of a spoon before the final bake.
How to Serve Cherry Crumble Bars
When it comes to serving this easy cherry crumble bars recipe, you have several delicious options. For a casual afternoon, they are perfectly satisfying on their own, served at room temperature with a cup of coffee or tea. The sturdy nature of the buttery shortbread crust makes them easy to hold, which is why they are so popular at outdoor events.
Garnishes and Toppings
If you want to dress them up for a more formal dessert, a simple dusting of powdered sugar adds a touch of elegance. Alternatively, a quick glaze made from powdered sugar, milk, and a drop of almond extract can be drizzled over the cooled bars for extra sweetness and a professional bakery look. Fresh mint leaves also provide a beautiful color contrast against the deep red cherries.
A La Mode Style
For a truly indulgent experience, serve a square of the crumble bar slightly warm with a large scoop of high-quality vanilla bean ice cream. The warmth of the fruit dessert bars begins to melt the ice cream, creating a creamy sauce that pairs perfectly with the tart cherries and the crunchy oat topping.
Storage and Make-Ahead
Storing Leftovers
Leftover bars can be stored in an airtight container at room temperature for up to two days. However, to maintain the best texture and freshness, I recommend keeping them in the refrigerator, where they will stay delicious for up to five days. The cold temperature helps keep the buttery shortbread crust firm and the cherry filling intact.
Freezing
These bars freeze exceptionally well, making them a great option for summer baking recipes that you want to enjoy later in the year. Wrap individual squares tightly in plastic wrap and place them in a freezer-safe bag. They can be frozen for up to three months. Thaw them at room temperature for an hour or in the refrigerator overnight before serving.
Reheating
If you prefer your crumble bars warm, you can pop a single square into the microwave for 15–20 seconds. For a larger batch, place them in a 300°F oven for about 10 minutes to crisp up the topping without drying out the fruit center.
Final Thoughts
Mastering this easy cherry crumble bars recipe is a game-changer for anyone who loves the flavor of stone fruits but wants a low-stress baking project. The combination of the homemade cherry filling and the simple press-in crust results in a dessert that tastes like it took hours to prepare, even though the process is remarkably straightforward. These bars are a celebration of simple ingredients used well, proving that you don’t need complicated techniques to create something truly memorable. Once you see how quickly these disappear from the cooling rack, they are sure to become a permanent fixture in your dessert rotation.
Frequently Asked Questions
Can I use canned cherry pie filling instead of making my own?
Yes, you can certainly use canned pie filling to save time. If you choose this route, you can skip the saucepan step and spread the canned filling directly onto the par-baked buttery shortbread crust. Keep in mind that canned fillings are often much sweeter than a homemade cherry filling, so you may want to reduce the sugar in the crust slightly to compensate.
Why are my crumble bars falling apart?
The most common reason for bars falling apart is trying to slice them while they are still warm. The fruit filling needs time to cool and set, and the butter in the crust needs to firm up. For the best results, let the easy cherry crumble bars recipe reach room temperature, then chill them in the fridge for at least an hour before cutting into squares with a sharp knife.
Can I make this recipe with frozen cherries?
Absolutely. Frozen cherries are a fantastic option, especially when fresh ones aren’t in season. When using frozen fruit for these fruit dessert bars, do not thaw them beforehand. Cook them directly with the sugar and cornstarch. They will release a bit more moisture than fresh cherries, so you may need to simmer the filling for an extra minute or two to ensure it reaches the proper thickness.
Is it possible to make these bars vegan?
Yes, you can adapt this into a vegan-friendly easy cherry crumble bars recipe by substituting the butter with a high-quality vegan butter stick or solid coconut oil. If using coconut oil, ensure it is cold and firm so you can cut it into the flour just like butter. Most summer baking recipes like this one are very forgiving with dairy-free substitutions as long as the fat remains cold during the mixing process.
What is the difference between a crumble and a crisp?
While the terms are often used interchangeably, a crumble traditionally features a streusel-like topping made of flour, butter, and sugar, whereas a crisp often includes oats or nuts for extra crunch. This recipe uses both flour and oats to get the best of both worlds, resulting in a buttery shortbread crust and a topping that is both tender and distinctly crunchy.
Cherry Crumble Bars

These Cherry Crumble Bars feature a buttery oat crust and a sweet, tangy cherry filling, topped with a golden, crisp crumble layer. Perfect for summer gatherings or a sweet afternoon treat.
- 1 cup unsalted butter, melted
- 1 cup granulated sugar
- 1 teaspoon vanilla extract
- 2 cups all-purpose flour
- 1 cup rolled oats
- 1/2 teaspoon baking powder
- 1/4 teaspoon salt
- 4 cups pitted cherries, fresh or frozen
- 1/4 cup cornstarch
- 1 tablespoon lemon juice
- 1Preheat your oven to 350°F (175°C) and grease a 9x9 inch baking pan.
- 2In a large bowl, whisk together the melted butter, sugar, and vanilla extract.
- 3Stir in the flour, oats, baking powder, and salt until a crumbly dough forms.
- 4Press approximately two-thirds of the mixture firmly into the bottom of the prepared pan to form the base.
- 5In a separate bowl, toss the cherries with cornstarch and lemon juice until evenly coated.
- 6Spread the cherry mixture over the bottom crust.
- 7Sprinkle the remaining crumble mixture evenly over the cherry layer.
- 8Bake for 45 minutes, or until the top is golden brown and the filling is bubbly.
- 9Allow the bars to cool completely in the pan before slicing into squares.
Keywords: cherry, bars, dessert, crumble, baking, summer, fruit


