
Cheesy Taco Sticks Delight

Imagine the satisfying crunch of a golden, oven-baked crust giving way to savory taco-seasoned beef and a center of gooey, melted cheese. This easy cheesy taco sticks recipe transforms everything you love about a traditional taco into a portable, mess-free snack that is as fun to make as it is to eat. By using a few clever shortcuts, you can skip the tedious assembly of individual tacos and create a batch of handheld taco snacks that are perfect for game day, after-school fuel, or a quick dinner that the whole family will actually agree on.
The beauty of this dish lies in its simplicity and the clever use of refrigerated dough to create a sturdy yet tender exterior. Whether you are looking for a new easy weeknight dinner or a crowd-pleasing appetizer, these taco sticks offer a brilliant solution for busy kitchens. They provide a wonderful sensory experience, combining the warmth of spiced meat with the stretchy texture of melted cheese, all wrapped in a convenient package that is ready for dipping into your favorite salsa or creamy guacamole.
Why You’ll Love This Recipe
- Ultimate Portability: These sticks are designed to be held in one hand, making them one of the best kid-friendly appetizers for parties or busy evenings where plates are optional.
- Quick Preparation: By using refrigerated pizza dough or crescent rolls, you can move from prep to the oven in just a few minutes, saving you time without sacrificing flavor.
- Customizable Heat: Since you control the seasoning and the cheese type, it is incredibly easy to adjust the spice level to suit your family’s specific preferences.
- Perfect for Dipping: The shape and structure of these taco sticks make them the ideal vessel for various dips, allowing everyone to customize their flavor experience at the table.
Ingredients You’ll Need
To get the best results from your easy cheesy taco sticks recipe, you only need a handful of reliable pantry staples and refrigerated items. Each component plays a specific role in ensuring the sticks are flavorful, well-sealed, and structurally sound enough to hold all that cheesy goodness inside.
- Ground Beef: This provides the hearty protein base. Using a leaner beef ensures that the dough doesn’t become overly greasy during the baking process.
- Taco Seasoning: A robust blend of chili powder, cumin, and garlic powder gives the meat its signature Mexican-inspired flavor profile and savory depth.
- Refrigerated Pizza Dough: This serves as the outer shell. It is durable enough to stretch around the fillings while baking up into a beautiful, crispy golden brown.
- Cheese Sticks: Mozzarella or pepper jack string cheese is the secret to that perfect “cheese pull.” Using whole sticks ensures a consistent amount of cheese in every bite.
- Egg Wash: A simple beaten egg brushed over the top before baking acts as the “glue” for seasonings and gives the finished sticks a professional, glossy sheen.
- Toppings and Garnishes: While optional, dried oregano or a sprinkle of coarse salt on the crust adds an extra layer of visual and textural appeal.
Variations and Smart Swaps
- Protein Alternatives: If you prefer a lighter option, ground turkey or chicken works beautifully as a substitute for beef. Just ensure you season it well to maintain the classic taco flavor.
- Spice it Up: For those who love a kick, use pepper jack cheese sticks instead of mozzarella and add a few diced jalapeños directly into the beef mixture before rolling.
- Vegetarian Version: You can easily swap the ground meat for seasoned black beans or a plant-based meat crumble to make these handheld taco snacks suitable for vegetarians.
- Cheese Varieties: While string cheese is the most convenient, you can also use thick slices of sharp cheddar or Monterey Jack if you want a more intense cheese flavor.
How to Make an Easy Cheesy Taco Sticks Recipe
Step 1: Brown and Season the Beef
Start by cooking your ground beef in a large skillet over medium-high heat. As the meat browns, break it into very small crumbles; small pieces are much easier to roll into the dough later on. Once the beef is fully cooked and no longer pink, drain the excess fat thoroughly. This is a critical step because any leftover grease can cause the dough to become soggy or prevent it from sealing correctly. Add your taco seasoning and a splash of water, simmering until the liquid has evaporated and the meat is deeply fragrant and well-coated.
Step 2: Prepare the Dough Base
Unroll your refrigerated pizza dough onto a lightly floured surface or a piece of parchment paper. Use a rolling pin to gently stretch the dough into a large rectangle of even thickness. Once the dough is ready, use a pizza cutter or a sharp knife to divide it into smaller, equal-sized rectangles. You want each piece to be large enough to wrap completely around a cheese stick with enough overlap to create a secure seal. This foundation ensures that your easy weeknight dinner looks as good as it tastes.
Step 3: Assemble and Roll the Sticks
Place a small, even spoonful of the seasoned beef down the center of each dough rectangle, leaving plenty of room at the edges. Lay a cheese stick directly on top of the meat. To seal, fold the short ends of the dough over the ends of the cheese stick first, then roll the long side over and pinch the seams tightly. This “burrito-style” folding technique is essential to keep the cheese from leaking out onto the baking sheet as it melts in the high heat of the oven.
Step 4: Add the Finishing Touches and Bake
Arrange the rolls seam-side down on a prepared baking sheet lined with parchment paper. This placement helps use the weight of the stick to keep the seal closed. Brush each stick with a light coating of egg wash and sprinkle with any additional seasonings you like. Bake in a preheated oven until the crust is a deep, vibrant golden brown and feels firm to the touch. The high temperature will crisp the outside while turning the cheese inside into a liquid, stretchy delight.
Pro Tips for Success
- Tip: Always allow the cooked beef to cool slightly before placing it on the dough. If the meat is steaming hot, it can begin to melt the raw dough, making it sticky and difficult to handle.
- Tip: Don’t overfill the sticks. It is tempting to pile on the beef, but too much filling will make it impossible to seal the edges, leading to a “blowout” in the oven.
- Tip: Use parchment paper or a silicone baking mat. These are naturally non-stick and will save you from losing any delicious cheese that might escape during the baking process.
- Tip: Pinch the seams firmly. Use your fingers to really press the dough together; a weak seal is the most common reason for leaking cheese.
- Tip: For an extra-crispy bottom, preheat your baking sheet in the oven for five minutes before placing the taco sticks on it.
How to Serve Taco Sticks
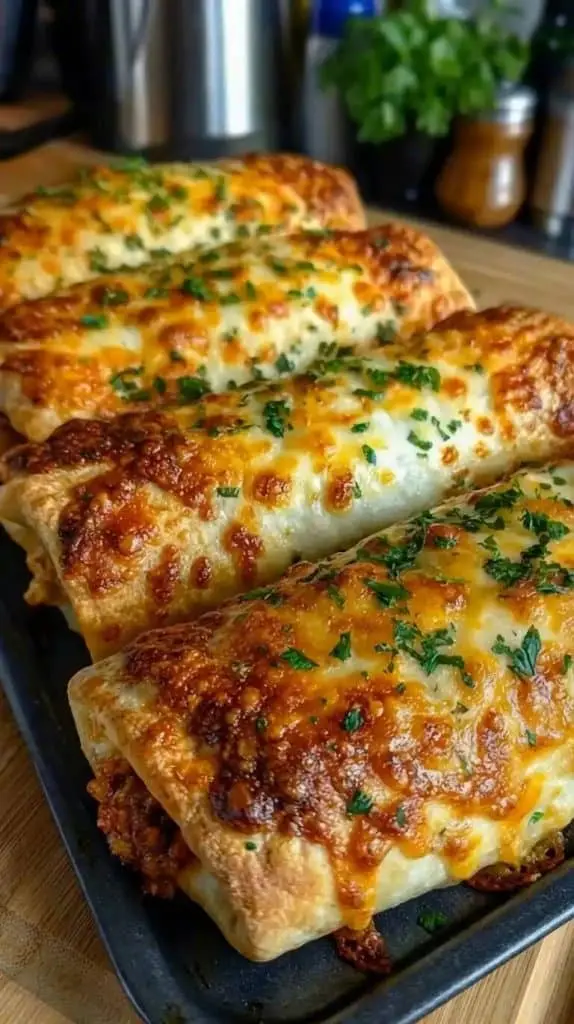
When it comes to serving these kid-friendly appetizers, the dipping experience is just as important as the stick itself. Because the flavors inside are classic taco-inspired, they pair perfectly with traditional Mexican condiments. Arrange the warm sticks on a large platter with small bowls of chilled salsa, sour cream, and freshly mashed guacamole. The contrast between the hot, crispy dough and the cold dips is incredibly satisfying.
Garnishes
To elevate the presentation, sprinkle the finished sticks with finely chopped fresh cilantro or a dusting of smoked paprika. You can also serve them with fresh lime wedges on the side; a quick squeeze of citrus juice over the top right before eating cuts through the richness of the cheese and beef, brightening the entire dish.
Side Dishes
If you are serving these as an easy weeknight dinner, consider pairing them with a simple Mexican street corn salad or a bed of cilantro-lime rice. This turns a portable snack into a complete, balanced meal that feels hearty and intentional. A side of crisp shredded lettuce and diced tomatoes can also provide a fresh, crunchy contrast to the baked dough.
Storage and Make-Ahead
Storing Leftovers
If you happen to have leftovers, these taco sticks store remarkably well. Allow them to cool completely to room temperature before placing them in an airtight container. They will stay fresh in the refrigerator for up to three or four days. Cooling them before storage prevents condensation from forming inside the container, which would otherwise make the crust soft and gummy.
Reheating
For the best results, avoid the microwave when reheating. Instead, place the taco sticks back in a 350°F oven or an air fryer for 5-7 minutes. This will restore the original crispness of the dough and melt the cheese center perfectly. If you must use a microwave, wrap them in a paper towel and heat in short 30-second bursts, though the crust will remain soft.
Making It Ahead
You can assemble these sticks a few hours in advance and keep them covered in the refrigerator until you are ready to bake. This makes them a fantastic option for parties, as you can do all the messy prep work earlier in the day and simply pop them into the oven when your guests arrive.
Final Thoughts
This easy cheesy taco sticks recipe is a testament to how simple ingredients can come together to create something truly special. It bridges the gap between a snack and a meal, offering the comforting flavors of a taco in a fun, manageable format. Whether you are feeding a crowd of hungry sports fans or just looking for a way to break up your usual dinner routine, these golden, beefy, and cheesy sticks are sure to become a frequent request in your household. Grab your favorite dipping sauce and enjoy the crunch!
Frequently Asked Questions
Can I use crescent roll dough instead of pizza dough?
Yes, crescent roll dough is an excellent substitute for this easy cheesy taco sticks recipe. It results in a more buttery, flaky, and slightly sweeter crust compared to the more bread-like texture of pizza dough. If using crescent rolls, simply pinch the perforations together to create a solid sheet before cutting into rectangles.
How do I prevent the cheese from leaking out during baking?
The secret to keeping the cheese inside is a double-seal method. Ensure you fold the ends of the dough over the cheese stick first before rolling it up. Most importantly, place the sticks seam-side down on the baking sheet so the weight of the filling keeps the seal compressed while the dough sets in the oven.
Can I freeze these taco sticks for later?
Absolutely. You can freeze them either before or after baking. If freezing before, assemble them and place them on a tray in the freezer until solid, then transfer to a freezer bag. Bake from frozen, adding an extra 5-10 minutes to the cooking time. If already baked, let them cool, freeze, and then reheat in the oven when needed.
What is the best way to keep the bottom of the sticks from getting soggy?
To ensure a crispy bottom, make sure your ground beef is drained exceptionally well after browning. Additionally, using a perforated baking sheet or a preheated pizza stone can help circulate air or provide immediate heat to the bottom of the dough, preventing any moisture from settling and softening the crust.
Can I make these taco sticks in an air fryer?
Yes, the air fryer is a fantastic tool for making handheld taco snacks. Cook them at 350°F for about 8-10 minutes, or until they reach your desired level of golden brown. Because air fryers circulate air so efficiently, you may not even need the egg wash to get a beautiful color, though it still helps with seasoning adhesion.
Cheesy Taco Sticks Delight

These Cheesy Taco Sticks Delight are a crowd-pleasing snack or dinner option. Soft pizza dough wrapped around a melty blend of taco-seasoned cheeses, baked to golden perfection and brushed with garlic butter.
- 1 tube (13.8 oz) refrigerated pizza dough
- 1 cup shredded cheddar cheese
- 1 cup shredded pepper jack cheese
- 1 tablespoon taco seasoning
- 2 tablespoons melted butter
- 1/2 teaspoon garlic powder
- 1/2 teaspoon dried parsley
- 1Preheat your oven to 400°F (200°C) and line a baking sheet with parchment paper.
- 2Unroll the pizza dough on a lightly floured surface and cut it into 10 equal rectangles.
- 3In a small bowl, mix the cheddar and pepper jack cheeses with the taco seasoning.
- 4Place a generous tablespoon of the cheese mixture along the center of each dough rectangle.
- 5Fold the sides of the dough over the cheese and pinch the edges tightly to seal, forming a stick shape.
- 6Place the sticks seam-side down on the prepared baking sheet.
- 7Mix the melted butter with garlic powder and parsley, then brush over the tops of the sticks.
- 8Bake for 10-12 minutes or until the dough is golden brown and the cheese is melted.
Keywords: taco sticks, cheesy breadsticks, kid-friendly dinner, easy appetizers, mexican inspired snacks


