
Fried Bologna Sandwiches

There is something undeniably nostalgic about a classic fried bologna sandwich recipe. For many, it evokes memories of childhood lunches or late-night snacks in a quiet kitchen. While it might seem like a humble meal, the magic happens when the cold meat hits a hot skillet. The edges curl and crisp, the fat renders out into a savory glaze, and the bologna transforms from a simple deli slice into something deeply flavorful and satisfying. It is the ultimate American comfort food sandwich that relies on heat and timing to turn basic ingredients into a gourmet experience.
This recipe focuses on getting the textures just right: the crunch of toasted bread, the snap of the seared meat, and the creamy melt of American cheese. Whether you grew up eating these or are trying one for the first time, the key is in the technique. By scoring the meat and controlling the heat, you avoid the common pitfalls of uneven browning or soggy bread. This thick-cut bologna preparation is quick enough for a busy weekday but satisfying enough to feel like a real treat.
Why You’ll Love This Recipe
- Unbeatable Texture: Frying the bologna creates a unique contrast between the crispy, charred edges and the soft, tender center that you simply cannot get from a cold sandwich.
- Lightning Fast: From start to finish, you can have a hot, restaurant-quality meal on the table in less than ten minutes using just a handful of staples.
- Perfectly Customizable: While the base is simple, this sandwich serves as a canvas for your favorite toppings, from spicy peppers to garden-fresh tomatoes.
- Nostalgic Appeal: It captures the essence of traditional diner-style cooking, providing a sense of warmth and familiarity that more complicated recipes often miss.
Ingredients You’ll Need
The beauty of a classic fried bologna sandwich recipe lies in its simplicity. Because there are so few components, choosing the right quality for each ingredient makes a significant difference in the final flavor profile and mouthfeel.
- Bologna: Look for a high-quality, all-beef or beef-and-pork blend. For the best results, use thick-cut bologna rather than paper-thin slices to ensure a meaty bite.
- Bread: Traditional white bread is the classic choice, but a sturdy brioche or a thick-cut Texas toast provides excellent structural integrity for the heavy fillings.
- Cheese: American cheese is the gold standard here because of its superior melting capability, creating a silky sauce-like texture as it hits the hot meat.
- Yellow Mustard: The sharp acidity of standard yellow mustard cuts through the richness of the fried meat and the buttery bread, balancing every bite.
- Butter: Use salted butter to toast the bread. This creates a golden-brown crust and adds a layer of savory flavor that oil simply cannot replicate.
- Mayonnaise: A thin swipe of mayo provides moisture and a tangy creaminess that complements the more aggressive flavors of the meat and mustard.
Easy Ways to Change It Up
The Spicy Kick: Swap the mild American cheese for Pepper Jack and add a few slices of pickled jalapeños. A drizzle of hot honey or a dash of hot sauce in the mayo adds a modern twist to this vintage meal.
The Breakfast Version: Turn this into a morning staple by adding a fried egg with a runny yolk. The yolk acts as a natural sauce that coats the thick-cut bologna and soaks into the toasted bread.
The Deluxe Garden Style: If you want more crunch and freshness, add shredded iceberg lettuce, thinly sliced red onions, and a thick slice of heirloom tomato after the sandwich is assembled.
The Garlic Toast Variation: Instead of plain butter, use a roasted garlic spread on the bread before toasting. This adds a sophisticated, savory depth that elevates the sandwich from a snack to a meal.
How to Make a Classic Fried Bologna Sandwich
Step 1: Prep the Bologna Slices
To prevent the bologna from curling into a dome or “clown hat” shape in the pan, you must score the edges. Use a sharp knife to make three or four small radial cuts from the edge toward the center, about half an inch deep. This allows the meat to stay flat against the cooking surface, ensuring even contact and a consistent golden-brown sear across the entire surface area.
Step 2: Sear the Meat to Perfection
Heat a cast iron skillet or a heavy non-stick pan over medium-high heat. Place the scored bologna slices in the dry pan; you usually do not need extra oil as the meat contains enough fat to fry itself. Cook for about 2-3 minutes per side until the edges are dark brown and crispy. This browning, known as the Maillard reaction, is where the deep, savory flavor of the classic fried bologna sandwich recipe is born.
Step 3: Melt the Cheese
Once you flip the bologna to the second side, immediately place a slice of American cheese on top of each piece of meat. If you like it extra cheesy, you can stack two slices. Cover the pan with a lid for the last 30 seconds of cooking. The steam will trap the heat, ensuring the cheese is perfectly melted and draped over the sides of the crispy meat before you remove it from the heat.
Step 4: Toast the Bread and Assemble
Remove the meat from the pan and quickly wipe away excess grease if necessary. Add a pat of butter and place your bread slices in the skillet. Toast until golden and fragrant. To assemble, spread yellow mustard on one slice and mayonnaise on the other. Pile the cheesy bologna high between the slices and press down gently to marry the flavors together. Serve immediately while the bread is still crunchy.
Pro Tips for the Best Results
Tip: Always use a heavy-bottomed pan. A cast iron skillet retains heat much better than thin aluminum, which helps get those dark, caramelized edges without burning the center of the meat.
Tip: Don’t crowd the pan. If you are making multiple sandwiches, fry the bologna in batches. Crowding lowers the temperature of the skillet, causing the meat to steam rather than sear.
Tip: Keep the bread slices thick. Thin sandwich bread can fall apart under the weight of the juicy, hot bologna and melted cheese. Texas toast is a fantastic option for a sturdier sandwich.
Tip: Timing is everything. Have your condiments ready and your bread nearby before you start frying. This sandwich is best enjoyed the very second it leaves the pan while the textures are at their peak.
How to Serve Your Sandwich
A classic fried bologna sandwich recipe is traditionally served with simple, salty sides. A pile of ridged potato chips or a large dill pickle spear provides the necessary crunch to contrast the soft, warm sandwich. For a more substantial meal, consider serving it alongside a cup of tomato soup or a side of creamy coleslaw, which adds a refreshing, cold element to the plate.
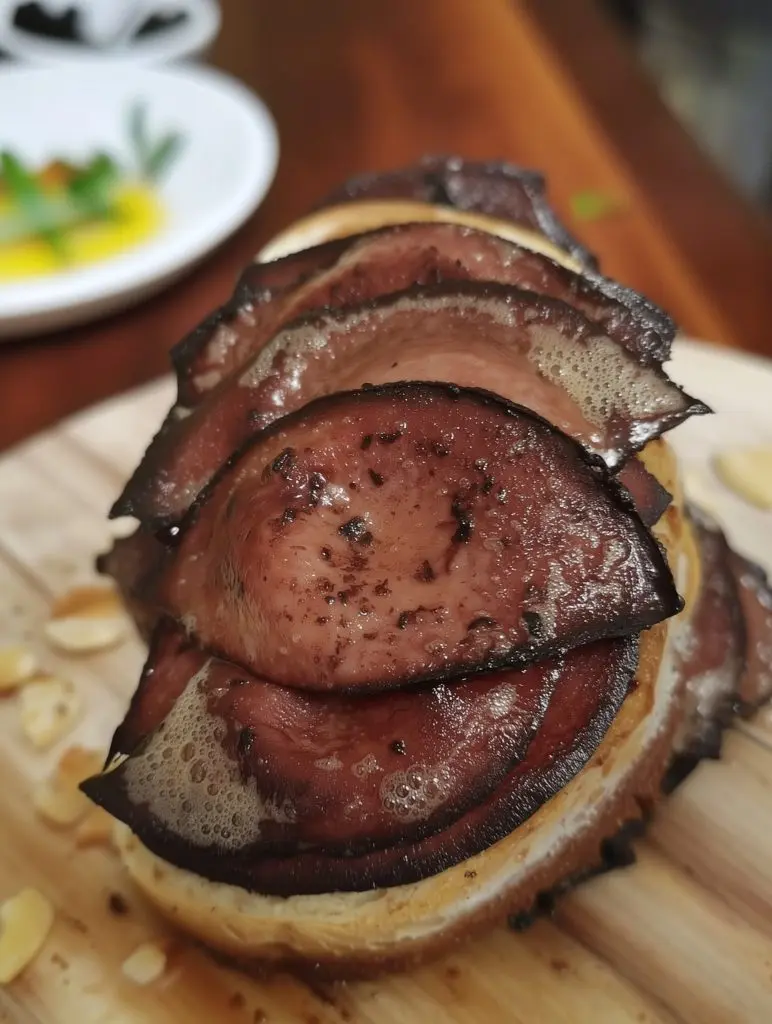
Presentation-wise, cutting the sandwich diagonally into triangles isn’t just for aesthetics; it makes it easier to handle and ensures you get a bit of every layer in that first corner bite. If you’re serving this for a casual gathering, wrapping the bottom half in parchment paper or foil helps catch any drips of mustard or melted cheese, keeping the experience mess-free.
Storage and Make-Ahead
Storing Leftovers
While this sandwich is best eaten fresh, you can store fried bologna slices in an airtight container in the refrigerator for up to three days. However, do not store the fully assembled sandwich, as the bread will become soggy almost immediately from the condiments and the moisture in the meat.
Reheating
To reheat the bologna, place it back in a dry skillet over medium heat for a minute on each side. Avoid using the microwave if possible, as it can make the meat rubbery. If you must use a microwave, wrap the meat in a damp paper towel and heat in 15-second intervals. Always toast fresh bread when you are ready to eat the leftovers.
Final Thoughts
Mastering the classic fried bologna sandwich recipe is a rite of passage for any fan of American diners and home-style cooking. It is proof that you don’t need expensive ingredients to create a memorable, soul-satisfying meal. By paying attention to the small details—like scoring the meat and toasting the bread in butter—you elevate a simple pantry staple into something truly special. Give this recipe a try the next time you need a quick lunch that feels like a warm hug, and you’ll quickly see why this humble sandwich has remained a favorite for generations.
Frequently Asked Questions
Why does my bologna curl up in the middle when I fry it?
Bologna contains moisture and fat that expand and contract at different rates when exposed to high heat. Because the edges are constrained, the center of the slice is forced upward into a dome. To prevent this, make small “relief cuts” around the edges of the slice before frying. This allows the meat to expand outward rather than upward, keeping it flat in the pan.
Can I make this sandwich with turkey or chicken bologna?
Yes, you can certainly use turkey or chicken varieties. However, keep in mind that these lean meats have a lower fat content and may require a small amount of oil or butter in the pan to prevent sticking. They also brown faster and can become dry if overcooked, so keep a close eye on them during the searing process to maintain a juicy texture.
What is the best type of cheese to use for a fried bologna sandwich?
While American cheese is the most traditional choice due to its low melting point and creamy finish, sharp cheddar or provolone are excellent alternatives. If you want a more complex flavor, try a smoked gouda, which complements the savory, smoky notes of the fried meat. Just ensure the cheese is sliced thin so it melts thoroughly before the bread burns.
Is it better to use mayo or mustard?
This is a matter of personal preference, but most enthusiasts agree that a combination of both is best. The yellow mustard provides a necessary acid hit to cut through the fat, while the mayonnaise adds a cooling, creamy element that ties the bread and meat together. If you only choose one, mustard is the more classic pairing for diner-style cooking.
Do I need to add oil to the pan to fry the bologna?
Generally, no oil is needed. Bologna is a processed meat with a relatively high fat content. As the pan heats up, the fat within the meat will begin to render out, providing its own natural cooking oil. If you are using an older cast iron skillet that isn’t well-seasoned, a tiny drop of neutral oil can help, but for most non-stick or seasoned pans, it is unnecessary.
Southern Style Fried Bologna Sandwich

This classic Fried Bologna Sandwich is the ultimate comfort meal, featuring thick-cut bologna seared to crispy perfection, topped with melty American cheese and tangy yellow mustard on butter-toasted white bread.
- 4 thick slices of beef bologna
- 4 slices thick white bread
- 2 slices American cheese
- 1 tbsp unsalted butter
- 2 tbsp yellow mustard
- 1Score the Meat: Make three small cuts from the edge toward the center of each bologna slice to keep them flat while frying.
- 2Sear: Heat a skillet over medium heat. Fry the bologna for about 3 minutes per side until dark brown and crispy.
- 3Toast: Butter the bread and toast in the skillet until golden brown.
- 4Assemble: Spread mustard on the toasted bread, layer the fried bologna, and add cheese immediately so it melts from the heat of the meat.
Keywords: bologna sandwich, fried bologna, southern recipe, easy lunch ideas, comfort food


