
Best Chocolate Chip Cookies

Finding the absolute best chocolate chip cookie recipe is often considered the holy grail of home baking. We all have a specific vision of perfection: a cookie with crisp, golden-brown edges that shatter slightly upon impact, giving way to a center that is incredibly soft, buttery, and dense. The flavor should be more than just “sweet”—it needs a sophisticated depth that comes from caramelized sugars, high-quality vanilla, and the rich, toasted notes of browned butter. This recipe delivers on every one of those promises, creating a cookie that feels like it came from a high-end artisanal bakery right in your own kitchen.
The beauty of this particular method lies in the balance of textures and the intentionality of every ingredient. By moving away from standard preparation techniques and embracing a few professional secrets—like a mandatory dough rest and the use of chopped chocolate bars instead of standard chips—you elevate a simple pantry staple into a gourmet treat. Whether you are baking for a holiday, a bake sale, or a quiet weeknight craving, these chewy chocolate chip cookies are designed to be the only recipe you will ever need to reach for again.
Why This Recipe Is a Keeper
- Unbeatable Texture: These bakery style cookies offer the ultimate contrast between a ring of crispy outer edges and a thick, fudge-like center that stays soft for days.
- Complex Flavor Profile: By browning the butter and using a higher ratio of brown sugar, we achieve a deep, toffee-like undertone that perfectly complements the rich chocolate.
- Consistent Results: The technique focuses on temperature control and specific mixing methods, ensuring you achieve the perfect cookie texture every single time you bake.
- Make-Ahead Friendly: This dough actually improves with time, making it the perfect candidate for preparing a few days in advance or keeping in the freezer for “emergency” cookie cravings.
Ingredients You’ll Need
To achieve the best chocolate chip cookie recipe, every component must serve a specific purpose. We aren’t just looking for sweetness; we are building a foundation of fats and sugars that interact to create that iconic chew and rise. Here is what you will need to gather before you start.
- Unsalted Butter: We use unsalted butter so we can precisely control the salt content. Browning the butter removes water and toasts the milk solids, providing a nutty, toasted flavor that defines brown butter cookies.
- Dark and Light Brown Sugar: Brown sugar contains molasses, which adds moisture and acidity. This reacts with the leavening agents to create a soft, chewy structure and a rich, caramelized color.
- Granulated Sugar: While brown sugar provides chew, white sugar helps the edges crisp up and encourages the cookies to spread just the right amount in the oven.
- Egg and Egg Yolk: An extra egg yolk is the secret to a rich, almost custard-like interior. The proteins provide structure, while the extra fat from the yolk ensures the center remains tender.
- All-Purpose Flour: This provides the necessary gluten structure. We use just enough to hold the cookie together without making it cakey or dry.
- Chopped Chocolate Bars: Using a roughly chopped high-quality chocolate bar instead of chips creates “pools” of melted chocolate and varying textures throughout the cookie.
- Vanilla Bean Paste or Extract: A generous amount of vanilla rounds out the flavors. If you can find vanilla bean paste, the small flecks add a beautiful visual and intense aroma.
- Sea Salt Flakes: A finishing touch of flaky salt balances the sugar and intensifies the chocolate, making every bite more dynamic.
Variations and Smart Swaps
While this recipe is designed for perfection, there is always room to adapt based on what you have in your pantry or your personal flavor preferences.
- The Nutty Crunch: Add half a cup of toasted, chopped walnuts or pecans. The earthy crunch of the nuts pairs beautifully with the brown butter cookies base.
- Espresso Infusion: Add a teaspoon of espresso powder to the dry ingredients. This doesn’t make the cookies taste like coffee; instead, it acts as a flavor enhancer that makes the chocolate taste even deeper.
- Chocolate Varieties: If dark chocolate is too intense for your palate, try a mix of 70% dark and 35% milk chocolate. The milk chocolate adds a creamy sweetness that appeals to younger bakers.
- Miso Twist: For a modern, savory-sweet variation, whisk a tablespoon of white miso paste into the butter and sugar mixture. This adds a unique umami depth that is incredibly addictive.
How to Make the Best Chocolate Chip Cookie Recipe
Step 1: Brown the Butter for Nutty Complexity
The first step in elevating these to bakery style cookies is browning the butter. Place your unsalted butter in a light-colored saucepan over medium heat. As it melts, it will begin to crackle and foam. Stir constantly with a heat-proof spatula. Once the crackling subsides and you see small golden-brown bits forming at the bottom of the pan, remove it from the heat immediately. The butter should smell nutty and fragrant. Transfer it to a large heat-safe bowl, making sure to scrape in all those brown bits—that is where the concentrated flavor lives.
Step 2: Cream the Sugars and Aromatics
Once the butter has cooled slightly but is still liquid, add both the brown and granulated sugars. Whisk vigorously for about two minutes. You are looking for the sugar to partially dissolve into the fat, creating a smooth, glossy paste. Add the egg, the extra yolk, and the vanilla. Continue whisking until the mixture lightens in color and becomes slightly aerated. This step is crucial for achieving the perfect cookie texture, as it sets the stage for the cookie’s rise and spread.
Step 3: Fold in the Dry Ingredients and Chocolate
Sift your flour, baking soda, and salt together, then gently fold them into the wet ingredients using a spatula. It is vital not to overmix at this stage; stop just when the last streak of flour disappears. Overworking the dough develops too much gluten, which leads to a tough, bready cookie rather than a tender one. Finally, fold in your chopped chocolate chunks. By hand-chopping the chocolate, you ensure that some areas have tiny slivers while others have large, melty pockets.
Step 4: The Essential Chilling Phase
This is the hardest part: patience. Scoop the dough into large rounds (about 3 tablespoons each) and place them on a tray. Cover and refrigerate for at least 12 hours, though 24 to 48 hours is even better. This “aging” process allows the flour to fully hydrate and the sugars to concentrate. It results in a cookie that spreads less, browns more evenly, and possesses a much more complex, toffee-like flavor profile. Skipping this step is the difference between a good cookie and the best chocolate chip cookie recipe.
Step 5: Bake to Golden Perfection
Preheat your oven to 350°F (175°C) and line a heavy baking sheet with parchment paper. Space the chilled dough balls at least 3 inches apart, as they will spread. Bake for 10 to 12 minutes. You are looking for edges that are set and lightly browned, while the centers should still look slightly underdone and soft. They will continue to set on the hot baking sheet once removed from the oven. Immediately after taking them out, sprinkle with a pinch of flaky sea salt.
Pro Tips for Success
- Use a Kitchen Scale: For chewy chocolate chip cookies, precision is key. Measuring flour by weight rather than volume prevents the common mistake of adding too much flour, which results in dry, crumbly cookies.
- Don’t Skip the Salt: Salt is a flavor enhancer. Without enough salt in the dough and the flaky finish on top, the cookies will taste flat and overly sugary.
- Check Your Oven Temp: Most home ovens are calibrated incorrectly. Use an oven thermometer to ensure you are truly baking at 350°F, which is the “sweet spot” for achieving golden edges and soft centers.
- The “Pan Bang” Trick: About 2 minutes before the cookies are done, lift the baking sheet and gently drop it against the oven rack. This collapses the air pockets, creating those beautiful ripples and a denser, chewier center.
- Quality Chocolate Matters: Since chocolate is the star, avoid standard bag chips that contain stabilizers. Use high-quality couverture chocolate or premium bars for a superior melt.
Troubleshooting Common Problems
Why Did My Cookies Spread Too Much?
Excessive spreading usually happens if the butter was too hot when the sugars were added, or if the dough wasn’t chilled long enough. If the fat is too liquid, it will melt in the oven before the flour structure has a chance to set. Ensure your dough is cold to the touch before it hits the oven. Another culprit could be greasing the baking sheet; always use parchment paper or a silicone mat instead of butter or spray.
Why Are My Cookies Cakey Instead of Chewy?
A cakey texture is often caused by too much flour or too many eggs. If you measure your flour with a cup instead of a scale, you might be packing it down and using up to 30% more than the recipe requires. Additionally, over-creaming the butter and sugar with an electric mixer can incorporate too much air, leading to a puffy, cake-like result. Stick to a hand whisk and a spatula for the perfect cookie texture.
How to Serve Your Cookies
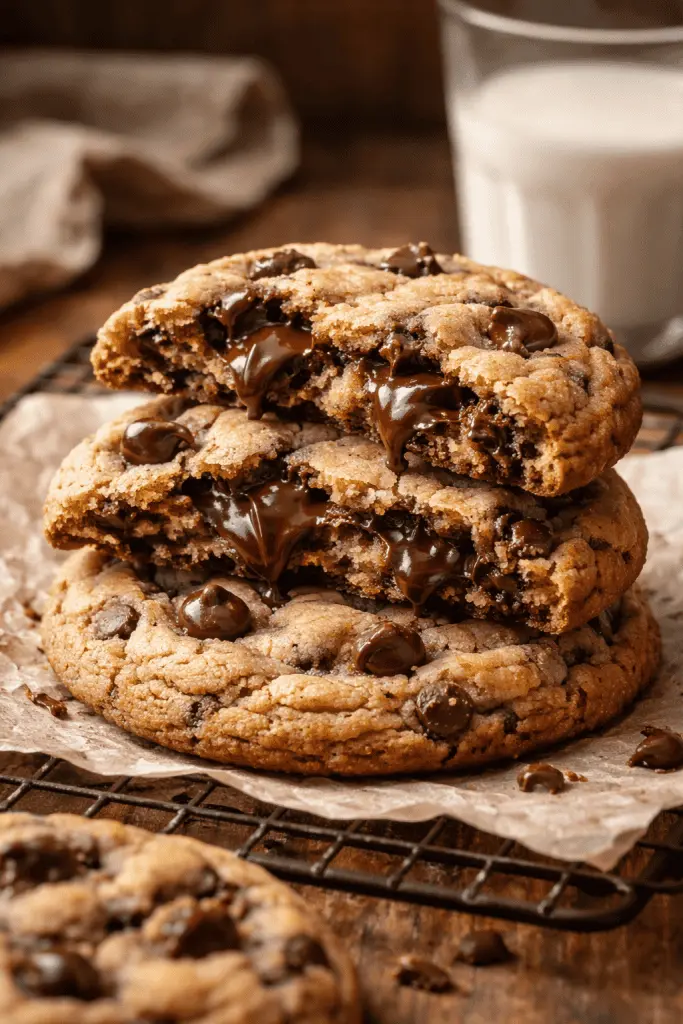
While these cookies are undeniably incredible straight off the baking sheet, a few minutes of cooling is necessary for the structure to firm up. If you try to pick them up immediately, they may fall apart. Give them about 10 minutes on the pan, then move them to a wire rack. Serving them warm ensures the chocolate is still in its molten state, which is the ultimate sensory experience.
For a truly indulgent dessert, serve a warm cookie in a shallow bowl with a scoop of high-quality vanilla bean ice cream. The cold cream against the warm, brown butter cookies creates a classic contrast. They also pair perfectly with a cold glass of whole milk or a strong cup of black coffee, which helps cut through the richness of the butter and chocolate.
Storage and Make-Ahead
Storing Leftovers
Once completely cooled, store your cookies in an airtight container at room temperature. To keep them extra soft, you can place a single piece of white bread in the container; the cookies will absorb the moisture from the bread. They will remain fresh and chewy for up to 4 days.
Freezing the Dough
This is the best way to ensure you always have fresh cookies on hand. After scooping the dough into balls and chilling them, place the solid balls into a freezer-safe Ziploc bag. You can bake them directly from frozen—just add an extra 2 minutes to the total bake time. Frozen dough stays good for up to 3 months.
Reheating
If you have cookies that are a few days old, you can revive that “just-baked” feel by popping one in the microwave for 10 seconds or in a 300°F oven for 5 minutes. This softens the butter and melts the chocolate chunks once again.
Final Thoughts
Mastering the best chocolate chip cookie recipe is a journey of small details that lead to a massive payoff. By browning your butter, choosing high-quality chocolate, and allowing the dough the time it needs to rest, you are creating a dessert that stands head and shoulders above the rest. These cookies aren’t just a snack; they are a testament to how simple ingredients, when treated with care and proper technique, can become something truly extraordinary. Happy baking!
Frequently Asked Questions
Can I use chocolate chips instead of chopped bars?
Yes, you can use chips, but the result will be slightly different. Standard chocolate chips contain stabilizers designed to help them keep their shape under heat. Chopped chocolate bars or “fèves” lack these stabilizers, allowing the chocolate to melt into luxurious pools that weave through the dough. If you do use chips, look for high-quality dark chocolate chips for the best flavor.
Do I really have to chill the dough for 24 hours?
While you can bake them after just 2 hours of chilling, the flavor and texture will not be as developed. During a 24 to 48-hour rest, the enzymes in the flour break down starches into simple sugars, and the moisture redistributes. This results in a deeper, more caramelized flavor and a much better “chew” in the finished chewy chocolate chip cookies.
Why do you use an extra egg yolk?
The extra egg yolk adds fat and lecithin without the extra water found in an egg white. This makes the cookies richer and contributes to a dense, fudge-like center. Egg whites can sometimes make a cookie lean toward a “cakey” or “foamy” texture, so reducing the white-to-yolk ratio is a pro move for a perfect cookie texture.
Why is my butter foaming so much when I brown it?
The foam is caused by the water content in the butter evaporating. As the water boils off, the milk solids are left behind to toast. This is completely normal! Just keep whisking so you can see the color of the butter beneath the foam. Once the foam subsides slightly and you see golden specks, your brown butter cookies base is ready.
Can I make these cookies smaller?
You can certainly make smaller cookies, but you will need to adjust the bake time. Smaller cookies (about 1.5 tablespoons of dough) usually bake in 8 to 9 minutes. Keep a close eye on them, as smaller cookies can dry out faster. The “large scoop” method is generally preferred for this recipe to maximize the contrast between the crispy edges and the soft centers.
Best Chocolate Chip Cookies

This recipe produces the ultimate soft and chewy chocolate chip cookies with perfectly golden edges and a rich, buttery flavor.
- 1 cup unsalted butter, softened
- 1 cup granulated white sugar
- 1 cup packed light brown sugar
- 2 teaspoons pure vanilla extract
- 2 large eggs, room temperature
- 3 cups all-purpose flour
- 1 teaspoon baking soda
- 1/2 teaspoon baking powder
- 1 teaspoon sea salt
- 2 cups semi-sweet chocolate chips
- 1Preheat oven to 375°F (190°C) and line baking sheets with parchment paper or silicone mats.
- 2In a large bowl, cream together the softened butter, white sugar, and brown sugar until the mixture is light and fluffy.
- 3Add the eggs one at a time, beating well after each addition, then stir in the vanilla extract.
- 4In a medium bowl, whisk together the flour, baking soda, baking powder, and salt.
- 5Gradually add the dry ingredients to the creamed butter mixture, mixing until just combined.
- 6Fold in the chocolate chips by hand using a spatula.
- 7Drop rounded tablespoons of dough onto the prepared baking sheets, spaced about 2 inches apart.
- 8Bake for 8 to 10 minutes, or until the edges are lightly browned but the centers still look slightly soft.
- 9Let the cookies cool on the baking sheet for 5 minutes before transferring them to a wire rack to cool completely.
Keywords: chocolate chip cookies, baking, dessert, chewy cookies, easy sweets


