
Sandwich Crust Garlic Rolls

Finding clever ways to reduce food waste in the kitchen often leads to the most surprising and delicious discoveries. This sandwich crust garlic rolls recipe turns those overlooked bread edges—which often end up in the bin or the back of the freezer—into a buttery, savory snack that rivals any gourmet appetizer. By rolling the crusts tightly and infusing them with a rich garlic herb butter, you transform humble leftovers into golden, crispy bites that are perfect for dipping or as a side for your favorite pasta dish.
What makes this leftover bread recipes hack so brilliant is its speed and simplicity; you can go from bread scraps to a warm, fragrant snack in less than fifteen minutes. Whether you are looking for a kid-friendly after-school treat or a quick way to use up the heels of a loaf, these rolls provide a satisfying crunch and a punch of garlic flavor that satisfies every salty craving.
Why This Recipe Is a Keeper
- Zero-Waste Brilliance: It provides a delicious purpose for the bread crusts that kids often refuse to eat, ensuring nothing goes to waste.
- Budget-Friendly: Using basic pantry staples like butter and garlic, this bread crust snacks idea creates a high-value appetizer for pennies.
- Incredible Texture: The rolling technique creates a dense, chewy interior with a shatteringly crisp exterior once baked or air-fried.
- High Customizability: You can easily pivot the flavor profile by adding different cheeses, spices, or dipping sauces to suit your meal.
Ingredients You’ll Need
The beauty of this recipe lies in its minimalist ingredient list. Because there are so few components, the quality of each one really shines through, particularly the fat and the aromatics which carry all the flavor to the bread.
- Bread Crusts: You can use the crusts removed from white, wheat, or even sourdough sandwich bread. Sturdier crusts tend to hold their shape better during the rolling process.
- Unsalted Butter: Using unsalted butter allows you to control the sodium level. It acts as the vehicle for the garlic and helps the bread achieve that signature golden-brown finish.
- Fresh Garlic: While powder works in a pinch, freshly minced garlic provides a pungent, aromatic depth that truly defines these garlic butter bread rolls.
- Fresh Parsley: A touch of green adds visual appeal and a grassy freshness that cuts through the richness of the butter.
- Parmesan Cheese: Finely grated parmesan adds a salty, nutty umami kick and helps create a slightly textured crust on the outside of the rolls.
- Salt and Pepper: Essential for balancing the flavors and waking up the natural sweetness of the wheat in the bread.
Simple Swaps and Variations
Cheesy Center: For a gooey surprise, place a tiny sliver of mozzarella cheese at one end of the crust before rolling it up. As the rolls bake, the cheese melts into the center of the “roll.”
Spicy Garlic Rolls: If you enjoy a bit of heat, mix a pinch of red pepper flakes or a dash of cayenne into your garlic butter mixture before brushing it onto the bread.
Everything Bagel Style: Instead of just garlic and parsley, brush the rolls with butter and coat them in everything bagel seasoning for a savory, seedy crunch.
Sweet Cinnamon Version: Skip the garlic and herbs. Use melted butter, cinnamon, and sugar to turn those crusts into a quick dessert that tastes like a churro or a tiny cinnamon roll.
How to Make This Sandwich Crust Garlic Rolls Recipe
Step 1: Prep and Flatten the Crusts
Start by collecting your bread crusts. If they are particularly thick or uneven, you can use a rolling pin to lightly flatten them. This makes the bread more pliable and easier to roll tightly without snapping. If the crusts feel very dry or brittle, a quick 5-second zap in the microwave can soften the fibers enough to make them cooperative. Aim for long, continuous strips for the best visual “spiral” effect.
Step 2: Create the Infused Garlic Butter
In a small microwave-safe bowl, melt your butter until it is completely liquid. Stir in the finely minced garlic, chopped parsley, salt, and pepper. Let this mixture sit for a few minutes if time allows; the residual heat from the butter will begin to mellow the raw bite of the garlic and infuse the fat with herbal notes. This is the secret to getting that deep flavor into every crevice of this easy garlic bread hack.
Step 3: Roll and Secure the Bread
Lightly brush the inside of each bread strip with a small amount of the garlic butter. Starting from one end, roll the crust up tightly into a spiral. If the bread is stubborn and wants to unroll, you can secure it with a toothpick or simply place it seam-side down on your baking sheet. Crowding them slightly in a small baking dish can also help them maintain their shape as they crisp up.
Step 4: Final Coating and Baking
Once all your rolls are arranged on the parchment-lined tray, generously brush the tops and sides with the remaining garlic butter. Sprinkle the grated parmesan cheese over the top, ensuring some falls into the spirals. Bake in a preheated oven at 375°F (190°C) for about 8 to 10 minutes. You are looking for the cheese to be bubbly and the edges of the bread to turn a deep, toasted golden brown.
Pro Tips for the Best Results
- Tip: Avoid over-saturating the bread with butter before rolling. If the crust becomes too soggy, it won’t hold its spiral shape and may become greasy rather than crispy.
- Tip: Use a microplane to grate your garlic into a paste. This ensures the garlic flavor is evenly distributed and prevents anyone from biting into a large, sharp chunk of raw garlic.
- Tip: If using very thin sandwich bread, you can double up the crusts or roll two strips together to create a more substantial, thicker roll.
- Tip: For an even faster version, these garlic butter bread rolls work beautifully in the air fryer. Cook at 350°F for 4-6 minutes, shaking the basket halfway through.
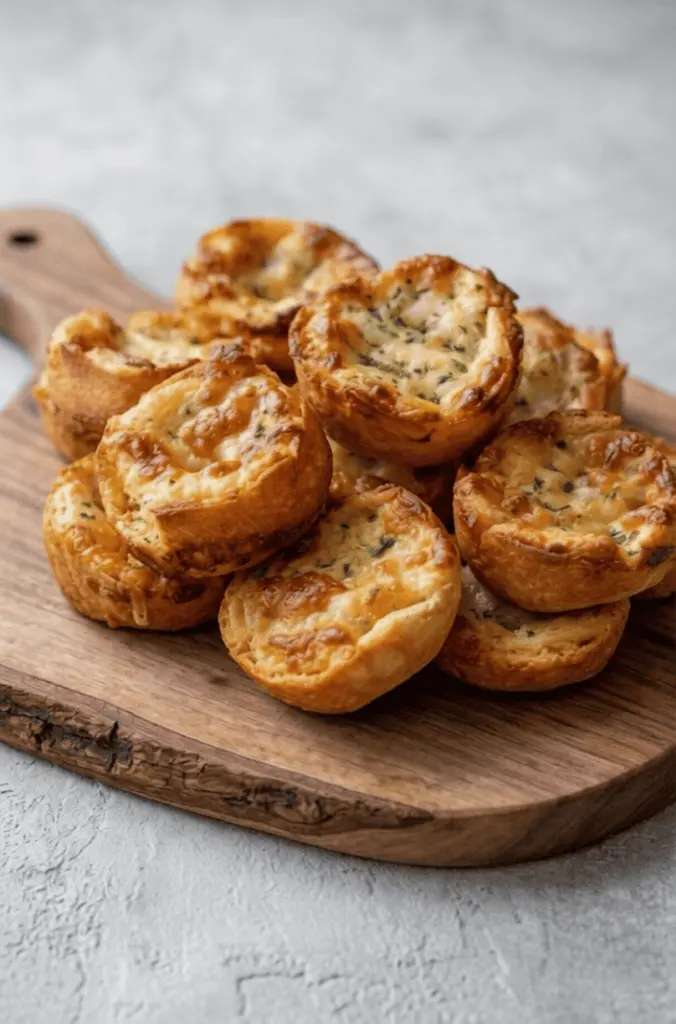
How to Serve Your Garlic Rolls
These rolls are at their absolute peak when served warm, straight from the oven. The exterior should be crunchy while the butter-soaked interior remains slightly soft. They make an excellent companion to a bowl of tomato soup or a hearty plate of spaghetti bolognese. The spiral shape makes them look far more elegant than a standard piece of toast, making them a great addition to a party appetizer platter.
For dipping, consider a side of warm marinara sauce, a creamy garlic aioli, or even a simple balsamic and olive oil dip. If you are serving them as a standalone snack, a final dusting of fresh parsley or a squeeze of lemon juice can brighten the flavors and make the presentation pop. They also work well as “croutons” for a Caesar salad—simply toss a few of the rolls into the bowl for a giant, buttery crunch in every bite.
Storage and Reheating
Storing Leftovers
If you happen to have leftovers, store them in an airtight container at room temperature for up to two days. However, because bread crusts are prone to drying out, they are best enjoyed within the first 24 hours.
Reheating
To restore the crunch, avoid the microwave, which will make the bread rubbery. Instead, place the rolls back into a toaster oven or a regular oven at 350°F for 3 to 5 minutes. This will re-melt the butter and crisp the edges perfectly.
Final Thoughts
Mastering this sandwich crust garlic rolls recipe is a game-changer for anyone looking to stretch their grocery budget while still enjoying gourmet flavors. It is a testament to the fact that with a little bit of butter, garlic, and creativity, even the most basic kitchen scraps can be transformed into something extraordinary. These little rolls are addictive, savory, and undeniably satisfying. Once you start making this easy garlic bread alternative, you will never look at a loaf of bread the same way again.
Frequently Asked Questions
Can I use whole slices of bread instead of just crusts?
Absolutely! If you don’t have a stash of crusts, you can use entire slices of sandwich bread. Simply remove the crusts to use for the rolls, or flatten the entire slice, spread the garlic butter, and roll it up. You may need to cut the flattened slice into strips to get the right “bite-sized” roll appearance. Using the whole slice results in a slightly softer, fluffier roll compared to the dense crunch of using just the crusts.
Can I make these vegan or dairy-free?
Yes, this recipe adapts very easily to dietary needs. Simply swap the traditional butter for a high-quality vegan butter substitute or even a flavorful olive oil. For the parmesan, you can use a nutritional yeast sprinkle or a vegan parmesan alternative. The bread crust snacks will still crisp up beautifully and carry the garlic flavor perfectly without any dairy components.
How do I keep the rolls from unrolling during baking?
The key to keeping the rolls together is a combination of flattening the bread first and placing them seam-side down on the baking sheet. If your bread is particularly springy, you can use a single toothpick to pin the edge of the crust to the center of the roll. Just remember to remove the toothpicks before serving! Additionally, packing the rolls tightly into a small oven-safe ramekin or baking dish helps them support each other as they bake.
Can I freeze these rolls for later?
You can freeze these rolls after they have been rolled and brushed with butter, but before baking. Place them on a tray in the freezer until solid, then transfer them to a freezer bag. When you are ready to eat, you can bake them directly from frozen—just add 3 to 4 minutes to the total baking time. This is a great way to save up crusts over a few weeks until you have enough for a full batch of garlic butter bread rolls.
Sandwich Crust Garlic Rolls

Give your leftover sandwich bread crusts a delicious second life with this quick and easy recipe. These rolls are tossed in a savory garlic butter and baked until crispy and golden brown, making them a perfect side dish or snack.
- 4 cups sandwich bread crusts or bread ends, cut into uniform pieces
- 1/4 cup unsalted butter, melted
- 3 cloves garlic, finely minced
- 1 tablespoon fresh parsley, finely chopped
- 1/4 teaspoon kosher salt
- 1/4 cup grated Parmesan cheese
- 1/2 teaspoon Italian seasoning
- 1Preheat your oven to 375°F (190°C) and line a rimmed baking sheet with parchment paper or a silicone mat.
- 2In a large mixing bowl, combine the melted butter, minced garlic, chopped parsley, salt, and Italian seasoning.
- 3Add the bread crusts to the bowl and toss gently until every piece is thoroughly coated with the garlic butter mixture.
- 4Spread the seasoned crusts in a single layer on the prepared baking sheet, ensuring they are not piled on top of each other.
- 5Evenly sprinkle the grated Parmesan cheese over the crusts.
- 6Bake for 10 to 12 minutes, or until the rolls are golden, crispy, and the cheese has melted and turned slightly brown.
- 7Remove from the oven and serve immediately while hot.
Keywords: garlic rolls, bread crusts, snack, appetizer, easy side dish, garlic bread, leftover bread recipes


