
Pineapple Bliss Bars

When the craving for something bright, citrusy, and sweet hits, there is nothing quite like a easy pineapple dessert bar recipe to satisfy your sweet tooth. These bars perfectly capture the essence of a tropical getaway, combining a rich, buttery base with a vibrant fruit filling that balances tartness and sugar. Unlike heavy chocolate desserts or complex pastries, these bars offer a refreshing palate cleanser that works just as well for a casual backyard barbecue as it does for a sophisticated holiday brunch.
The beauty of this tropical dessert bars recipe lies in its simplicity and the way it elevates basic pantry staples into something extraordinary. By focusing on the contrast between a crisp shortbread foundation and a jammy, golden pineapple center, you create a handheld treat that is both nostalgic and refreshing. Whether you are a seasoned baker or someone looking for a foolproof win, this recipe provides a high-reward result with minimal effort, making it a staple in any kitchen repertoire.
Why You’ll Love This Recipe
- Perfect Flavor Balance: The natural acidity of the fruit cuts through the richness of the buttery shortbread crust, ensuring the bars are sweet but never cloying.
- Pantry-Friendly Ingredients: You likely already have most of the components in your kitchen, especially if you keep a can of crushed pineapple on hand for quick baking needs.
- Excellent Portability: These bars hold their shape beautifully once cooled, making them the ideal candidate for potlucks, lunchboxes, or gifting to neighbors.
- Crowd-Pleasing Texture: With a bottom that is slightly crunchy and a top layer that remains soft and fruit-forward, it hits every textural note that a great homemade fruit bars recipe should.
Ingredients You’ll Need
Before you start preheating the oven, it is helpful to understand how each component functions to create the perfect bar. Selecting the right ingredients ensures your easy pineapple dessert bar recipe turns out consistent every single time.
- All-Purpose Flour: This provides the essential structure for the crust. It creates a sturdy base that can support the weight of the fruit filling without becoming soggy.
- Unsalted Butter: Using real butter is non-negotiable for flavor. It creates those sought-after shortbread notes and ensures the crust is tender rather than tough.
- Canned Crushed Pineapple: This is the star of the show. Using canned crushed pineapple is actually preferable to fresh in this instance because it offers a consistent moisture level and sweetness.
- Granulated Sugar: Sugar serves a dual purpose: it sweetens the crust and helps macerate the pineapple, creating a jam-like consistency during the baking process.
- Cornstarch: This acts as the thickening agent. Without it, the pineapple juice would run everywhere, leaving you with a mess rather than a defined bar.
- Vanilla Extract: A splash of high-quality vanilla rounds out the fruitiness and adds a layer of aromatic warmth to the homemade fruit bars.
- A Pinch of Salt: Never skip salt in desserts. It heightens the pineapple flavor and prevents the crust from tasting flat.
Easy Ways to Change It Up
- The Toasted Coconut Variation: Stir half a cup of shredded sweetened coconut into the crust mixture or sprinkle it over the top before baking for a “pina colada” inspired twist on these tropical dessert bars.
- Add a Nutty Crunch: Finely chopped macadamia nuts or pecans added to the crust provide a wonderful textural contrast and a rich, earthy flavor.
- Cream Cheese Swirl: If you want a more decadent treat, dollop a mixture of softened cream cheese and powdered sugar over the pineapple layer before the final bake.
- Lemon or Lime Zest: Grate a little citrus zest into the pineapple filling to amplify the tartness and give the bars a brighter, zingier finish.
How to Make This Easy Pineapple Dessert Bar Recipe
Creating these bars is a straightforward process, but paying attention to the texture of your dough and the thickness of your filling will make all the difference in the final result.
Step 1: Prepare the Buttery Shortbread Base
Start by creaming your softened butter with a portion of the sugar until the mixture is light and fluffy. Gradually incorporate the flour and salt until a crumbly dough forms. Press about two-thirds of this mixture firmly into the bottom of a lined baking pan. This step is crucial because a well-pressed buttery shortbread crust prevents the fruit juices from seeping through to the bottom, ensuring the bars stay crisp and easy to handle.
Step 2: Cook the Pineapple Filling
While the crust takes its first turn in the oven to set, combine your canned crushed pineapple (with its juices), sugar, and cornstarch in a small saucepan. Heat this over medium heat, stirring constantly until the mixture bubbles and thickens into a glossy, translucent golden yellow. This pre-cooking step ensures that the cornstarch is fully activated and that the bars won’t be watery once they are sliced.
Step 3: Layer the Components
Once the crust is par-baked and slightly golden, spread the warm pineapple mixture evenly across the surface. Take the remaining third of your crust dough and crumble it over the top. You want some of the bright yellow pineapple to peek through the crumbles, as this creates a beautiful visual appeal for your easy pineapple dessert bar recipe.
Step 4: Bake to Golden Perfection
Slide the pan back into the oven and bake until the top crumbles are golden brown and the pineapple filling is bubbling at the edges. The aroma in your kitchen at this stage will be incredible—a mix of toasted butter and sweet fruit. Resist the urge to cut into them immediately, as the structure needs time to set as it cools.
Pro Tips for the Best Results
- Drain, But Not Too Much: If your recipe calls for the juice, keep it! If not, make sure you drain the pineapple well to prevent a soggy bottom.
- Use Parchment Paper: Leave an overhang of parchment paper on the sides of your pan. This allows you to lift the entire block of tropical dessert bars out at once for clean, professional-looking slices.
- Cold Butter vs. Softened: For a flakier, more pie-like crust, use cold butter and a pastry cutter. For a tender, melt-in-your-mouth shortbread, use softened butter.
- Cool Completely: These bars must be completely cool—ideally chilled in the refrigerator for an hour—before slicing. This ensures the filling is stable and the layers remain distinct.
- Check Your Cornstarch: Ensure your cornstarch is fresh. If it’s old, it may lose its thickening power, leading to a runny easy pineapple dessert bar recipe.
Troubleshooting Common Problems
Why is my crust crumbly and falling apart?
A crumbly crust usually happens if the butter wasn’t fully incorporated or if the crust wasn’t pressed firmly enough into the pan. Make sure to use the bottom of a flat measuring cup to pack the dough tightly into the corners before baking.
Why did the pineapple filling soak into the crust?
This is often caused by skipping the par-baking step. Giving the crust a head start in the oven creates a “seal” that protects the dough from the moisture of the fruit. Additionally, make sure your filling is sufficiently thickened on the stove before adding it to the pan.
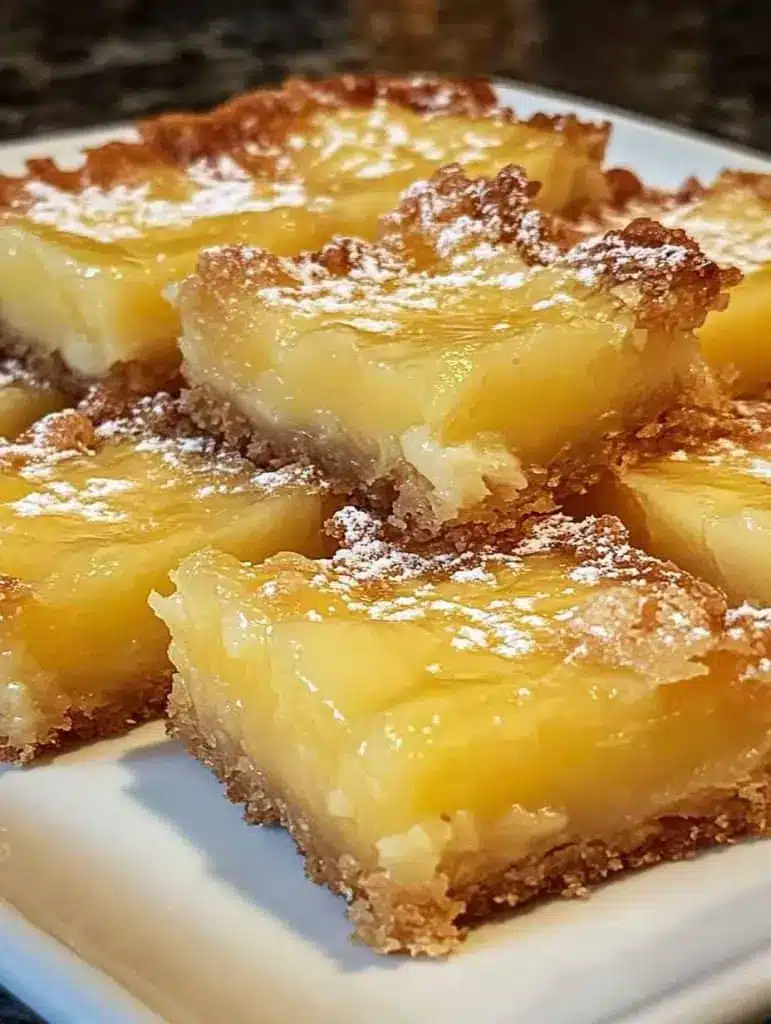
How to Serve Your Pineapple Bars
When it comes to serving these homemade fruit bars, you have several options depending on the occasion. For a casual gathering, simply cut them into squares and arrange them on a platter. They are fantastic at room temperature, but many people prefer them chilled, as the cold temperature makes the pineapple flavor even more refreshing.
If you want to turn these bars into a plated dessert, serve a warm square with a scoop of high-quality vanilla bean ice cream. The heat from the bar will slightly melt the ice cream, creating a creamy sauce that pairs perfectly with the acidity of the pineapple. For a finishing touch, a light dusting of powdered sugar or a sprig of fresh mint can add a touch of elegance to the presentation.
Storage and Make-Ahead
Storing Leftovers
Because of the fruit content, these bars are best stored in the refrigerator. Place them in an airtight container with layers of parchment paper between them to prevent sticking. They will stay fresh and delicious for up to 5 days, though the crust will naturally soften slightly over time.
Freezing Instructions
You can freeze this easy pineapple dessert bar recipe for up to 3 months. To do so, freeze the individual bars on a baking sheet first until solid, then transfer them to a freezer-safe bag. Thaw them in the refrigerator overnight before serving to maintain the best texture.
Making It Ahead
These are actually better when made a day in advance! Making them the evening before your event gives the flavors time to meld and the structure time to fully set, resulting in the cleanest slices possible.
Final Thoughts
Mastering a easy pineapple dessert bar recipe is a fantastic way to bring a little bit of sunshine into your kitchen regardless of the season. With their buttery base and zesty fruit filling, they offer a sophisticated yet approachable treat that appeals to both children and adults. By following the tips for thickening the filling and properly setting the crust, you’ll ensure a perfect result every time. These bars are a testament to the fact that you don’t need a long list of exotic ingredients to create a dessert that is truly memorable and delicious.
Frequently Asked Questions
Can I use fresh pineapple instead of canned?
Yes, you can use fresh pineapple, but you will need to pulse it in a food processor until it reaches a crushed consistency. You may also need to add a bit more sugar and simmer it longer, as fresh pineapple can be more acidic and vary in liquid content compared to the consistent nature of canned crushed pineapple.
Can these bars be made gluten-free?
Absolutely. You can substitute the all-purpose flour in the buttery shortbread crust with a high-quality 1:1 gluten-free flour blend. Since shortbread doesn’t rely heavily on gluten development for its texture, the swap works remarkably well in this specific recipe.
How do I get clean edges when slicing the bars?
The secret to clean edges is two-fold: first, ensure the bars are completely cold. Second, use a large, sharp chef’s knife and wipe the blade clean with a damp cloth between every single cut. This prevents the fruit filling from smearing onto the crust layers.
Do I need to refrigerate these dessert bars?
While they can sit out at room temperature for a few hours during a party, they should be stored in the refrigerator for the long term. The moisture in the pineapple filling can lead to spoilage if left in a warm environment for more than a day.
Can I add other fruits to the pineapple filling?
Yes! Pineapple pairs beautifully with other tropical fruits. You can replace a small portion of the pineapple with finely diced mango or even some maraschino cherry halves for a “pineapple upside-down cake” inspired look and flavor in your homemade fruit bars.
Pineapple Bliss Bars

These Pineapple Bliss Bars feature a buttery, crumbly shortbread base topped with a luscious, tangy pineapple custard layer. Perfectly sweet and refreshing, they are the ultimate tropical treat for any gathering.
- 1 cup unsalted butter, softened
- 1/2 cup granulated sugar
- 2 cups all-purpose flour
- 1/4 tsp salt
- 4 large eggs
- 1 1/2 cups granulated sugar
- 1/4 cup all-purpose flour
- 1 can (20 oz) crushed pineapple, drained thoroughly
- 2 tbsp lemon juice
- 1/2 cup powdered sugar for dusting
- 1Preheat oven to 350°F (175°C) and grease a 9x13 inch baking pan.
- 2Cream together softened butter and 1/2 cup sugar until light. Stir in 2 cups flour and salt until crumbly.
- 3Press dough firmly into the bottom of the pan and bake for 15-18 minutes until lightly golden.
- 4In a large bowl, whisk eggs, 1 1/2 cups sugar, and 1/4 cup flour until combined.
- 5Fold in the well-drained crushed pineapple and lemon juice.
- 6Pour the pineapple mixture over the warm crust and bake for another 25-30 minutes until set.
- 7Cool completely on a wire rack, then dust with powdered sugar before slicing.
Keywords: pineapple bars, tropical dessert, easy baking, pineapple squares, summer recipes


