
Fried Potatoes and Onions

There is nothing quite like the nostalgic sizzle of a cast iron pan filled with classic fried potatoes and onions. This humble, comforting dish has been a staple in American kitchens for generations, serving as the ultimate bridge between a hearty breakfast and a satisfying dinner side. When done correctly, the potatoes develop a shatteringly crisp, golden-brown exterior while the centers remain buttery and tender, all complemented by the sweet, jammy notes of caramelized onions. It is a masterclass in how a few simple, inexpensive pantry staples can be transformed into a comfort food side dish that outshines the main course.
Mastering this recipe is less about complex culinary skills and more about understanding heat management and patience. By following a few key techniques, you can ensure your potatoes never turn out mushy or greasy. Whether you are serving these alongside over-easy eggs on a Sunday morning or as a rustic partner to a seared steak, this version of classic fried potatoes and onions provides the perfect balance of texture and savory flavor that keeps everyone reaching for seconds.
Why You’ll Love This Recipe
- Incredible Texture: This method prioritizes that coveted contrast between a deeply crispy skillet potatoes exterior and a soft, fluffy interior that melts in your mouth.
- Budget-Friendly: Made with basic ingredients like potatoes, onions, and oil, this is one of the most cost-effective ways to feed a hungry family without sacrificing flavor.
- Ultimate Versatility: While it is a natural fit for breakfast, these southern fried potatoes are equally at home next to pork chops, roasted chicken, or even served as a base for a hearty bowl.
- Minimal Cleanup: Since everything happens in one skillet, you won’t be left with a mountain of dishes, making it an easy weeknight dinner addition or a low-stress morning meal.
Ingredients You’ll Need
The success of these potatoes relies heavily on choosing the right components. While the list is short, each ingredient plays a vital role in achieving the perfect balance of savory aromatics and starchy satisfaction. Here is what you will need to get the best results from your classic fried potatoes and onions.
- Potatoes: Russet potatoes are the gold standard here because their high starch content leads to the crispiest edges. However, Yukon Golds are a fantastic alternative if you prefer a creamier, waxier texture.
- Onions: A large yellow or white onion provides the best sweetness once caramelized. They soften beautifully, providing a soft, savory counterpoint to the crunchy potato cubes.
- Cooking Oil: You want an oil with a high smoke point, such as vegetable, canola, or grapeseed oil. This allows you to get the pan hot enough for a good sear without the oil burning.
- Butter: Adding a small amount of butter toward the end of the cooking process adds a rich, nutty flavor and helps the potatoes achieve a beautiful mahogany color.
- Salt and Black Pepper: These are non-negotiable for bringing out the natural earthiness of the potatoes. Coarse kosher salt and freshly cracked pepper work best.
- Optional Seasonings: A pinch of paprika or garlic powder can add depth, though the classic fried potatoes and onions flavor profile is usually best kept simple and traditional.
Simple Swaps and Variations
One of the best things about this dish is how easily it adapts to what you have in your pantry. While the classic version is hard to beat, you can easily customize it to suit your specific cravings or dietary needs.
- Add Smokiness with Bacon: Start by frying a few strips of bacon in the skillet, then use the rendered bacon fat to cook the potatoes. This adds an incredible depth of southern fried potatoes flavor.
- Bell Pepper Medley: For a “Potatoes O’Brien” style twist, toss in some diced red and green bell peppers at the same time you add the onions for extra color and a mild sweetness.
- Fresh Herb Finish: Just before serving, garnish the pan with freshly chopped parsley, chives, or thyme. The burst of green brightness cuts through the richness of the fried components beautifully.
- Spicy Kick: If you enjoy a bit of heat, add a pinch of cayenne pepper or some diced jalapeños. This turns the dish into a more adventurous perfect breakfast potatoes option.
How to Make Classic Fried Potatoes and Onions
Step 1: Prep and Dry the Potatoes
Start by peeling your potatoes and dicing them into uniform half-inch cubes. Uniformity is the secret to ensuring every piece finishes cooking at the exact same time. Once diced, it is crucial to pat the potatoes completely dry with a clean kitchen towel or paper towels. Moisture is the enemy of a good sear; if the potatoes are wet, they will steam instead of fry, preventing you from achieving those crispy skillet potatoes you’re after. If you have extra time, soaking the diced potatoes in cold water for 30 minutes to remove excess starch—then drying them thoroughly—can result in an even crunchier exterior.
Step 2: Heat the Skillet and Fat
Place a large, heavy-bottomed skillet—preferably cast iron—over medium-high heat. Add your cooking oil and let it shimmer before adding the potatoes. You want the oil to be hot enough that the potatoes sizzle immediately upon contact. A well-seasoned cast iron skillet is the best tool for this job because it retains heat exceptionally well and provides a natural non-stick surface that encourages deep browning. Do not rush this step; a cold pan is the primary cause of potatoes sticking and breaking apart.
Step 3: The Initial Sear
Carefully add the potatoes to the hot skillet in a single layer. If your pan is too small, cook them in batches rather than overcrowding. Once they are in the pan, resist the urge to stir them for at least 5 to 7 minutes. This “quiet time” allows a crust to form on the bottom. When you see the edges turning golden, use a sturdy spatula to flip them. This patience is what separates classic fried potatoes and onions from a generic potato hash; you want those distinct, browned faces on each cube.
Step 4: Incorporate the Onions and Aromatics
Once the potatoes are about 70% cooked and have developed a good crust, it is time to add the sliced or diced onions. We add them later in the process because onions have a higher sugar content and lower water content than potatoes, meaning they burn much faster. By adding them mid-way through, they have just enough time to soften and turn sweet and translucent without turning bitter and charred. This is also the perfect time to add your salt, pepper, and any other dry spices, as the oil is now well-distributed.
Step 5: The Final Crisp and Butter Finish
Continue cooking, stirring occasionally, until the onions are golden and the potatoes are fork-tender. During the last two minutes of cooking, drop a tablespoon of butter into the center of the pan. As it melts, toss the potatoes to coat them. This final addition of fat creates a luxurious mouthfeel and helps the seasoning stick to every nook and cranny. Take a final look for that deep, reddish-brown color that signals the classic fried potatoes and onions are ready to be pulled from the heat.
Pro Tips for the Best Results
- Tip: Never overcrowd the pan. If the potatoes are piled on top of each other, the steam released from the bottom layer will soften the top layer, resulting in a mushy texture rather than a crisp one.
- Tip: Use a lid selectively. If you find your potatoes are browning too fast but are still hard in the middle, you can cover the pan for 2–3 minutes to trap steam and soften them, but always remove the lid for the final few minutes to re-crisp the edges.
- Tip: Don’t skimp on the oil. Potatoes are porous and will soak up the fat. You need enough oil to coat the bottom of the pan entirely to ensure an even fry across all the potato surfaces.
- Tip: Wait to salt. Adding salt at the very beginning can draw out moisture, making the potatoes soggy. It is often better to season once the potatoes have already started to develop a crust.
- Tip: Slice onions into wedges or thick strips. If they are diced too finely, they may disappear into the dish or burn before the potatoes are finished. Thicker pieces hold up better to the high heat.
Troubleshooting Common Problems
Why Are My Potatoes Sticking to the Pan?
Sticking usually happens for two reasons: either the pan wasn’t hot enough when the potatoes were added, or you tried to flip them too early. When the starch in the potatoes hits a hot, oiled surface, it undergoes a process that eventually releases the food once a crust has formed. If you find them sticking, wait another minute or two before trying to flip them again.
Why Are the Potatoes Burnt Outside but Raw Inside?
This is a classic sign that your heat is too high. The outside is cooking faster than the heat can penetrate to the center. Lower the heat to medium and, if necessary, use the “lid trick” mentioned in the pro tips to help the centers cook through with trapped steam before finishing the crisping process uncovered.
How to Serve Classic Fried Potatoes and Onions
This dish is the ultimate culinary chameleon. For a traditional perfect breakfast potatoes presentation, serve them alongside crispy bacon, breakfast sausage, and eggs cooked to your preference—sunny side up eggs are particularly good because the runny yolk creates a rich sauce for the potatoes.
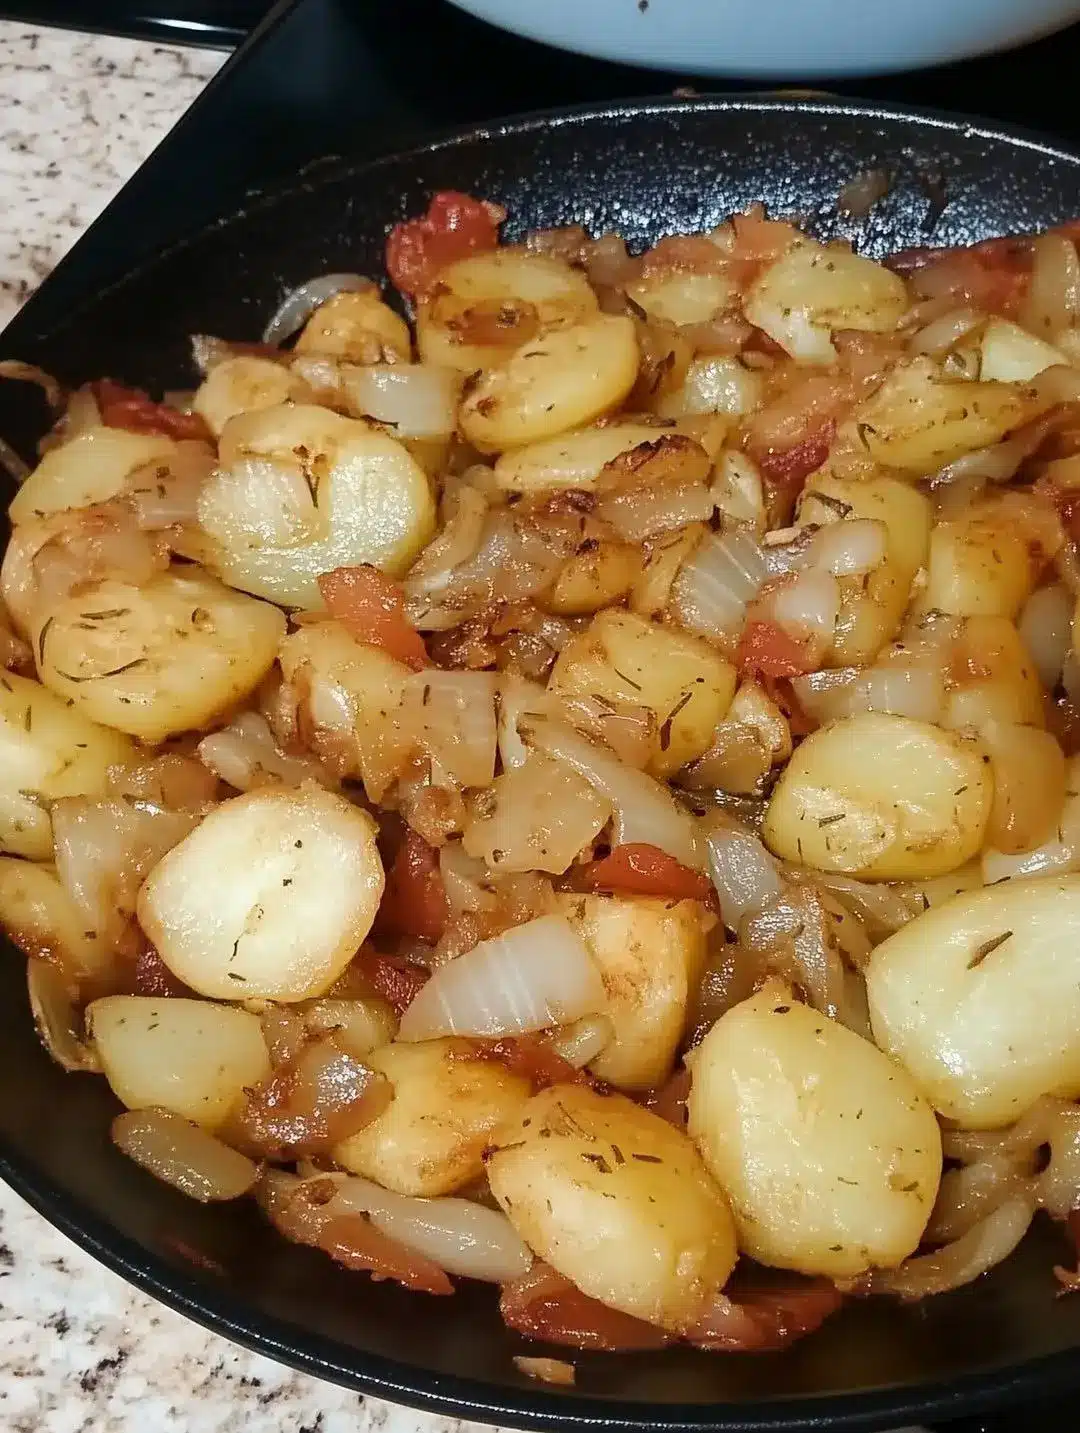
If you are serving these for dinner, they pair beautifully with grilled meats. They are a natural companion to a pan-seared ribeye or baked pork chops. For a more casual meal, try serving them with a dollop of sour cream and a sprinkle of green onions on top, almost like a deconstructed baked potato. They also make an excellent base for a “skillet bowl,” topped with shredded cheese, black beans, and salsa for a southwestern twist on classic fried potatoes and onions.
Storage and Make-Ahead
Storing Leftovers
While these are best served fresh from the skillet, leftovers can be stored in an airtight container in the refrigerator for up to 3 to 4 days. Keep in mind that the potatoes will lose their crispness as they sit, but the flavor will remain excellent as the onions continue to mellow.
Reheating
To revive that signature crunch, avoid the microwave, which will make them rubbery. Instead, reheat the potatoes in a dry skillet over medium heat for 5–7 minutes, tossing frequently until they are heated through and the edges have crisped up again. A toaster oven set to 350°F is another great option for smaller portions.
Final Thoughts
There is a reason why classic fried potatoes and onions remain a favorite across so many households. This dish proves that you don’t need expensive ingredients or fancy equipment to create something truly memorable and delicious. By focusing on the fundamentals—the right potato, the right pan, and a little bit of patience—you can master this comfort food side dish and bring a taste of home-cooked tradition to your table. Whether it’s your first time making them or you’re looking to perfect your technique, these potatoes are sure to become a frequent request in your kitchen.
Frequently Asked Questions
What is the best potato to use for frying?
Russet potatoes are generally considered the best for frying because their high starch content allows them to crisp up perfectly. However, many people enjoy using Yukon Gold potatoes for their buttery flavor and slightly creamier interior. Avoid red potatoes for this specific dish, as they are too waxy and won’t get as crispy.
Do I need to parboil the potatoes first?
While some recipes call for parboiling, it isn’t strictly necessary for classic fried potatoes and onions if you dice them small enough (about 1/2 inch). Cooking them raw in the skillet allows the flavors of the oil and onions to penetrate the potato more deeply, though it does require a bit more time and careful heat management.
Can I make these potatoes ahead of time?
You can prep the potatoes by dicing them and keeping them submerged in cold water in the fridge for up to 24 hours. This prevents browning and removes excess starch. However, the actual frying should be done just before serving to ensure the best possible texture and crunch.
Why did my onions burn before the potatoes were done?
This usually happens if the onions are added to the pan at the same time as the potatoes. Because onions have less density and more sugar, they cook much faster. To prevent burning, always wait until the potatoes are at least halfway cooked and starting to brown before adding your onions to the skillet.
Can I use a non-stick pan instead of cast iron?
Yes, you can use a non-stick skillet, but you may find it harder to achieve the same level of deep, dark browning that a cast iron pan provides. If using non-stick, be careful not to use metal utensils that could scratch the coating, and you may need slightly less oil since the surface is already slippery.
Classic Fried Potatoes and Onions

This traditional side dish features crispy, golden-brown potato slices and sweet caramelized onions. Perfectly seasoned with salt, pepper, and a touch of paprika, it is the ultimate comfort food for any meal.
- 4 large Yukon Gold potatoes, sliced into 1/4-inch rounds
- 1 large yellow onion, thinly sliced
- 3 tablespoons vegetable oil
- 2 tablespoons unsalted butter
- 1 teaspoon kosher salt
- 1/2 teaspoon freshly ground black pepper
- 1/2 teaspoon smoked paprika
- 1Prepare the potatoes by washing and slicing them into 1/4-inch thick rounds. Pat them dry with paper towels to ensure they fry instead of steam.
- 2Heat the oil and butter in a large skillet over medium-high heat until the butter is melted and bubbling.
- 3Add the potatoes to the skillet in an even layer. Cook undisturbed for 5-7 minutes until the bottoms are crispy and golden.
- 4Flip the potatoes over and stir in the sliced onions.
- 5Reduce the heat to medium and continue cooking for 10-15 minutes, stirring occasionally, until the potatoes are tender and the onions are caramelized.
- 6Season with salt, pepper, and paprika. Toss well to combine and serve immediately.
Keywords: fried potatoes, onions, skillet side dish, breakfast potatoes, southern cooking


