
Caramel Chocolate Crunch Bars

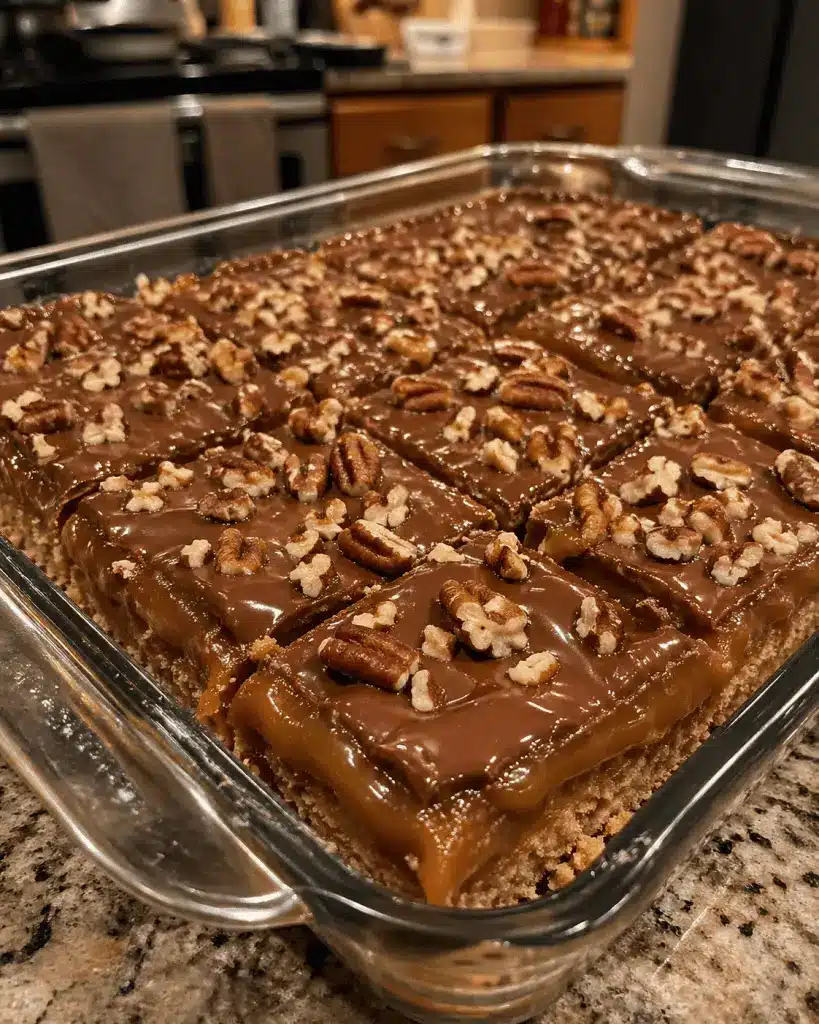
There is something undeniably nostalgic about a classic candy bar, but taking those familiar flavors and elevating them in your own kitchen is a true culinary joy. These homemade caramel chocolate crunch bars offer a sophisticated upgrade to the store-bought variety, combining a buttery, melt-in-your-mouth base with a thick layer of velvety caramel and a topping of crisp, chocolate-coated cereal. The contrast between the soft, chewy center and the audible snap of the chocolate shell makes every bite a multi-sensory experience that is far superior to anything found in a vending machine.
Mastering the balance of these textures is simpler than you might think, making this recipe a fantastic project for both novice bakers and seasoned sweet-tooth enthusiasts. By focusing on high-quality ingredients and a few key temperature cues, you can create professional-grade homemade candy bars that are perfect for gifting, holiday dessert platters, or simply keeping in the fridge for a late-night indulgence. This guide will walk you through the essential techniques to ensure your caramel is perfectly set and your chocolate topping maintains its signature crunch.
Why You’ll Love This Recipe
- Textural Contrast: These bars feature a symphony of textures, from the crumbly shortbread-style base to the chewy caramel layer and the light, airy crunch of the chocolate topping.
- Better Than Store-Bought: By using real butter, pure vanilla, and high-quality chocolate, you avoid the waxy aftertaste and artificial preservatives found in commercial candy bars.
- Make-Ahead Convenience: These no-bake dessert bars (with a quick-baked base) actually benefit from time in the refrigerator, making them an ideal treat to prepare a day in advance.
- Customizable Sweetness: You have full control over the salt levels and chocolate intensity, allowing you to tailor the flavor profile to your personal preference for dark or milk chocolate.
Ingredients You’ll Need
To achieve the perfect balance of flavor and structure, each component of these homemade caramel chocolate crunch bars requires specific ingredients that perform distinct roles during the assembly and setting process.
- All-Purpose Flour: This provides the structural foundation for the base, ensuring it is sturdy enough to hold the heavy caramel and chocolate layers without falling apart.
- Unsalted Butter: Used in both the base and the caramel, butter provides a rich, creamy mouthfeel and helps the caramel stay soft enough to bite through without sticking to your teeth.
- Brown Sugar: The molasses content in brown sugar gives the caramel its deep, amber color and a complex, toffee-like flavor profile that white sugar simply can’t match.
- Sweetened Condensed Milk: This is the secret to a foolproof chewy caramel layer; it provides a thick, stable consistency that sets up beautifully every single time.
- Semi-Sweet Chocolate Chips: These offer a balanced sweetness that complements the rich caramel, though you can use dark chocolate if you prefer a less sugary finish.
- Crisped Rice Cereal: This provides the essential “crunch” factor in our crispy chocolate treats, adding volume and a light, airy texture to the top layer.
- Vanilla Extract: A high-quality extract rounds out the flavors, bridging the gap between the salty butter and the sweet sugar components.
- Sea Salt: A small pinch is vital to cut through the richness of the caramel and enhance the natural notes of the cocoa.
Variations and Smart Swaps
- Dark Chocolate Sea Salt: Swap the semi-sweet chocolate for a 70% cocoa variety and sprinkle flaky Maldon sea salt over the top before the chocolate sets for a more “grown-up” flavor.
- Nutty Crunch: Incorporate half a cup of finely chopped toasted pecans or peanuts into the caramel layer to add an extra dimension of texture and a savory, nutty undertone.
- Gluten-Free Option: You can easily adapt these homemade caramel chocolate crunch bars by using a high-quality 1-to-1 gluten-free flour blend for the base and ensuring your rice cereal is certified gluten-free.
- White Chocolate Matcha: For a unique twist, use white chocolate for the topping and whisk in a teaspoon of culinary-grade matcha powder for a vibrant green color and earthy flavor.
How to Make Homemade Caramel Chocolate Crunch Bars
Step 1: Prepare and Bake the Buttery Base
Start by creaming together your softened butter and sugar until the mixture is light and fluffy, then gradually incorporate the flour and salt. Press this dough firmly into an even layer in a parchment-lined baking pan; using the bottom of a flat measuring cup can help achieve a perfectly level surface. Bake until the edges are just barely golden brown. This step is crucial because it creates a crisp barrier that prevents the moist caramel from making the base soggy as the bars set.
Step 2: Simmer the Velvety Caramel Layer
In a heavy-bottomed saucepan, combine the sweetened condensed milk, butter, and brown sugar over medium heat. You must stir this mixture constantly with a silicone spatula to prevent the milk sugars from scorching on the bottom of the pan. Bring the mixture to a gentle boil and continue cooking until it thickens and pulls away slightly from the sides of the pan. This usually takes about 5 to 7 minutes; you are looking for a deep golden hue and a consistency that coats the back of a spoon thickly.
Step 3: Pour and Set the Caramel
Once the caramel reaches the correct thickness, remove it from the heat and stir in the vanilla extract. Pour the hot caramel immediately over the cooled base, spreading it to the corners with an offset spatula. It is important to let this layer cool completely at room temperature before adding the chocolate. If the caramel is too warm when the topping is applied, the layers will bleed together rather than staying distinct and beautiful.
Step 4: Create the Crispy Chocolate Topping
Melt your chocolate chips in a heat-safe bowl using 30-second intervals in the microwave or a double boiler. Once the chocolate is glossy and smooth, gently fold in the crisped rice cereal. The goal is to coat every piece of cereal thoroughly without crushing the delicate puffs. Spread this mixture over the set caramel layer, pressing down lightly to ensure the chocolate adheres to the caramel below. This creates the signature crispy chocolate treats texture that defines the top of the bar.
Step 5: Chill, Slice, and Serve
Place the entire pan in the refrigerator for at least two hours, or until the chocolate is firm to the touch. When you are ready to serve, lift the bars out of the pan using the parchment paper overhang. For the cleanest cuts, use a sharp chef’s knife dipped in hot water and wiped dry between every slice. This prevents the chocolate from cracking and keeps the caramel from sticking to the blade, resulting in professional-looking homemade candy bars.
Pro Tips for Success
- Tip: Use a parchment paper sling with an overhang on two sides. This allows you to lift the entire block out of the pan easily, preventing the first corner piece from crumbling.
- Tip: Do not rush the caramel. If you cook it over too high a heat, it may become grainy or oily. A steady, medium-low simmer is the best way to achieve a smooth, chewy caramel layer.
- Tip: Temper your expectations with the chocolate. If you want the topping to stay shiny and have a firm snap, avoid overheating the chocolate during the melting process.
- Tip: For a perfectly flat base, use a fork to prick the dough a few times before baking. This prevents air bubbles from lifting the crust while it’s in the oven.
- Tip: Add the salt to the caramel at the very end of the cooking process to preserve its bright, sharp flavor profile.
Troubleshooting Common Problems
Why Is My Caramel Layer Too Soft?
If the caramel doesn’t hold its shape when sliced, it likely wasn’t cooked long enough. The mixture needs to reach a “soft ball” stage (about 235°F to 240°F if using a thermometer). To fix this next time, ensure the mixture reaches a thick, lava-like consistency that leaves a visible trail when you run your spatula through it.
Why Did My Chocolate Top Crack?
Chocolate often cracks if it is sliced while it is too cold and brittle. To prevent this, take the pan out of the refrigerator about 15 minutes before you plan to cut the bars. The slight rise in temperature will allow the chocolate to give way under the knife rather than shattering.
Why Is My Base Crumbling?
A crumbly base usually happens if the flour wasn’t fully hydrated by the butter or if it was overbaked. Ensure your butter is properly softened (but not melted) when mixing, and pull the base out of the oven the moment the edges turn pale gold.
How to Serve Homemade Caramel Chocolate Crunch Bars
These bars are incredibly rich, so they are best served in smaller squares or thin rectangular “fingers” that mimic the shape of traditional candy bars. Because of the caramel’s sensitivity to temperature, they are best enjoyed slightly chilled or at a cool room temperature. If they sit out in a warm kitchen for too long, the caramel will soften and the bars will become much messier to handle.
Creative Ways to Serve It
For a beautiful dessert display, arrange the bars on a marble slab or a dark wooden board to contrast the chocolate tones. If you are serving these at a party, consider placing individual bars into small paper cupcake liners; this makes them easy for guests to grab without getting sticky fingers. You can also crumble any smaller “end pieces” over vanilla bean ice cream for an incredible sundae topping that features all the best parts of homemade caramel chocolate crunch bars.
Storage and Make-Ahead
Storing Leftovers
These bars should be stored in an airtight container to keep the rice cereal from becoming stale. They will stay fresh in the refrigerator for up to two weeks. Always place a sheet of parchment paper between layers if you are stacking them to prevent the chocolate from sticking to the caramel bottoms above.
Freezing
You can freeze these bars for up to three months. Wrap individual bars tightly in plastic wrap and then place them in a heavy-duty freezer bag. When the craving strikes, let them thaw in the refrigerator overnight. Freezing is actually a great way to preserve the crispy chocolate treats texture over a longer period.
Making It Ahead
Since these bars need several hours to set, they are the perfect make-ahead dessert. You can prepare them up to three days in advance of an event, keeping them in the pan until the morning you plan to serve them to maintain the best possible moisture levels in the base.
Final Thoughts
Creating your own homemade caramel chocolate crunch bars is a rewarding experience that results in a treat far more impressive than anything you can buy at the store. The combination of the buttery crust, the rich, golden caramel, and that signature chocolate crunch is a timeless trio that never fails to please a crowd. Whether you are making these for a special occasion or just to satisfy a weekend sugar craving, the attention to detail in the cooking process will shine through in every bite. Once you taste the difference that fresh ingredients make, you may never look at a standard candy bar the same way again.
Frequently Asked Questions
Can I use different cereals for the crunch layer?
Absolutely. While crisped rice cereal is traditional for that light “crackel” texture, you can use crushed cornflakes, toasted quinoa, or even broken pretzels for a salty-sweet variation. The key is to use something that provides a significant textural contrast to the soft caramel and the solid chocolate shell.
Why did my caramel turn out grainy?
Grainy caramel is usually caused by sugar crystals forming and recrystallizing. This can happen if the sugar isn’t fully dissolved before the mixture boils or if you scrape the sides of the pan too aggressively. To avoid this, stir gently and ensure your heat is consistent, allowing the brown sugar to melt completely into the butter and milk.
Do I have to use a candy thermometer?
While a thermometer provides the most accuracy, it isn’t strictly necessary for these no-bake dessert bars. You can rely on visual and sensory cues: the caramel is ready when it reaches a deep peanut butter color, smells intensely of toffee, and is thick enough to hold a shape for a second or two after being stirred.
Can I use milk chocolate instead of semi-sweet?
Yes, milk chocolate works wonderfully and provides a sweeter, creamier finish that is very close to a traditional candy bar profile. If you find the bars too sweet, just ensure you include that pinch of sea salt in the caramel or as a garnish on top to provide the necessary flavor balance.
What is the best way to get clean slices?
The secret is a hot knife and a cold bar. Let the bars chill thoroughly in the fridge. Dip a large, sharp knife into a tall glass of hot water, wipe it completely dry, and make one long, smooth cut. Repeat the dipping and drying process after every single cut to prevent the layers from smearing into each other.
Caramel Chocolate Crunch Bars

Indulge in these irresistible Caramel Chocolate Crunch Bars, featuring a buttery shortbread base, a gooey caramel center, and a satisfyingly crunchy chocolate topping. Perfect for bake sales, parties, or a sweet treat at home.
- 2 cups all-purpose flour
- 1/2 cup granulated sugar
- 1 cup unsalted butter, softened
- 1 can (14 oz) sweetened condensed milk
- 1/2 cup packed light brown sugar
- 1/2 cup unsalted butter
- 2 cups milk chocolate chips
- 1/2 cup crisp rice cereal
- 1Preheat your oven to 350°F (175°C) and grease a 9x13 inch baking pan or line with parchment paper.
- 2In a medium bowl, combine the flour, granulated sugar, and 1 cup of softened butter. Press the mixture firmly into the bottom of the prepared pan.
- 3Bake the crust for 18-20 minutes or until the edges are lightly golden brown.
- 4While the crust bakes, combine the sweetened condensed milk, brown sugar, and 1/2 cup butter in a heavy saucepan over medium heat.
- 5Bring the caramel mixture to a boil, stirring constantly. Reduce heat and simmer for 5 minutes until thickened and golden.
- 6Pour the caramel evenly over the baked crust. Return to the oven and bake for an additional 12-15 minutes.
- 7Allow the bars to cool completely.
- 8Melt the chocolate chips in the microwave in 30-second intervals, stirring until smooth. Fold in the rice cereal.
- 9Spread the chocolate mixture over the cooled caramel layer. Refrigerate for at least 1 hour before cutting into bars.
Keywords: Caramel Bars, Chocolate Crunch, Shortbread, Dessert, Homemade Sweets


