
Baked Garlic Butter Cheese Bombs

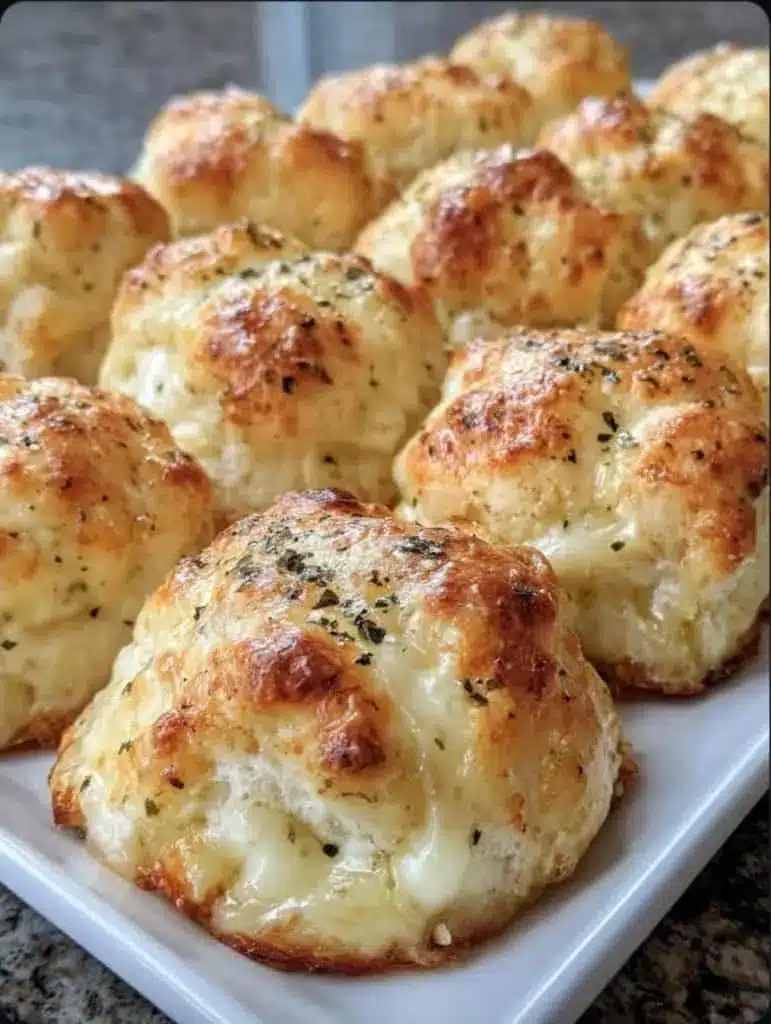
There is something undeniably irresistible about the combination of warm bread, melted cheese, and a punchy herb butter. These baked garlic butter cheese bombs represent the ultimate comfort food, offering a pillowy exterior that gives way to a gooey, stretchy mozzarella center. Whether you are serving them as a side dish for a pasta dinner or as a standalone snack, they deliver a high-impact flavor profile that feels far more labor-intensive than it actually is.
The beauty of this recipe lies in the contrast between the savory, salted crust and the mild, creamy cheese inside. By using a few clever shortcuts and focusing on the aromatics of a homemade garlic butter, you can create a professional-grade appetizer in under thirty minutes. It is the kind of dish that disappears from the table almost as soon as it is set down, making it a reliable staple for any gathering.
Why You’ll Love This Recipe
- Incredible Texture: These cheesy bread rolls offer a satisfying contrast between the slightly crisp, buttery exterior and the soft, elastic cheese pull of the molten center.
- Maximum Efficiency: By utilizing high-quality prepared dough, you can focus your energy on the seasoning and assembly, making these one of the most reliable easy party appetizers in your repertoire.
- Customizable Flavor: The garlic butter base is highly adaptable, allowing you to increase the heat with red pepper flakes or add earthy depth with different dried herbs.
- Universal Appeal: From picky children to discerning adults, the classic combination of garlic, butter, and cheese is a flavor profile that virtually everyone enjoys.
Ingredients You’ll Need
Creating the perfect cheese bomb requires a balance of convenient base ingredients and fresh aromatics. Each component plays a specific role in ensuring the dough rises correctly while the cheese melts into a perfect pocket of goodness.
- Refrigerated Biscuit Dough: This serves as the structural foundation. Large, flaky layers work best here because they provide enough surface area to wrap around the cheese securely.
- Mozzarella Cheese: Using low-moisture mozzarella, either in cubes or cut from string cheese, ensures a clean melt without releasing too much water into the dough.
- Unsalted Butter: This acts as the carrier for all the savory flavors. Using unsalted allows you to control the exact sodium level of the final baked garlic butter cheese bombs.
- Fresh Garlic: Mincing fresh cloves provides a sharp, authentic bite that pre-minced jars simply cannot replicate.
- Dried Italian Seasoning: A blend of oregano, basil, and thyme adds an herbaceous layer that cuts through the richness of the butter.
- Parmesan Cheese: A final dusting of finely grated Parmesan creates a salty, umami-rich crust on the outside of each roll.
- Fresh Parsley: Used as a garnish, it adds a pop of bright color and a subtle freshness to the heavy, savory flavors.
Variations and Smart Swaps
- Spicy Kick: Incorporate half a teaspoon of crushed red pepper flakes into your butter mixture or add a small slice of pickled jalapeño inside the dough with the cheese.
- Meat Lover’s Version: Wrap a small piece of pepperoni or cooked Italian sausage around the mozzarella before sealing the dough for a pizza-inspired twist.
- Herb Alternatives: If you don’t have Italian seasoning, fresh rosemary or chopped chives work beautifully to create a different aromatic profile.
- Cheese Diversification: While mozzarella is traditional for the stretch, swapping in sharp cheddar or pepper jack can add a bolder flavor to these mozzarella stuffed biscuits.
How to Make Baked Garlic Butter Cheese Bombs
Step 1: Prepare the Dough Rounds
Start by separating your refrigerated biscuits and cutting each one in half. Using your fingers or a lightly floured rolling pin, flatten each piece into a small disc. It is important to ensure the edges are slightly thinner than the center, as this allows you to gather the dough around the cheese without creating a bulky, undercooked knot at the bottom of the roll.
Step 2: Encase the Cheese Centers
Place a cube of mozzarella in the center of each dough disc. Carefully lift the edges and pinch them together firmly to create a tight seal. This “bomb” assembly is the most critical stage; if the seal is weak, the cheese will escape during the baking process. Once sealed, gently roll the dough between your palms to form a smooth, uniform sphere.
Step 3: Create the Garlic Butter Coating
In a small bowl, combine the melted butter with the minced garlic and dried herbs. Use a pastry brush to coat the bottom of your baking dish with a thin layer of this mixture. Arrange the dough balls in the dish with the seam-side down, then generously brush the tops and sides of each roll with the remaining homemade garlic butter. This ensures the flavor penetrates the dough rather than just sitting on top.
Step 4: Bake to Golden Perfection
Transfer the dish to a preheated oven and bake until the rolls have puffed significantly and the tops are a deep, golden brown. You are looking for a matte finish to turn into a glossy sheen as the butter soaks in. The smell of toasted garlic and yeast should be quite strong at this point. If you notice any cheese starting to bubble out of a seal, the rolls are likely ready to be pulled.
Step 5: Add the Finishing Touches
Immediately after removing the pan from the oven, apply one final coat of the butter mixture if you have any left, or a fresh dusting of Parmesan and parsley. This final application hits the hot dough and creates an aromatic steam that keeps the exterior soft. Let them rest for just a few minutes so the cheese sets slightly, preventing it from running out too quickly when bitten into.
Pro Tips for Success
- Tip: Ensure your cheese is cold when you wrap it. Cold mozzarella takes longer to melt, which gives the dough enough time to bake through before the cheese becomes too fluid and tries to burst the seals.
- Tip: Pinch the seams aggressively. Use a “pinch and twist” motion to ensure the dough is completely fused at the bottom of each ball.
- Tip: Avoid over-crowding the pan. Leaving a small amount of space between each roll allows the hot air to circulate, ensuring the sides of the baked garlic butter cheese bombs brown evenly.
- Tip: Use a high-quality baking sheet or a cast-iron skillet. Cast iron, in particular, holds heat exceptionally well and produces a much crispier bottom crust.
- Tip: Mince the garlic very finely. Large chunks of garlic may not mellow out enough during the short bake time, leading to an overpowering raw bite.
Troubleshooting Common Problems
Why is my cheese leaking out?
Cheese leakage usually happens for two reasons: either the dough wasn’t pinched tightly enough at the seam, or the dough was stretched too thin in one spot, causing a blowout. To fix this next time, make sure the cheese is centered perfectly and the dough is of even thickness all the way around before you seal it.
Why is the dough raw in the middle?
If the exterior is dark brown but the inside is doughy, your oven temperature may be too high, or the rolls are too large. Ensure you are using the specified temperature and that you have divided the biscuits into smaller portions as directed. Smaller rolls bake through more consistently than large ones.
How to Serve Cheese Bombs
These savory bites are best served warm, while the cheese is at its most elastic. Presentation-wise, serving them straight from a decorative skillet or a rustic wooden board emphasizes their “pull-apart” nature, which guests always find engaging.
Dipping Sauces
While the garlic butter provides plenty of moisture, providing a side of warm marinara sauce is a classic choice that leans into the pizza-like flavors. For a different profile, a creamy ranch dressing or a spicy garlic aioli can complement the richness of the mozzarella stuffed biscuits perfectly.
Menu Pairings
These rolls are the perfect companion to a heavy Italian meal. Serve them alongside a large bowl of spaghetti carbonara or a zesty Caesar salad. They also function beautifully as easy party appetizers for game days, where they can be piled high in a basket next to chicken wings or sliders.
Storage and Make-Ahead
Storing Leftovers
If you happen to have leftovers, store them in an airtight container in the refrigerator for up to three days. Because of the butter and cheese content, they will firm up significantly when cold, so they are not recommended for eating straight from the fridge.
Reheating
To revive the fluffy texture, avoid the microwave if possible, as it can make the dough chewy. Instead, place the rolls on a baking sheet, cover them loosely with foil, and warm them in a 350°F oven for about 5 to 8 minutes. This restores the crispness of the crust and remelts the cheese center perfectly.
Making It Ahead
You can assemble the raw dough balls and stuff them with cheese up to four hours in advance. Keep them covered with plastic wrap in the refrigerator. When you are ready to serve, simply brush them with the garlic butter and bake as directed, adding a couple of extra minutes to the bake time since the dough is starting from a cold temperature.
Final Thoughts
Mastering the art of baked garlic butter cheese bombs is a surefire way to elevate your snack game. It is a recipe that relies on simple physics—trapping steam and fat inside a dough pocket—to create a result that feels luxurious. By paying attention to the seal of the dough and the quality of your garlic, you can produce a batch of rolls that rivals any restaurant appetizer. These are designed for sharing, so prepare to see them vanish within minutes of leaving the oven.
Frequently Asked Questions
Can I use homemade pizza dough instead of biscuits?
Yes, homemade or store-bought pizza dough works exceptionally well for this recipe. You will need to portion the dough into golf-ball-sized pieces and ensure they are well-rested so they don’t snap back when you try to flatten them. Pizza dough often results in a slightly chewier, more bread-like texture compared to the flaky layers of a biscuit.
Can I make these in an air fryer?
Absolutely. To make these in an air fryer, place the prepared rolls in a single layer in the basket, ensuring they aren’t touching. Air fry at 330°F for 6 to 8 minutes, or until they are golden brown. Because air fryers circulate heat very quickly, you should check them a few minutes early to prevent the garlic from burning.
What is the best cheese to use for a good cheese pull?
Low-moisture part-skim mozzarella is the gold standard for achieving that iconic stretchy cheese pull. Fresh mozzarella (the kind stored in water) contains too much moisture and will likely make the dough soggy or cause a leak. String cheese sticks cut into one-inch segments are a very convenient and effective option.
Do I have to use fresh garlic?
While fresh garlic provides the best flavor, you can substitute it with one teaspoon of garlic powder mixed into the butter if you are in a hurry. However, avoid the jarred minced garlic if possible, as the preservative liquid can add an acidic aftertaste that clashes with the richness of the butter and cheese.
Can I freeze these after they are baked?
Yes, you can freeze baked cheese bombs. Allow them to cool completely, then freeze them in a single layer before transferring them to a freezer-safe bag. They will keep for up to a month. To serve, thaw them in the refrigerator overnight and reheat in the oven to restore the original texture.
Baked Garlic Butter Cheese Bombs

These Baked Garlic Butter Cheese Bombs are the ultimate comfort food snack or side dish. Soft, pillowy dough is wrapped around a melty mozzarella center and finished with a rich, savory garlic butter glaze.
- 1 tube (16.3 oz) refrigerated flaky layers biscuits
- 5 ounces mozzarella cheese, cut into 1/2-inch cubes
- 3 tablespoons unsalted butter, melted
- 2 cloves garlic, minced
- 1/2 teaspoon dried oregano
- 1 tablespoon fresh parsley, finely chopped
- 2 tablespoons grated Parmesan cheese
- 1/4 teaspoon salt
- 1Preheat your oven to 375°F (190°C) and line a baking sheet with parchment paper or a silicone mat.
- 2Open the refrigerated biscuit tube and separate the biscuits. Cut each individual biscuit in half to create 16 to 20 pieces.
- 3Flatten each piece of dough with your fingers and place a cube of mozzarella cheese in the center.
- 4Wrap the dough around the cheese cube, pinching the edges firmly to seal, then roll into a smooth ball.
- 5In a small bowl, whisk together the melted butter, minced garlic, dried oregano, parsley, and salt.
- 6Place the dough balls on the prepared baking sheet and brush each generously with the garlic butter mixture.
- 7Bake for 10-12 minutes or until the tops are golden brown and the dough is cooked through.
- 8Remove from the oven, sprinkle immediately with grated Parmesan cheese, and serve while warm.
Keywords: cheese bombs, garlic butter, appetizer, baked snacks, easy dinner side


