
Old-Fashioned War-Time Cake

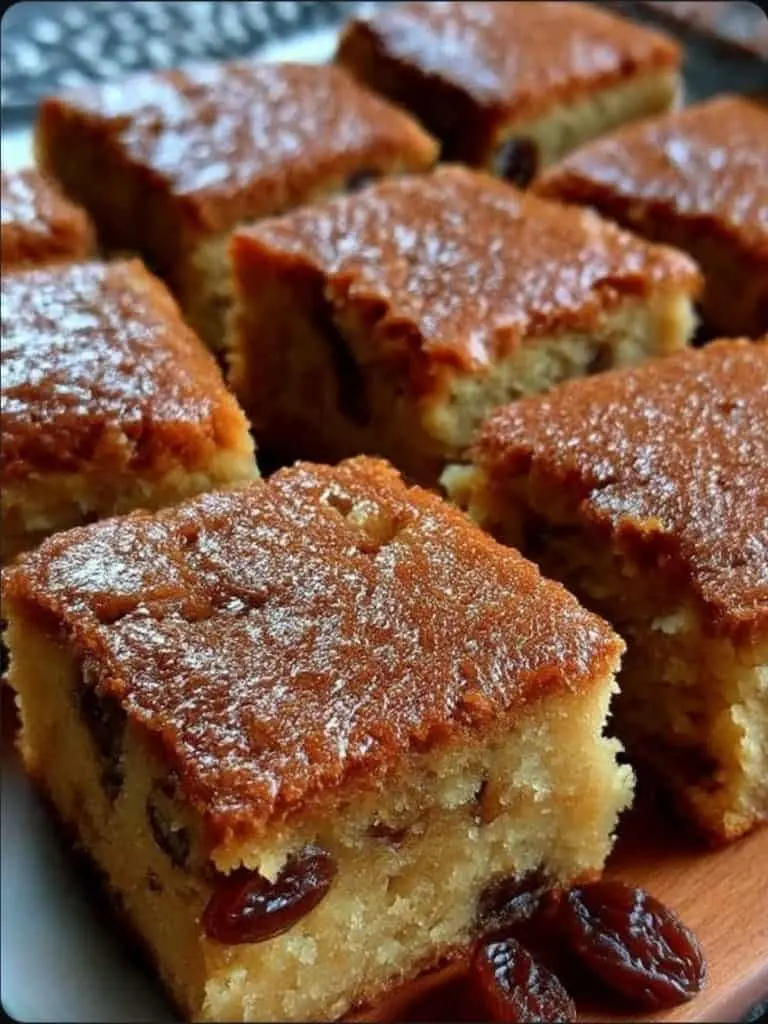
Stepping back into culinary history reveals recipes that were born out of necessity but stayed for their incredible flavor. The old fashioned war cake recipe is perhaps the most famous example of resourcefulness, originating during times of rationing when staples like eggs, butter, and milk were hard to come by. Also known as “Depression Cake” or “Boiled Raisin Cake,” this dessert relies on a unique stovetop method to create a moist, deeply spiced crumb that rivals any modern cake. It is a testament to the idea that you don’t need fancy ingredients to create something truly comforting and delicious.
What makes this eggless spice cake so remarkable is the depth of flavor achieved through a simple simmer. By boiling the raisins with sugar, spices, and fat before adding the dry ingredients, you plump the fruit and create a rich, syrup-like base that ensures the cake stays moist for days. Whether you are looking for a dairy-free dessert option or simply want to taste a piece of history, this old fashioned war cake recipe delivers a dense, chewy texture and a warm, autumnal aroma that fills the entire house as it bakes.
Why This Recipe Is a Keeper
- Incredibly Long Shelf Life: Because of the high moisture content from the boiled raisins and the lack of dairy, this cake stays fresh and moist much longer than standard sponge cakes.
- Budget-Friendly Ingredients: This recipe uses basic pantry staples like flour, sugar, and dried fruit, making it one of the most affordable desserts you can bake from scratch.
- Naturally Dairy-Free and Eggless: It is a fantastic option for those with allergies or dietary restrictions, providing a rich dessert experience without the need for specialized substitutions.
- One-Pot Preparation: Most of the work happens in a single saucepan, which means fewer dishes to wash and a very straightforward mixing process that even beginner bakers can master.
Ingredients You’ll Need
The magic of this historical cake lies in how it uses common pantry items to replicate the richness usually provided by animal fats and proteins. Each ingredient serves a specific structural or flavor-enhancing purpose to ensure the final result is never dry or bland.
- Raisins: These are the star of the show. Boiling them hydrates the dried fruit, making them burst with sweetness while releasing natural pectin that helps bind the cake.
- Brown Sugar or Molasses: These provide a deep, caramelized sweetness and contribute to the dark, rich color of the crumb while keeping the texture soft.
- Vegetable Shortening or Oil: Since butter was rationed, these fats became the standard. They provide a tender mouthfeel and ensure the dairy free cake remains moist even after several days.
- Warm Spices: A blend of cinnamon, cloves, and nutmeg is essential. These spices provide the “warmth” in the flavor profile, masking the absence of rich dairy notes.
- Baking Soda: In the absence of eggs, baking soda reacts with the acidic components (like the raisins or molasses) to provide the necessary lift and aeration.
- All-Purpose Flour: This provides the structural foundation. Because the batter is quite heavy with fruit, a sturdy flour is needed to hold everything together.
Easy Ways to Change It Up
While the traditional version is a classic for a reason, there are several ways to adapt this boiled raisin cake to suit your personal preferences or what you have available in your cupboards.
- The Nutty Variation: Add a half-cup of chopped walnuts or pecans to the batter just before baking. This adds a necessary crunch that contrasts beautifully with the soft, chewy raisins.
- Coffee Infusion: Instead of using plain water to boil your raisins, use a cup of strong brewed coffee. This enhances the spices and adds a sophisticated depth to the chocolatey-dark batter.
- Citrus Twist: Add the zest of one orange to the saucepan while the mixture cools. The bright citrus oils cut through the heavy spice and sugar for a more vibrant flavor.
- Extra Dried Fruit: You can substitute half of the raisins with dried currants, chopped dates, or even dried cranberries for a slightly tart variation of the original recipe.
How to Make an Old Fashioned War Cake Recipe
The technique for this cake is different from your standard “cream the butter and sugar” method. It involves a two-stage process: a simmer on the stove followed by a gentle bake in the oven.
Step 1: Boil the Fruit and Spice Base
Start by combining your raisins, sugar, fat, water, and spices in a medium saucepan. Bring the mixture to a gentle boil and let it simmer for about ten minutes. This step is crucial because it softens the raisins and dissolves the sugar into a thick syrup. You’ll notice the kitchen begins to smell like a holiday kitchen immediately. Once simmered, you must let the mixture cool completely to room temperature before moving on, or you risk the flour clumping or the leavening agent activating too early.
Step 2: Incorporate the Dry Ingredients
Once your boiled mixture is cool to the touch, sift in your flour and baking soda. Sifting is particularly important here because the raisin syrup is quite dense, and you want to avoid any pockets of dry flour. Stir the batter by hand until just combined. The batter should be thick, dark, and glossy. Do not overmix, as this can develop the gluten in the flour too much, leading to a tough, bread-like texture rather than a tender cake.
Step 3: Bake Until Set and Fragrant
Pour the batter into a prepared loaf pan or square baking dish. Bake in a preheated oven until a toothpick inserted into the center comes out clean or with just a few moist crumbs. Because this cake is so dense, it may take longer than a standard sponge cake. Look for the edges to pull slightly away from the sides of the pan and the top to feel springy but firm. The aroma will be deeply spiced and sweet.
Step 4: Cool Thoroughly Before Slicing
This is perhaps the hardest step, but the old fashioned war cake recipe needs time to “set.” If you cut it while it is hot, the structure may be too fragile and the moisture might cause it to crumble. Let it cool in the pan for at least twenty minutes before transferring it to a wire rack. This cake actually tastes even better the next day as the spices have more time to meld and the moisture redistributes throughout the crumb.
Pro Tips for Success
- Do Not Skip the Cooling Step: Adding flour to a hot raisin mixture will result in a gummy, unappealing texture. Ensure the boiled base is at room temperature.
- Check Your Baking Soda: Since there are no eggs to help the cake rise, your baking soda must be fresh. Test it by dropping a pinch into vinegar; if it doesn’t fizz vigorously, replace it.
- Plump the Raisins: If your raisins are particularly old and dry, let them soak in the water for 30 minutes before you even turn on the heat.
- Use a Metal Pan: For the best crust development, use a light-colored metal baking pan rather than glass, which can sometimes cause the bottom to brown too quickly before the center is done.
- Proper Measuring: Spoon the flour into your measuring cup and level it off with a knife. Packing the flour can lead to a dry, heavy cake.
Troubleshooting Common Problems
Why is my cake too dense or heavy?
War cakes are naturally denser than birthday cakes, but if it feels like a brick, you likely overmixed the batter or used too much flour. Next time, stir only until the white streaks of flour disappear. Also, ensure you aren’t simmering the liquid for too long, which can evaporate too much water and throw off the ratios.
Why did the raisins sink to the bottom?
This usually happens if the batter is too thin. Ensure you boiled the mixture long enough to create a slightly syrupy consistency and that you measured your flour accurately. You can also toss the raisins in a tablespoon of flour before adding them to the liquid to help them “grip” the batter.
Why does the cake taste bitter?
A bitter aftertaste is often a sign of too much baking soda or a clump of soda that wasn’t mixed in properly. Always sift your baking soda with the flour to ensure even distribution throughout the eggless spice cake batter.
How to Serve This Recipe
This cake is incredibly versatile and can be served as a simple snack, a breakfast bread, or a proper dessert. Because it isn’t overly sweet, it pairs perfectly with a variety of accompaniments.
Classic Presentations
The most traditional way to enjoy this cake is plain, perhaps with a light dusting of powdered sugar. A thin schmear of salted butter on a room-temperature slice is also a revelation, as the salt balances the sweetness of the raisins. It is the perfect companion to a hot cup of coffee or tea in the afternoon.
Garnishes and Toppings
If you want to dress it up for guests, a dollop of whipped cream or a scoop of vanilla bean ice cream works wonders. For a more decadent touch, a simple lemon glaze—made with powdered sugar and lemon juice—provides a tart contrast to the warm spices of the boiled raisin cake.
Storage and Make-Ahead
One of the greatest strengths of the old fashioned war cake recipe is its durability. It was often sent in care packages to soldiers because it could withstand travel and temperature changes without spoiling or drying out.
Storing Leftovers
Wrap the cake tightly in plastic wrap or store it in an airtight container at room temperature. It will stay fresh for 5 to 7 days. In fact, many people prefer the flavor on day three or four, as the spices continue to intensify over time.
Freezing
This cake freezes exceptionally well. Wrap individual slices or the entire loaf in plastic wrap, followed by a layer of aluminum foil. It can be frozen for up to three months. Thaw at room temperature for a few hours before serving.
Final Thoughts
Baking an old fashioned war cake recipe is about more than just making a snack; it is about connecting with a time when creativity was the most important ingredient in the kitchen. This cake proves that you don’t need expensive fats or dairy to create a dessert that feels indulgent and satisfying. Its moist, spiced crumb and chewy raisins make it a timeless classic that deserves a spot in your permanent recipe rotation. Whether you’re baking it for historical curiosity or practical necessity, it’s a recipe that never fails to comfort.
Frequently Asked Questions
Can I make this cake gluten-free?
Yes, you can substitute the all-purpose flour with a high-quality 1-to-1 gluten-free flour blend. Since the dairy free cake is already quite dense and moist, it adapts better to gluten-free flours than lighter sponge cakes do. Just be sure your blend contains xanthan gum to help with the structure in the absence of eggs.
Why do you have to boil the raisins first?
Boiling serves two purposes: it rehydrates the raisins so they are soft and juicy, and it creates a flavored syrup that acts as the liquid base for the cake. This “boiled” method is what gives the cake its signature moistness and helps the spices bloom before the cake even enters the oven.
Can I use white sugar instead of brown sugar?
You can, but the cake will have a lighter color and a slightly less complex flavor. Brown sugar contains molasses, which adds moisture and a deep caramel note that is traditional for this eggless spice cake. If you only have white sugar, adding a tablespoon of molasses to the boiling mixture will yield the best results.
Is this cake the same as fruitcake?
While it shares some ingredients with a traditional holiday fruitcake, war cake is generally lighter and less “boozy.” It focuses primarily on raisins and spices rather than a wide variety of candied fruits and nuts. The texture is more like a dense spice bread than the heavy, sticky consistency of a classic fruitcake.
Can I bake this in a bundt pan?
You can, but you may need to adjust the baking time. A bundt pan provides more surface area, so the cake might bake faster. Be sure to grease and flour the pan extremely well, as the high sugar and raisin content in this boiled raisin cake can make it prone to sticking in intricate pan designs.
Old-Fashioned War-Time Cake

A classic, dairy-free, and egg-free chocolate cake that rose to popularity during times of rationing. Also known as Depression Cake or Crazy Cake, it is incredibly moist and easy to make in a single pan.
- 1 1/2 cups all-purpose flour
- 1 cup granulated sugar
- 1/4 cup unsweetened cocoa powder
- 1 teaspoon baking soda
- 1/2 teaspoon salt
- 1 teaspoon pure vanilla extract
- 1 teaspoon white vinegar
- 1/3 cup vegetable oil
- 1 cup lukewarm water
- 1Preheat your oven to 350°F (175°C).
- 2In an ungreased 8-inch square baking pan, sift together the flour, sugar, cocoa, baking soda, and salt.
- 3Make three indentations (wells) in the dry mixture: two small ones and one larger one.
- 4Pour the vinegar into one small well, the vanilla extract into the other small well, and the vegetable oil into the large well.
- 5Pour the water over the entire mixture and stir with a fork until smooth and well combined.
- 6Bake for 30 to 35 minutes, or until a toothpick inserted into the center comes out clean.
- 7Allow to cool completely in the pan before slicing and serving.
Keywords: war-time cake, depression cake, crazy cake, wacky cake, eggless chocolate cake, vegan cake


