
Cheese Dreams

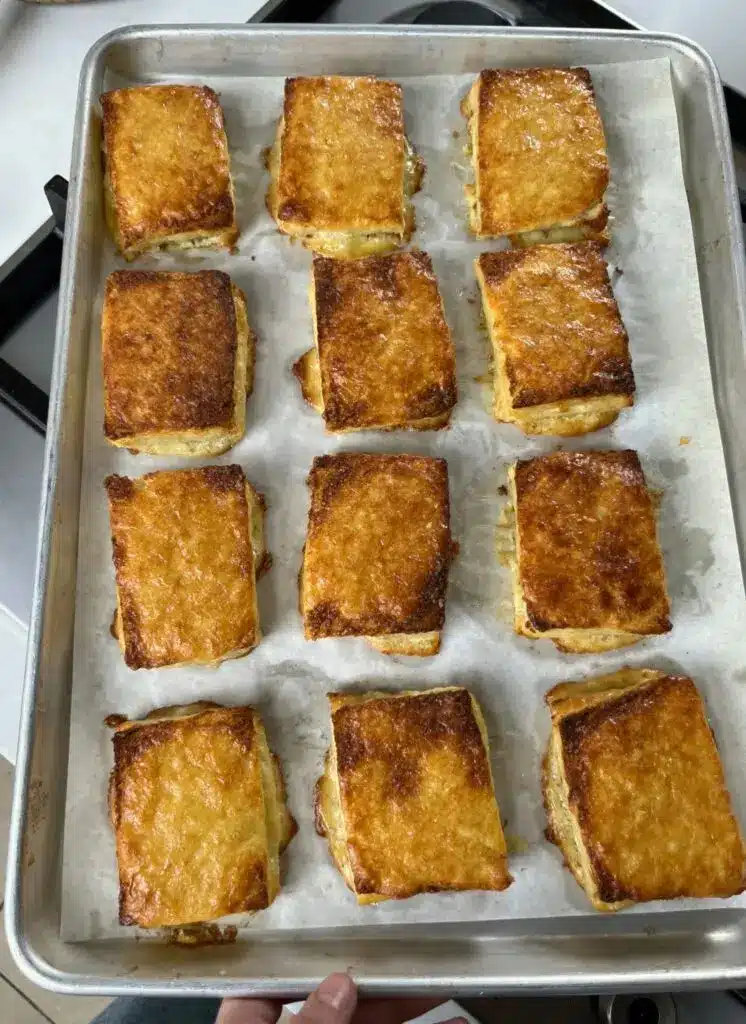
There is something deeply nostalgic about a traditional american cheese dreams recipe. This dish, which gained immense popularity during the Great Depression, is far more than just a grilled cheese sandwich. It represents a comfort food classic that relies on simple, pantry-staple ingredients to create a decadent, bubbling, and golden-brown lunch or snack. Traditionally served open-faced and often broiled until the cheese reaches a perfect state of gooey meltiness, these sandwiches offer a satisfying crunch that pairs beautifully with the rich, sharp flavors of melted cheddar.
Whether you are looking for a quick mid-week meal or a vintage recipe to share with the family, this dish is surprisingly versatile. By focusing on quality bread and the right melting cheese, you can elevate this humble snack into a centerpiece. The following guide will walk you through the nuances of achieving that signature “dreamy” texture, ensuring your toast stays crisp while the toppings remain perfectly tender and hot.
Why This Recipe Is a Keeper
- Timeless Comfort: This traditional american cheese dreams recipe evokes a sense of nostalgia while providing the ultimate savory satisfaction that only melted cheese and toasted bread can offer.
- Budget-Friendly Ingredients: Using basic staples like bread, butter, and cheese, this is an easy lunch recipe that feels indulgent without requiring a trip to a specialty grocery store.
- Quick Preparation: From start to finish, you can have a hot, bubbling meal on the table in less than fifteen minutes, making it ideal for busy schedules.
- Texture Contrast: The combination of the crispy, buttered underside of the bread and the soft, molten cheese topping creates a multi-sensory eating experience that kids and adults alike adore.
Ingredients You’ll Need
To make the best version of this classic, you want to choose ingredients that stand up well to high heat. Since the bread is broiled or pan-fried, its thickness and fat content matter significantly for the final result.
- Thick-Cut Bread: A sturdy white bread, brioche, or even a pullman loaf works best. You need something that can support the weight of the cheese without becoming soggy or limp during the cooking process.
- Sharp Cheddar Cheese: While American cheese was common in the original era, a sharp cheddar provides a deeper flavor profile and a beautiful golden hue when broiled.
- Salted Butter: Using softened salted butter allows for an even spread and ensures every corner of the bread develops a rich, savory crust.
- Crisp Bacon: A hallmark of many traditional versions, adding a slice of precooked bacon under or over the cheese adds a smoky saltiness that balances the richness of the dairy.
- Yellow Mustard or Cayenne: A tiny swipe of mustard or a pinch of cayenne pepper provides a necessary acidic or spicy counterpoint to the heavy cheese, brightening the overall flavor.
Variations and Smart Swaps
While the traditional american cheese dreams recipe is perfect in its simplest form, there are many ways to customize the dish to suit your current cravings or what you have available in the refrigerator.
- The Deluxe Tomato Version: Place a thin slice of heirloom tomato under the cheese before broiling. The tomato softens and releases its juices, creating a flavor profile similar to a grilled cheese dipped in tomato soup.
- Protein Upgrades: Instead of bacon, try using thin slices of deli ham, smoked turkey, or even a spoonful of tuna salad for a “tuna dream” variation.
- Spice it Up: Add sliced jalapeños or a drizzle of hot honey over the finished sandwich to give this comfort food classic a modern, spicy twist.
- Bread Alternatives: If you prefer a heartier base, sourdough or rye bread offers a tangy flavor that cuts through the richness of the cheddar beautifully.
How to Make a Traditional American Cheese Dream
Step 1: Prepare the Bread Base
Start by generously buttering one side of each bread slice. For this traditional american cheese dreams recipe, it is vital to spread the butter all the way to the edges. This ensures that the entire slice toasts evenly and prevents the crusts from burning before the center is crisp. If you are using a broiler, place the buttered side up on a baking sheet and toast lightly for 1-2 minutes until just barely pale gold.
Step 2: Layer the Flavors
Flip the bread over (if pan-frying) or keep it on the sheet. Apply a very thin layer of mustard if desired, then layer your protein, such as precooked bacon. Cover the toppings with thick slices or a generous mound of shredded cheddar cheese. Using shredded cheese often results in a better “melt” and more surface area for those coveted crispy brown spots to form under the heat.
Step 3: Broil Until Bubbling
Place the assembled sandwiches under the broiler. Watch them closely, as the transition from perfectly melted to burnt happens quickly. You are looking for the cheese to be completely melted, bubbling in the center, and beginning to develop dark brown “freckles” across the surface. This broiled cheese sandwich technique is what separates a “dream” from a standard grilled cheese, giving it a unique toasted aroma.
Step 4: Rest and Serve
Allow the sandwiches to rest for about sixty seconds after removing them from the oven. This brief rest period allows the cheese to set slightly so it doesn’t slide off the bread when you take your first bite. It also ensures the bottom of the bread remains crisp rather than steaming against the plate. Serve while the cheese is still hot and stretchy.
Pro Tips for Success
- Tip: Always use room temperature butter. Trying to spread cold butter on soft bread will tear the slices, leading to uneven toasting and a messy presentation.
- Tip: Grate your own cheese. Pre-shredded cheese is often coated in potato starch or cellulose to prevent clumping, which can hinder the smooth, creamy melt you want for this recipe.
- Tip: Don’t skip the precooking. If you are adding bacon or ham, ensure it is already cooked or warmed, as the broiler time is too short to cook raw meat.
- Tip: Use a middle oven rack. If the bread is too close to the heating element, the top will char before the cheese has a chance to melt through to the bread.
How to Serve Cheese Dreams
Serving a traditional american cheese dreams recipe is all about leaning into the comfort food theme. Traditionally, these were often served at “bridge luncheons” or as a quick Sunday supper. To make it a full meal, consider the following pairings.
Classic Accompaniments
Nothing beats the pairing of melted cheese and a hot bowl of tomato basil soup. The acidity of the soup perfectly cuts through the fat of the vintage recipe. For a lighter touch, a crisp green salad with a simple vinaigrette provides a refreshing contrast to the warm, heavy sandwich. Pickles—whether dill spears or sweet bread-and-butter chips—are also a mandatory side for many traditionalists.
Garnishes
A sprinkle of fresh chives or parsley right before serving adds a pop of color and a mild herbal note that elevates the presentation. If you enjoy a bit of tang, serving these with a side of chili sauce or even a small dollop of mango chutney can offer a surprising and delicious flavor profile.
Storage and Make-Ahead
Because this dish relies heavily on the contrast between crispy bread and melted cheese, it is best enjoyed immediately. However, if you have leftovers, they can be managed with the right technique.
Storing Leftovers
Store any leftover sandwiches in an airtight container in the refrigerator for up to two days. Avoid stacking them directly on top of each other while warm, as the steam will make the bread soggy.
Reheating
To revive the crunch, avoid the microwave. Instead, place the cheese dream in a toaster oven or a dry skillet over medium-low heat. Cover the skillet with a lid for a minute to help the cheese melt, then remove the lid to let the bread crisp back up. This preserves the integrity of the traditional american cheese dreams recipe better than any other method.
Final Thoughts
The traditional american cheese dreams recipe is a testament to the fact that you don’t need expensive ingredients to create a memorable and satisfying meal. By mastering the simple technique of broiling an open-faced sandwich, you unlock a world of texture and flavor that elevates the humble grilled cheese to something truly special. It is a comfort food classic that has stood the test of time for a reason. Whether you stick to the classic bacon and cheddar combination or experiment with your own modern swaps, this dish is sure to become a repeat favorite in your kitchen.
Frequently Asked Questions
What is the difference between a grilled cheese and a cheese dream?
A grilled cheese is typically a closed sandwich cooked in a skillet, whereas a traditional american cheese dreams recipe is often served open-faced and finished under a broiler. The broiling process creates a unique bubbling texture on the cheese and a specific type of crunch on the bread that pan-frying alone cannot achieve.
Can I make this recipe in an air fryer?
Yes, the air fryer is an excellent tool for making a broiled cheese sandwich. Simply place the assembled sandwich in the basket and air fry at 375°F for about 4-6 minutes. The circulating air will make the bread exceptionally crispy while melting the cheese perfectly. Just be sure the cheese is secured so it doesn’t fly off!
Why is my bread getting soggy?
Soggy bread is usually caused by using bread that is too thin or by adding “wet” ingredients like tomatoes directly onto the bread without a barrier. To prevent this, toast the buttered bread slightly before adding your toppings, or place a slice of cheese or a piece of cooked bacon down first to act as a moisture shield.
What is the best cheese to use for a cheese dream?
For a traditional american cheese dreams recipe, sharp cheddar is the gold standard because of its high fat content and strong flavor. However, Gruyère, Fontina, or even a high-quality Monterey Jack are excellent choices if you are looking for a superior melt and a slightly different flavor profile.
Is this recipe suitable for making ahead of time?
While you can assemble the sandwiches (bread, toppings, and cheese) a few hours in advance and keep them covered in the fridge, you should wait to broil or fry them until right before you plan to eat. The magic of the “dream” is in the immediate contrast between the hot, molten cheese and the crisp toast.
Classic Vegetarian Cheese Dreams

Cheese Dreams are a nostalgic American comfort food staple. This version features thick-cut sourdough topped with a rich blend of sharp cheddar and nutty Gruyere, broiled until bubbling and golden. It is a sophisticated yet simple take on the open-faced grilled cheese.
- 4 slices thick-cut sourdough bread
- 2 tablespoons unsalted butter, softened
- 1 cup sharp cheddar cheese, shredded
- 1/2 cup Gruyere cheese, shredded
- 1 large heirloom tomato, thinly sliced
- 1/2 teaspoon smoked paprika
- 1 tablespoon fresh chives, finely chopped
- 1Preheat your oven broiler to the high setting and position the top rack about 6 inches from the heat source.
- 2Arrange the sourdough slices on a large baking sheet and spread the softened butter evenly over the top side of each slice.
- 3Place the baking sheet under the broiler for 1 to 2 minutes, or until the bread is lightly toasted and golden brown.
- 4Remove the sheet from the oven and carefully flip each slice of bread over.
- 5Divide the shredded cheddar and Gruyere cheeses equally among the un-toasted sides of the bread.
- 6Top each slice with a tomato slice and a light dusting of smoked paprika.
- 7Return the sandwiches to the broiler for another 2 to 3 minutes until the cheese is completely melted, bubbly, and shows small brown spots.
- 8Remove from the oven, garnish with fresh chives, and serve immediately while hot.
Keywords: cheese dreams, open faced grilled cheese, vegetarian lunch, easy dinner, melted cheese sandwich


