
Butterfinger Balls

When it comes to satisfying a sweet tooth, few combinations are as legendary as chocolate and peanut butter. While a standard truffle is always a win, adding the iconic, flaky crunch of a classic candy bar takes things to an entirely different level. These easy butterfinger peanut butter balls are the ultimate no-bake dessert for anyone who loves a texture-rich treat that requires zero time in the oven. They offer a creamy, melt-in-your-mouth interior studded with crispy bits of toffee-like candy, all encased in a smooth, snappy chocolate shell.
Whether you are preparing for a holiday cookie exchange or just need a quick weekend project with the kids, this recipe is remarkably approachable. By skipping the baking process, you keep the kitchen cool and the preparation stress-free. The beauty of these homemade truffles lies in their simplicity; with just a few pantry staples and a handful of candy bars, you can create a high-end confection that tastes like it came from a professional candy shop.
Why This Recipe Is a Keeper
- Incredible Texture: The contrast between the silky peanut butter center and the jagged, crunchy Butterfinger pieces creates a sophisticated eating experience that beats standard peanut butter balls.
- No-Bake Convenience: You won’t need to touch your oven, making this an ideal chocolate peanut butter candy for hot summer days or busy holiday seasons when oven space is at a premium.
- Make-Ahead Friendly: These treats actually benefit from time in the fridge, allowing you to prepare them days in advance of a party or gathering without any loss in quality.
- Customizable Coating: While milk chocolate is a traditional choice, the base recipe is sturdy enough to handle dark chocolate, white chocolate, or even a colorful candy melt drizzle for special occasions.
Ingredients You’ll Need
To achieve the perfect balance of sweetness and structural integrity, choosing the right ingredients is key. This recipe relies on high-fat components to keep the center moist while using dry sugars and crushed candies to provide the necessary body for rolling.
- Creamy Peanut Butter: This acts as the flavorful base. It is best to use a standard commercial brand rather than a “natural” variety that separates, as the added oils in natural PB can make the balls too soft to hold their shape.
- Unsalted Butter: Softened butter adds a rich, velvety mouthfeel and helps the filling set up firmly once refrigerated.
- Powdered Sugar: Also known as confectioners’ sugar, this provides sweetness and acts as the binding agent that transforms the peanut butter into a rollable dough.
- Butterfinger Candy Bars: You will want these finely crushed. They provide the signature “honeycombed” crunch and a hit of extra molasses-peanut flavor that defines the recipe.
- Chocolate Chips: Whether you prefer milk, semi-sweet, or dark chocolate, these provide the protective outer coating. Using a high-quality chip ensures a better melt and a smoother finish.
- Coconut Oil or Shortening: A small amount added to the melting chocolate helps thin it out, making it easier to dip the balls and giving the final shell a beautiful glossy sheen.
Simple Swaps and Variations
While the classic version is hard to beat, you can easily adapt these easy butterfinger peanut butter balls to suit your personal preferences or what you have available in your pantry.
- Dark Chocolate Elevation: If you find the recipe too sweet, swap the milk chocolate coating for a 60% or 70% cacao dark chocolate. The bitterness of the cocoa balances the sugary candy interior perfectly.
- Extra Nutty Crunch: For even more texture, you can add a tablespoon of finely chopped roasted peanuts to the dough. This doubles down on the savory-salty profile.
- White Chocolate Drizzle: To make these look extra festive, melt a small amount of white chocolate and drizzle it over the set milk chocolate shells for a professional, striped appearance.
- Alternative Candy Bars: If you can’t find Butterfingers, any crispy, toffee-based candy bar can work as a substitute, though the flavor profile will shift slightly toward caramel.
How to Make Easy Butterfinger Peanut Butter Balls
Step 1: Cream the Peanut Butter and Butter
Start by combining your softened butter and creamy peanut butter in a large mixing bowl. It is helpful to use a hand mixer or a stand mixer to ensure these two fats are completely emulsified. You are looking for a pale, fluffy consistency. Taking the time to cream them properly ensures that the finished holiday treat recipe won’t have any greasy pockets or streaks of unmixed butter.
Step 2: Incorporate the Dry Ingredients
Gradually add the powdered sugar and the finely crushed Butterfinger pieces to the peanut butter mixture. Turn your mixer to a low speed to avoid a cloud of sugar escaping the bowl. As the sugar integrates, the mixture will transition from a soft paste to a thick, malleable dough. If the dough feels too sticky to handle, you can add a touch more sugar, but remember that it will firm up significantly once it is chilled.
Step 3: Roll and Chill the Centers
Scoop out small portions of the dough—about a tablespoon each—and roll them between your palms to form smooth, even spheres. Place them on a parchment-lined baking sheet. This is a critical stage: the balls must be chilled in the refrigerator for at least 30 to 60 minutes. Chilling prevents the centers from melting or falling apart when they hit the warm, melted chocolate later on.
Step 4: Melt the Chocolate Coating
Using either a double boiler or the microwave in short 30-second bursts, melt your chocolate chips along with the coconut oil. Stir frequently to ensure the heat is distributed evenly and the chocolate doesn’t scorch. You want a completely smooth, liquid consistency that flows easily off a spoon. Let the chocolate sit for a minute or two to cool slightly so it isn’t piping hot when you begin the dipping process.
Step 4: Dip and Set
Using a fork or a specialized dipping tool, submerge each chilled peanut butter ball into the chocolate. Lift it out, tapping the fork against the side of the bowl to let the excess chocolate drip away. Place the coated ball back onto the parchment paper. While the chocolate is still wet, you can sprinkle a few extra Butterfinger crumbs on top for a visual cue of what is inside. Allow them to set completely at room temperature or in the fridge until the shell is firm.
Pro Tips for the Best Results
- Use a Cookie Scoop: To ensure all your easy butterfinger peanut butter balls are the same size, use a small 1-tablespoon cookie scoop. This makes for a more professional presentation and ensures the chocolate-to-filling ratio is consistent.
- Don’t Skip the Shortening: Adding a little coconut oil or shortening to your chocolate isn’t just for shine; it makes the chocolate more “forgiving” and less likely to crack when you bite into the ball.
- Keep the Dough Cold: If you are making a large batch, keep half of the rolled balls in the fridge while you dip the first half. If the dough gets too warm, the balls may lose their shape or leave crumbs in your clean melted chocolate.
- Pulse the Candy: Use a food processor to crush your candy bars. You want a mix of fine powder and tiny pebbles; the powder flavors the dough, while the pebbles provide the crunch.
How to Serve These Treats
These candies are rich and decadent, so they are best served in small portions. They look beautiful arranged on a white ceramic platter or tucked into individual mini cupcake liners, which also makes them easier for guests to grab at a party. Because they are a no-bake dessert, they are quite stable at room temperature, but they provide the best “snap” when served slightly cool.
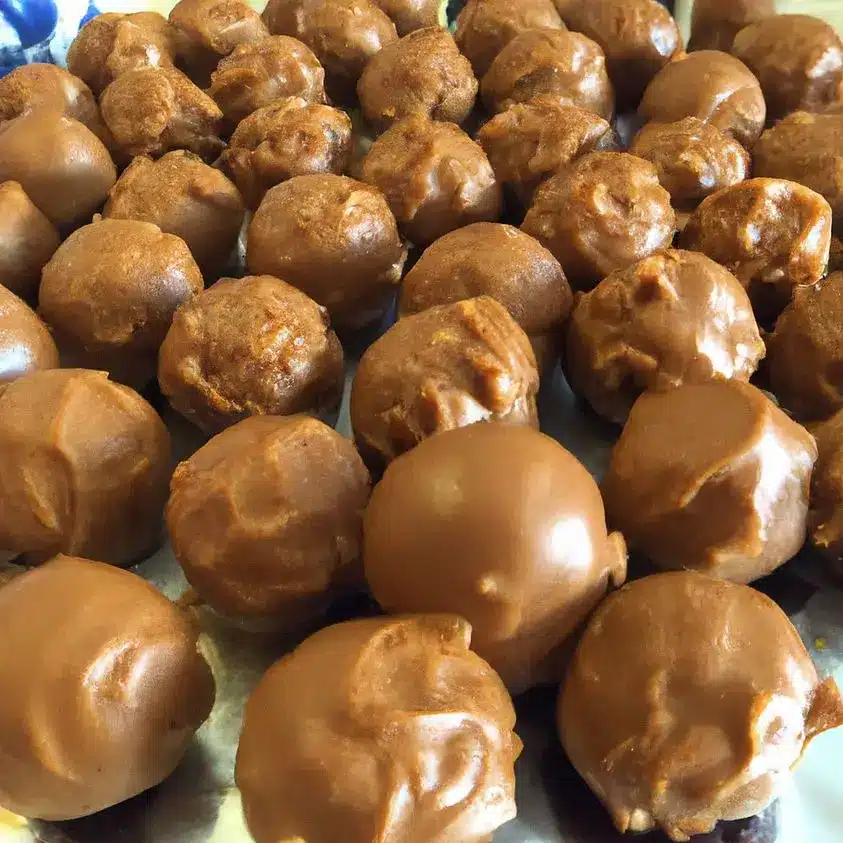
For a dessert spread, pair them with fresh berries or tart apple slices to cut through the richness of the peanut butter. They also make an excellent topping for a simple vanilla bean ice cream sundae if you crumble them up. If you are gifting them, place them in a decorative tin lined with parchment paper; they are sturdy enough to be transported without losing their charm.
Storage and Make-Ahead
Storing Leftovers
Keep your peanut butter balls in an airtight container in the refrigerator. They will stay fresh and delicious for up to two weeks. Cold storage helps maintain the texture of the chocolate and prevents the peanut butter center from becoming too soft.
Freezing Instructions
These are incredibly freezer-friendly. You can freeze the finished balls in a single layer on a tray before transferring them to a freezer-safe bag. They will last for up to three months. You can even eat them straight from the freezer for a firm, fudge-like experience!
Making It Ahead
If you are planning an event, you can make the peanut butter centers up to two days in advance and keep them chilled. When you are ready, simply melt your chocolate and do the dipping. This breaks the work into manageable steps.
Final Thoughts
Making easy butterfinger peanut butter balls is a rewarding way to create a classic candy experience right in your own kitchen. The combination of salty peanut butter, sweet chocolate, and that unmistakable Butterfinger crunch is a guaranteed winner for kids and adults alike. By following the chilling steps and using quality ingredients, you’ll end up with a batch of no-bake truffles that look and taste like they came from a high-end boutique. Enjoy the process and the inevitable praise that comes with sharing these treats!
Frequently Asked Questions
Can I use natural peanut butter for this recipe?
It is generally not recommended to use “natural” peanut butter that requires stirring. The lack of stabilizers in natural varieties often leads to a greasy dough that won’t hold its shape, even after chilling. For the best structural results, stick with a standard creamy brand like Jif or Skippy.
Why is my chocolate cracking when I bite into the ball?
Chocolate can become very brittle once it sets. To prevent this, ensure you added a small amount of coconut oil or vegetable shortening to the chocolate during the melting process. This softens the “snap” just enough to make it pleasant to bite through without the shell shattering.
Do I have to use a microwave to melt the chocolate?
No, you can use a double boiler on the stovetop. Simply place a heat-safe bowl over a pot of simmering water, ensuring the bottom of the bowl doesn’t touch the water. This provides a gentle, consistent heat that is less likely to seize or burn the chocolate than a microwave.
How do I get a smooth finish on the chocolate?
The secret is the “tap.” After dipping the ball, gently tap the fork holding the ball against the rim of your bowl. This vibrates the chocolate, causing it to level out and allowing the excess to fall away, leaving you with a thin, professional-looking coating.
Can I make these gluten-free?
Butterfinger bars are generally considered gluten-free in the United States, but you should always check the specific packaging of all your ingredients to be sure. If your candy bars and chocolate are certified gluten-free, this entire recipe is naturally safe for those with gluten sensitivities.
Butterfinger Balls

Deliciously sweet and crunchy, these no-bake Butterfinger Balls combine creamy peanut butter with crushed candy bars, all coated in a smooth chocolate shell.
- 1 cup creamy peanut butter
- 1/2 cup unsalted butter, softened
- 2 cups powdered sugar
- 1 1/2 cups crushed Butterfinger candy bars
- 1 1/2 cups graham cracker crumbs
- 12 oz semi-sweet chocolate chips
- 1 tablespoon coconut oil
- 1Beat together the peanut butter and softened butter in a large bowl until creamy.
- 2Incorporate the powdered sugar, crushed Butterfingers, and graham cracker crumbs until well mixed.
- 3Roll the mixture into small 1-inch balls and place them on a tray lined with parchment paper.
- 4Refrigerate the balls for 30-45 minutes to firm up.
- 5Melt the chocolate chips and coconut oil together in the microwave, stirring every 30 seconds until smooth.
- 6Dip each chilled ball into the melted chocolate using a fork, then place back on the parchment paper.
- 7Chill in the refrigerator until the chocolate coating has hardened completely.
Keywords: Butterfinger balls, no-bake dessert, peanut butter truffles, candy bar treats, holiday sweets


