
Grandma’s Homemade Chocolate Pie

There is something undeniably nostalgic about a slice of best homemade chocolate pie recipe sitting on a dessert plate, its dark, glossy filling contrasted against a cloud of fresh whipped cream. This isn’t just a simple dessert; it is a masterclass in texture, combining a crisp, buttery crust with a silky chocolate filling that manages to be both light and incredibly indulgent. Unlike store-bought versions that rely on artificial thickeners and excessive sugar, a made-from-scratch version celebrates the deep, complex notes of high-quality cocoa and real dairy.
Mastering this old-fashioned chocolate pie is a rewarding experience for any home baker, as it utilizes basic pantry staples to create a sophisticated result. By following a few key techniques—like properly tempering your eggs and allowing the custard enough time to set—you can achieve a professional-grade finish that will have everyone asking for the recipe. Whether you are serving it at a holiday gathering or a casual Sunday dinner, this pie remains the ultimate comfort food for chocolate lovers everywhere.
Why You’ll Love This Recipe
- The Ultimate Texture: This chocolate custard is engineered for a melt-in-your-mouth experience that is far superior to any instant pudding mix.
- Customizable Richness: By adjusting the type of cocoa powder or chocolate you use, you can tailor the flavor profile from sweet and milky to dark and bittersweet.
- Make-Ahead Convenience: Since the pie requires several hours to chill and set, it is the perfect dessert to prepare a day in advance for stress-free entertaining.
- Pantry-Friendly Ingredients: You likely already have the milk, eggs, sugar, and cocoa needed to whip up this chocolate cream pie at a moment’s notice.
Ingredients You’ll Need
The secret to the best homemade chocolate pie recipe lies in the quality of the dairy and the chocolate. Because the ingredient list is relatively short, each component plays a vital role in the final flavor and structural integrity of the dessert.
- Whole Milk: This provides the creamy base for the custard; using whole milk ensures a rich mouthfeel that lower-fat alternatives simply cannot replicate.
- Granulated Sugar: Beyond sweetness, sugar helps tenderize the custard and aids in the thickening process when combined with cornstarch.
- Unsweetened Cocoa Powder: For a deep chocolate flavor, use a high-quality cocoa powder. Dutch-processed cocoa will yield a darker, smoother taste.
- Egg Yolks: These are the “engine” of the custard, providing the necessary fats for a silky chocolate filling and helping the pie set firmly enough to slice.
- Cornstarch: This acts as the primary thickening agent, ensuring the pie holds its shape once sliced without becoming rubbery.
- Unsalted Butter: Whisking in a few tablespoons of cold butter at the very end adds a professional glossy sheen and a boost of richness.
- Vanilla Extract: A generous splash of vanilla acts as a flavor enhancer, making the chocolate notes taste more pronounced and well-rounded.
- Pre-baked Pie Crust: Whether you use a traditional flaky pastry or a crushed graham cracker crust, ensuring it is fully baked and cooled is essential for a clean slice.
Variations and Smart Swaps
The Cookie Crust Variation: For an extra dose of decadence, swap the standard pastry for a crushed chocolate sandwich cookie crust. The dark cocoa flavor of the cookies perfectly complements the old-fashioned chocolate pie filling.
Mexican Chocolate Twist: Add a half-teaspoon of ground cinnamon and a tiny pinch of cayenne pepper to the dry ingredients. This adds a subtle warmth that elevates the chocolate flavor to something more complex and adult.
Mocha Infusion: Dissolve one tablespoon of instant espresso powder into the milk before heating. The coffee won’t make the pie taste like a latte, but it will make the chocolate custard taste significantly deeper and more intense.
Dairy-Free Adaptation: While the texture will vary slightly, you can use full-fat canned coconut milk in place of the whole milk and a plant-based butter substitute for a dairy-friendly version of this classic treat.
How to Make the Best Homemade Chocolate Pie
Step 1: Whisk the Dry Ingredients and Milk
In a heavy-bottomed saucepan, whisk together the sugar, cocoa powder, cornstarch, and a pinch of salt. Slowly pour in the whole milk while whisking constantly to ensure no lumps of cocoa or starch remain. It is much easier to get a smooth base while the liquid is cold than after it begins to heat up. This foundational step is crucial for achieving that signature silky chocolate filling.
Step 2: Cook Until Thickened and Bubbly
Place the saucepan over medium heat and cook the mixture, stirring frequently with a heat-resistant spatula or whisk. You want to reach a point where the liquid begins to thicken and just starts to bubble. Once it reaches a boil, let it cook for about one minute while stirring vigorously. This “activates” the cornstarch, ensuring your best homemade chocolate pie recipe will actually set properly once chilled.
Step 3: Temper the Egg Yolks
Tempering is the most technical part of the process, but it is easy once you know the trick. Place your egg yolks in a separate medium bowl. Very slowly, drizzle about one cup of the hot chocolate mixture into the yolks while whisking the yolks rapidly. This gradually raises the temperature of the eggs so they don’t scramble when you add them to the main pot. Once combined, pour the egg mixture back into the saucepan.
Step 4: The Final Thickening
Return the saucepan to the heat and cook for another two minutes. The custard should become very thick, similar to the consistency of a heavy pudding. It should coat the back of a spoon thickly. Do not rush this stage; the eggs need this brief cook time to provide the structure necessary for a sliceable chocolate cream pie. Remove the pan from the heat immediately after it reaches the desired thickness.
Step 5: Add the Butter and Flavorings
While the custard is still hot, whisk in the cold butter and the vanilla extract. The butter will melt into the mixture, creating a beautiful gloss and adding a velvety finish to the chocolate custard. If you notice any small lumps, you can pass the entire mixture through a fine-mesh sieve into a clean bowl for a truly professional result.
Step 6: Fill and Chill the Pie
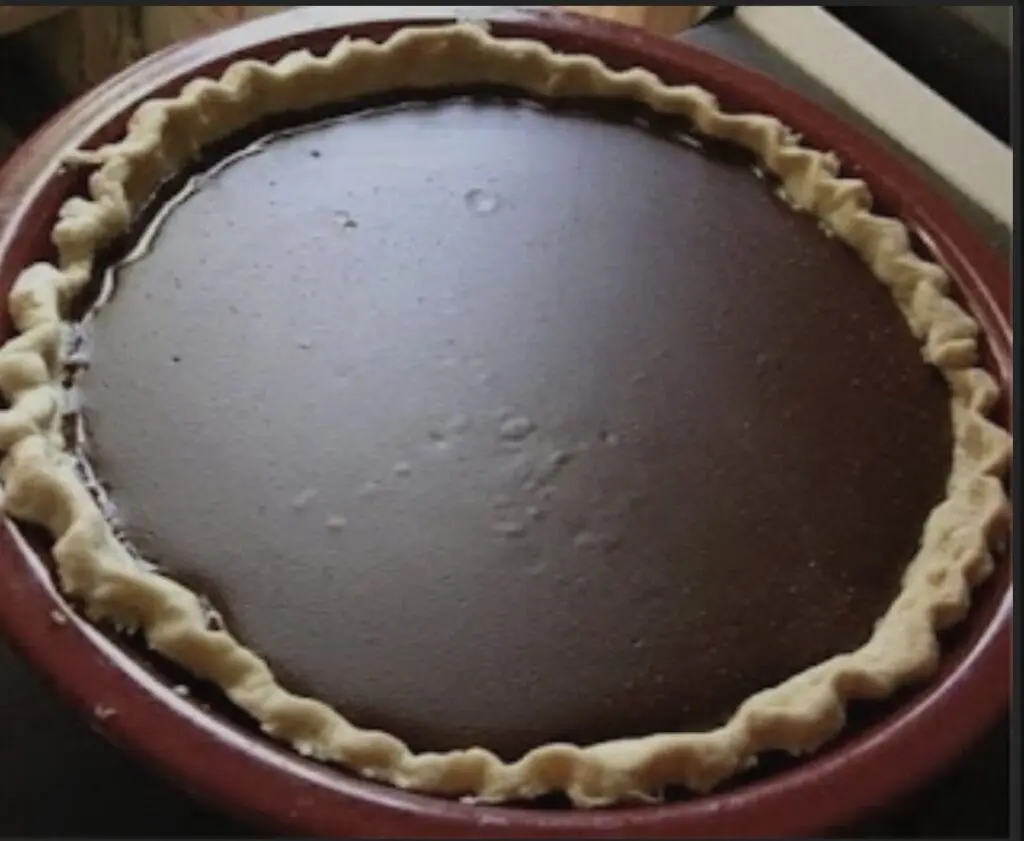
Pour the warm filling into your prepared and cooled homemade pie crust. Smooth the top with a spatula. To prevent a “skin” from forming on the surface, press a piece of plastic wrap directly onto the surface of the filling. Refrigerate the pie for at least four hours, though overnight is best. The cold environment allows the starches and fats to solidify, ensuring the pie is firm enough to serve.
Pro Tips for Success
- Tip: Use a heavy-bottomed saucepan to prevent the chocolate from scorching on the bottom of the pan, which can happen quickly with dairy-based custards.
- Tip: Sift your cocoa powder before adding it to the pot. Cocoa is notoriously lumpy, and sifting ensures a perfectly smooth chocolate cream pie without any bitter dry spots.
- Tip: Be patient during the cooling process. If you cut into the pie before it has fully chilled for at least four hours, the filling will likely run, losing its beautiful shape.
- Tip: When making the homemade pie crust, ensure it is fully “blind baked” (baked without filling) and completely cool before adding the hot custard to maintain crispness.
- Tip: For the best whipped cream topping, chill your bowl and beaters in the freezer for ten minutes before whipping the heavy cream.
Troubleshooting Common Problems
Why Is My Filling Too Runny?
If your pie doesn’t hold its shape when sliced, the most common culprit is undercooking the cornstarch or failing to let the pie chill long enough. The mixture must reach a full boil for at least a minute to ensure the starch molecules expand and trap the liquid. If the pie is still runny after 8 hours of chilling, it likely wasn’t cooked long enough on the stovetop.
How Do I Fix Lumpy Custard?
Lumps usually occur if the heat was too high or if the eggs weren’t tempered correctly. If you see bits of cooked egg or lumps of starch, don’t panic. Simply pour the hot filling through a fine-mesh strainer before pouring it into the crust. This will catch any imperfections and save your silky chocolate filling.
How to Serve Your Chocolate Pie
Presentation is key when serving the best homemade chocolate pie recipe. The classic way to finish this dessert is with a generous layer of stabilized whipped cream. You can either spread the cream over the entire surface or use a piping bag with a star tip to create elegant dollops around the perimeter.
Garnishes
To give the pie a professional “bakery-style” look, use a vegetable peeler to create chocolate curls from a bar of semi-sweet chocolate. Sprinkle these over the whipped cream just before serving. A dusting of cocoa powder or a few fresh raspberries can also add a beautiful pop of color and a tart contrast to the rich old-fashioned chocolate pie filling.
Complementary Sides
While this pie is a star on its own, it pairs beautifully with a strong cup of black coffee or a glass of cold milk. For an extra indulgent experience, serve a slice alongside a small scoop of salted caramel ice cream to balance the deep chocolate notes.
Storage and Make-Ahead
Storing Leftovers
Because of the high dairy and egg content, this chocolate cream pie must be kept refrigerated. Cover any leftovers loosely with plastic wrap or store them in a pie carrier. The pie will remain delicious for up to three or four days, though the crust may begin to soften slightly after the second day.
Making It Ahead
This is an ideal make-ahead dessert. You can prepare the custard and fill the crust up to 24 hours in advance. However, wait to add the whipped cream topping until you are within an hour or two of serving. This prevents the cream from deflating or weeping into the chocolate layer.
Final Thoughts
Creating the best homemade chocolate pie recipe from scratch is a culinary tradition that brings joy to any table. By focusing on a few technical details like tempering and chilling, you transform simple staples into an extraordinary chocolate custard that stands the test of time. This pie is more than just a dessert; it’s a celebration of classic flavors and the simple pleasure of a perfectly executed pastry. Once you taste the difference that real ingredients make, you’ll never go back to a box mix again.
Frequently Asked Questions
Can I use a store-bought crust for this recipe?
Absolutely. While a homemade pie crust offers the best flavor and texture, a high-quality store-bought frozen crust or a pre-made graham cracker crust works perfectly well. Just be sure to follow the package instructions for “blind baking” the crust before you add the chocolate filling, as the filling itself does not require further baking.
Why did a skin form on top of my chocolate filling?
A skin forms on custard when the surface is exposed to air as it cools, causing the proteins to dry out. To prevent this, always press a piece of plastic wrap or wax paper directly onto the surface of the hot chocolate custard immediately after pouring it into the pie shell. Remove the wrap only once the pie is fully chilled and you are ready to top it with cream.
Can I freeze this chocolate pie?
Freezing is generally not recommended for custard-based pies like this one. The process of freezing and thawing can cause the silky chocolate filling to break down, resulting in a grainy texture or a watery mess. For the best experience, enjoy the pie fresh from the refrigerator within a few days of making it.
What is the difference between Dutch-processed and natural cocoa?
Natural cocoa powder is acidic and has a sharp, intense chocolate flavor, while Dutch-processed cocoa has been treated with an alkalizing agent to neutralize that acidity. For this old-fashioned chocolate pie, Dutch-processed cocoa will provide a darker color and a smoother, more mellow flavor that many people prefer in a cream pie.
Can I make this pie with whole eggs instead of just yolks?
Using only the yolks is what gives this recipe its incredibly silky chocolate filling. Whole eggs contain the whites, which can make the custard feel more like a firm flan or a bread pudding rather than a creamy pie filling. The extra fat in the yolks is essential for that rich, luxurious mouthfeel that defines the best chocolate pies.
Grandma’s Homemade Chocolate Pie

This nostalgic recipe features a rich, velvety chocolate custard filling poured into a flaky, buttery crust. It is a timeless American classic that is perfect for any gathering.
- 1 (9-inch) pie crust, baked and cooled
- 1 1/2 cups granulated sugar
- 1/3 cup unsweetened cocoa powder
- 1/3 cup cornstarch
- 1/4 teaspoon salt
- 3 cups whole milk
- 3 large egg yolks, beaten
- 2 tablespoons unsalted butter
- 1 teaspoon vanilla extract
- 1In a medium saucepan, whisk together the granulated sugar, cocoa powder, cornstarch, and salt until well combined.
- 2Slowly whisk in the milk until the mixture is smooth and free of lumps.
- 3Cook over medium heat, stirring constantly with a whisk or wooden spoon, until the mixture thickens and comes to a boil. Boil for 1 minute while stirring.
- 4Remove the pan from the heat. Gradually whisk about 1/2 cup of the hot cocoa mixture into the beaten egg yolks to temper them.
- 5Pour the egg yolk mixture back into the saucepan. Return to a gentle boil and cook for an additional 2 minutes, stirring constantly.
- 6Remove from heat and stir in the butter and vanilla extract until the butter is melted and the filling is smooth.
- 7Pour the hot filling into the pre-baked pie crust.
- 8Place a piece of plastic wrap directly onto the surface of the chocolate filling to prevent a skin from forming.
- 9Refrigerate for at least 4 hours or until completely set before slicing.
Keywords: chocolate pie, grandma's recipe, homemade chocolate pie, custard pie, classic dessert, old fashioned pie


