Salted Caramel Apple Cups
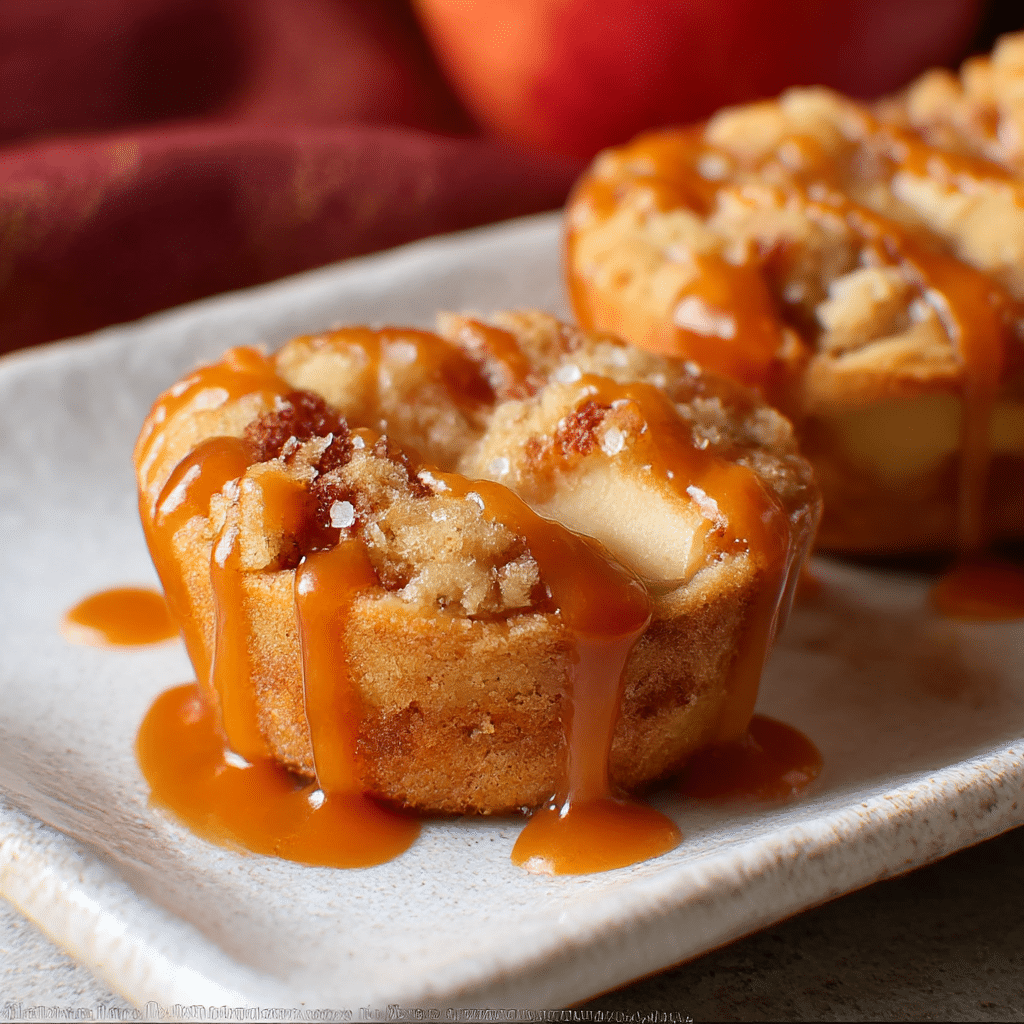
Discover how to make Salted Caramel Apple Cups with a perfect blend of sweet, salty, and fresh flavors in this easy, delicious recipe! These delightful treats combine the natural crispness of apples, the indulgent richness of caramel, and a hint of sea salt for a dessert that feels both cozy and elegant. Whether you’re looking for a fun fall dessert or a quick snack that impresses, these Salted Caramel Apple Cups bring celebration-worthy taste in every bite.
Why You’ll Love This Recipe
- Balanced flavors: The perfect mix of sweet caramel and salty sea salt amps up the natural apple taste.
- Simple ingredients: Uses everyday pantry staples that come together quickly for a fuss-free treat.
- Versatile and customizable: Easy to tweak according to your dietary preferences or what’s on hand.
- Eye-catching presentation: Individual servings inside hollowed apples make for a charming dessert display.
- Healthy-ish indulgence: Apples provide fiber and freshness, making it a better choice than many heavy desserts.
Ingredients You’ll Need
This Salted Caramel Apple Cups recipe uses simple, wholesome ingredients that each bring something special to the table — from crisp apples perfect for scooping, to rich caramel sauce that makes every bite irresistible.
- Crisp apples: Choose firm varieties like Granny Smith or Honeycrisp for optimal texture and slightly tart flavor.
- Salted caramel sauce: Ready-made or homemade, it adds the signature sweet and salty contrast.
- Sea salt: Sprinkled lightly to enhance all the flavors without overwhelming sweetness.
- Butter: Adds richness when cooking or warming caramel, ensuring smooth texture.
- Lemon juice: Prevents the apples from browning and adds a subtle zing.
- Cinnamon: Optional but recommended for warm spice notes that complement apples perfectly.
Variations for Salted Caramel Apple Cups
Feel free to make this recipe your own! These Salted Caramel Apple Cups are easy to customize based on taste, dietary needs, or what you have on hand, so don’t hesitate to try these variations.
- Dairy-free option: Use coconut oil or vegan butter and a dairy-free caramel sauce to keep it plant-based.
- Nutty twist: Sprinkle crushed pecans or walnuts on top for crunch and added flavor.
- Spiced up: Add a pinch of nutmeg or ginger to the caramel sauce for an extra layer of warmth.
- Frozen version: Prepare apple cups ahead and freeze for a cool, refreshing dessert on demand.
- Cheesecake surprise: Add a dollop of cream cheese mixture inside for a luscious creamy filling vibe.

How to Make Salted Caramel Apple Cups
Step 1: Prepare the apples
Start by washing and drying your apples thoroughly. Carefully core each apple, making sure to remove seeds and create enough space to hold the caramel filling. Lightly brush the insides with lemon juice to prevent browning.
Step 2: Warm the caramel sauce
If using store-bought caramel, gently warm it over low heat or in a microwave-safe bowl until pourable but not hot. For homemade caramel, melt sugar with butter and cream until golden and smooth, stirring continuously to avoid burning.
Step 3: Fill the apple cups
Pour or spoon the salted caramel sauce inside each hollowed apple, filling up to just below the rim. If you’d like, sprinkle a dash of sea salt on top to heighten the flavor contrast.
Step 4: Bake (optional)
Place the filled apples on a lined baking sheet and bake in a preheated oven at 350°F (175°C) for 10–15 minutes to warm through and slightly soften the apples. This step is optional but helps meld the flavors beautifully.
Step 5: Serve and enjoy
Remove from oven or serve immediately after filling for a fresh, crisp bite. Optionally, garnish with cinnamon, chopped nuts, or whipped cream for an elegant finish.
Pro Tips for Making Salted Caramel Apple Cups
- Choose the right apples: Firmer apples hold their shape and texture better when baked or filled.
- Use fresh lemon juice: This helps maintain the bright color of your apple cups and prevents browning.
- Don’t overfill: Leave a small gap at the top so caramel doesn’t spill over during baking or serving.
- Warm caramel gently: Avoid high heat to prevent burning or separating the sauce.
- Try different salts: Flaky sea salt works best to sprinkle on top for bursts of salty crunch.
How to Serve Salted Caramel Apple Cups
Garnishes
Top your Salted Caramel Apple Cups with a sprinkle of toasted nuts, a pinch of ground cinnamon, or a swirl of whipped cream to add texture and elevate the flavor profile.
Side Dishes
Pair these cups with vanilla ice cream for a classic pairing, or serve alongside a warm chai latte to complement the spices and caramel perfectly.
Creative Ways to Present
Serve your apple cups on a rustic wooden board lined with parchment paper, or place them inside colorful mini baking dishes for an inviting, festive vibe that’s sure to wow guests.
Make Ahead and Storage
Storing Leftovers
Keep leftover Salted Caramel Apple Cups in an airtight container in the refrigerator for up to 2 days to preserve freshness and flavor.
Freezing
Freeze apple cups before baking by wrapping tightly in plastic wrap and aluminum foil. Thaw in the refrigerator overnight and bake as instructed for a fresh-out-of-the-oven taste.
Reheating
Warm apple cups gently in the microwave or oven at low temperature to avoid drying out the fruit or toughening the caramel.
FAQs
Can I use any type of apple for Salted Caramel Apple Cups?
While you can technically use any apple, firmer varieties like Granny Smith, Honeycrisp, or Fuji work best because they hold their shape well when filled and baked.
Is it possible to make Salted Caramel Apple Cups dairy-free?
Yes! Substitute butter with vegan butter or coconut oil and use a dairy-free caramel sauce alternative to make this recipe suitable for dairy-free diets.
How long do Salted Caramel Apple Cups last?
They stay fresh in the refrigerator for up to 2 days. For longer storage, freezing is recommended, and then reheating before serving.
Can I prepare these in advance for a party?
Absolutely! You can prepare and fill the apple cups ahead of time, then bake and serve just before guests arrive for a quick, impressive dessert.
What’s the best way to prevent apples from browning?
Coating the apple interiors with fresh lemon juice immediately after coring slows down oxidation and keeps them looking fresh.
Final Thoughts
Now that you have this simple yet stunning Salted Caramel Apple Cups recipe, it’s time to bring those irresistible sweet and salty flavors into your kitchen! Whether for a cozy night in or a special gathering, these cups are sure to delight and become an instant favorite. Give it a try and enjoy every delicious bite!
Related Posts
PrintSalted Caramel Apple Cups
Salted Caramel Apple Cups are an easy and elegant dessert featuring crisp apples filled with rich salted caramel sauce, a touch of sea salt, and optional warm spices. This recipe offers a balanced blend of sweet, salty, and fresh flavors, making it a perfect treat for fall gatherings or quick snacks. Individual apple cups create an eye-catching presentation with a healthier indulgence thanks to fiber-rich apples.
- Prep Time: 15 minutes
- Cook Time: 10-15 minutes (optional baking)
- Total Time: 25-30 minutes
- Yield: 4 servings 1x
- Category: Appetizers
- Method: Baking
- Cuisine: American
- Diet: Gluten Free
Ingredients
Apples
- 4 firm apples (such as Granny Smith or Honeycrisp)
- 1 tablespoon lemon juice
Salted Caramel Sauce
- 1 cup salted caramel sauce (store-bought or homemade)
- 1 tablespoon butter (optional, for warming caramel)
- Sea salt, to taste (for sprinkling)
Optional Add-ins and Garnishes
- 1/2 teaspoon ground cinnamon
- Crushed pecans or walnuts, for topping
- Whipped cream, for serving
Instructions
- Prepare the apples: Wash and dry your apples thoroughly. Carefully core each apple, removing all seeds and creating enough hollow space to hold the caramel filling. Lightly brush the insides with lemon juice to prevent browning.
- Warm the caramel sauce: Gently warm the caramel sauce over low heat on the stove or in a microwave-safe bowl until it becomes pourable but not hot. If making homemade caramel, melt sugar with butter and cream while stirring continuously until golden and smooth, avoiding burning.
- Fill the apple cups: Pour or spoon the warmed salted caramel sauce inside each hollowed apple, filling up to just below the rim. Sprinkle a light dash of sea salt on top to enhance the sweet-salty flavor contrast.
- Bake (optional): Place the filled apples on a lined baking sheet and bake in a preheated oven at 350°F (175°C) for 10–15 minutes. This softens the apples slightly and melds flavors but can be skipped if you prefer a fresh crisp bite.
- Serve and enjoy: Remove from the oven or serve immediately after filling. Optionally, garnish with cinnamon, chopped nuts, or whipped cream to enhance texture and flavor.
Notes
- Choose firm apples like Granny Smith or Honeycrisp for the best texture and flavor.
- Use fresh lemon juice to prevent apple browning and maintain a bright appearance.
- Do not overfill the apple cups; leave a small gap at the top to avoid spillage.
- Warm caramel gently to prevent burning or separation of the sauce.
- Sprinkle flaky sea salt for a burst of salty crunch that complements the sweetness.
Nutrition
- Serving Size: 1 apple cup
- Calories: 250
- Sugar: 30g
- Sodium: 150mg
- Fat: 8g
- Saturated Fat: 5g
- Unsaturated Fat: 2g
- Trans Fat: 0g
- Carbohydrates: 40g
- Fiber: 4g
- Protein: 1g
- Cholesterol: 15mg
Keywords: Salted Caramel Apple Cups, caramel apple dessert, fall dessert, easy apple recipe, caramel treats, healthy dessert