How to Perfect Dutch Oven Sourdough Bread
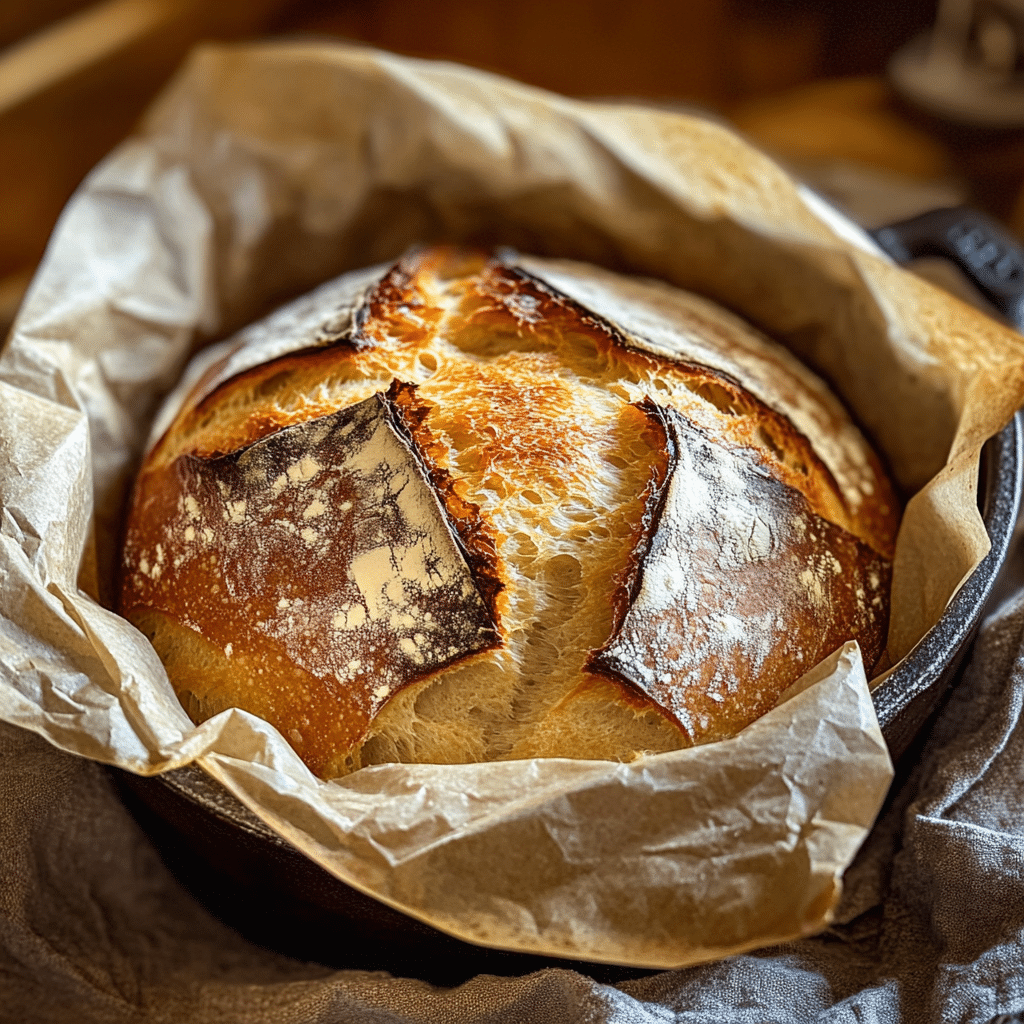
Discover the joy of baking crunchy, flavorful Dutch Oven Sourdough Bread right at home with this easy, step-by-step guide designed to deliver perfect results every time. This classic recipe blends the rustic charm of sourdough’s tangy crumb with the irresistible crust that only a cast iron Dutch oven can provide. Whether you’re a seasoned baker or a curious beginner, mastering Dutch Oven Sourdough Bread will elevate your baking game and fill your kitchen with comforting aromas and unmatched taste.
Why You’ll Love This Recipe
- Effortless crust creation: The Dutch oven traps steam perfectly to develop a crunchy, golden crust that is hard to resist.
- Deep, tangy flavor: Long fermentation enhances the natural sourness for a complex, flavorful loaf.
- Simple ingredients: Just flour, water, salt, and starter combine for a wholesome, authentic bread.
- Perfect for beginners: Step-by-step guidance makes this artisanal bread achievable for everyone.
- Versatile and adaptable: Great for sandwiches, toast, or alongside soups and salads.
Ingredients You’ll Need
The magic of Dutch Oven Sourdough Bread comes from using straightforward yet essential ingredients that work in harmony to create incredible texture and flavor. Each component plays a unique role in building the loaf’s structure and taste.
- Bread flour: High-protein flour provides strength and elasticity for a chewy crumb.
- Sourdough starter: The heart of the recipe, offering natural leavening and tangy flavor.
- Water: Hydrates the flour and activates gluten development for the right consistency.
- Salt: Enhances flavor and tightens gluten for better dough structure.
Variations for Dutch Oven Sourdough Bread
This recipe is wonderfully flexible, allowing you to experiment with flavors, textures, and dietary preferences. Feel free to tweak it based on what ingredients you have on hand or your taste goals, making every bake uniquely yours.
- Whole wheat boost: Substitute part of the bread flour with whole wheat for nuttier flavor and more fiber.
- Seeded delight: Add sunflower, flax, or sesame seeds to the dough or on top for added crunch and nutrition.
- Herb infusion: Mix in fresh rosemary, thyme, or garlic powder to create an aromatic twist.
- Gluten-free option: Use a gluten-free flour blend with xanthan gum and adjust hydration carefully.
- Sweet touch: Incorporate a tablespoon of honey or molasses for a hint of sweetness balancing the tang.

How to Make Dutch Oven Sourdough Bread
Step 1: Prepare Your Starter
Ensure your sourdough starter is active and bubbly by feeding it 4-6 hours before starting the dough. The starter’s health is crucial for good rise and flavor.
Step 2: Mix the Dough
Combine the bread flour and water first, mixing until no dry spots remain. Let this rest for 30 minutes to 1 hour (autolyse) to boost gluten formation before adding your active starter and salt. Then knead or fold the dough until smooth and elastic.
Step 3: Bulk Fermentation
Allow your dough to ferment at room temperature for 4 to 6 hours. During this time, perform a series of stretch and folds every 30 minutes to develop dough strength and aerate the crumb.
Step 4: Shape the Loaf
Gently turn the fermented dough onto a floured surface and shape it into a tight round boule. Use your hands to create surface tension without knocking out all the air.
Step 5: Proof Overnight
Place the shaped dough into a banneton or bowl lined with a floured kitchen towel, cover it, and refrigerate overnight for slow fermentation and flavor development.
Step 6: Preheat the Dutch Oven
About 45 minutes before baking, preheat your oven to 450°F (230°C) with the Dutch oven inside to ensure it reaches optimal temperature for baking.
Step 7: Bake Your Bread
Carefully transfer your dough to parchment paper, score the top with a sharp knife or lame, and place it inside the hot Dutch oven with the lid on. Bake for 20 minutes covered, then remove the lid and bake another 20-25 minutes until deep golden brown.
Step 8: Cool Completely
Remove the bread and let it cool on a wire rack for at least an hour to allow the crumb to set fully and the crust to crisp up more.
Pro Tips for Making Dutch Oven Sourdough Bread
- Use high-quality flour: It impacts gluten development and overall bread structure more than any other ingredient.
- Be patient with fermentation: Proper proofing ensures flavor and texture reach their full potential.
- Don’t skip scoring: It controls how your bread expands and creates a beautiful artisan look.
- Preheat the Dutch oven thoroughly: This mimics a professional steam oven environment for superior crust development.
- Use parchment paper: It makes handling and transferring dough much easier and safer.
- Allow your bread to cool: Cooling enhances crumb texture and prevents it from becoming gummy when sliced.
How to Serve Dutch Oven Sourdough Bread
Garnishes
Sprinkling flaky sea salt or brushing the crust lightly with melted butter right out of the oven adds an irresistible savory finish. For extra flair, brush with a touch of garlic-infused olive oil for aromatic appeal.
Side Dishes
This bread pairs perfectly with creamy soups, fresh garden salads, or a rustic cheese board. Its crunchy crust and chewy crumb hold up wonderfully against spreads, dips, and hearty stews.
Creative Ways to Present
Slice it thick for open-faced sandwiches or cube it for croutons. Toast it lightly and top with smashed avocado, heirloom tomatoes, or your favorite nut butter for a simple yet satisfying snack.
Make Ahead and Storage
Storing Leftovers
Keep your Dutch Oven Sourdough Bread wrapped loosely in a clean kitchen towel at room temperature to maintain crust crunch while preventing it from drying out, ideally consumed within 2-3 days.
Freezing
Slice and wrap the bread tightly in plastic wrap and aluminum foil before placing in a freezer-safe bag. Freeze for up to 3 months without significant loss of texture or flavor.
Reheating
To revive crusty freshness, sprinkle a little water on the loaf and warm it in a preheated oven at 375°F (190°C) for 10-15 minutes. Avoid microwaving to prevent a chewy texture.
FAQs
What makes Dutch Oven Sourdough Bread different from regular sourdough?
The key difference is baking inside a Dutch oven which traps steam, producing a crispier crust and more evenly risen loaf compared to traditional baking methods.
Can I use all-purpose flour instead of bread flour?
Yes, but bread flour’s higher protein content helps develop better gluten structure, resulting in a chewier crumb and higher rise. All-purpose will work but expect a slightly softer texture.
How do I know when my sourdough starter is ready to use?
An active starter should double in size within 4-6 hours of feeding and be bubbly with a pleasant sour aroma, indicating it’s ready to leaven your dough effectively.
Is it necessary to refrigerate the dough overnight?
Refrigeration slows fermentation, improving flavor complexity and making it easier to handle before baking. However, you can do a shorter proof at room temperature if short on time.
Why is scoring important before baking?
Scoring controls the direction in which the bread expands, helping prevent uncontrolled bursts and giving your loaf its characteristic artisan appearance.
Final Thoughts
Baking Dutch Oven Sourdough Bread is more than just making bread; it’s a rewarding experience that fills your home with warmth and the satisfaction of creating something delicious from simple ingredients. Give this recipe a try, and you’ll soon discover why so many fall in love with the crusty, tangy perfection that only homemade sourdough can offer.
Related Posts
- Why Sweet Potato Cinnamon Rolls Are a Must-Try
- Best Cinnamon Streusel Muffins to Savor
- Why Brown Butter Sage Biscuits Steal the Show
Dutch Oven Sourdough Bread

Bake a crunchy, flavorful Dutch Oven Sourdough Bread at home with this easy step-by-step recipe. Combining the tangy depth of sourdough with the perfect crust created by a cast iron Dutch oven, this recipe is approachable for beginners and rewarding for seasoned bakers. Enjoy a wholesome, artisanal loaf with simple ingredients that are versatile and delicious.
- Prep Time: 8 hours (including fermentation and proofing)
- Cook Time: 45 minutes
- Total Time: 8 hours 45 minutes
- Yield: 1 medium loaf
- Category: Bread
- Method: Baking
- Cuisine: Dutch/Artisan
- Diet: Vegetarian
Ingredients
Main Ingredients
- Bread flour: high-protein, quantity as per your preferred loaf size (commonly 500g)
- Sourdough starter: active and bubbly (typically 100-150g)
- Water: lukewarm, about 350-400ml
- Salt: around 10g
Optional Variations
- Whole wheat flour: substitute part of bread flour for nuttier flavor
- Seeds: sunflower, flax, or sesame seeds, to add to dough or on top
- Herbs: fresh rosemary, thyme, or garlic powder for aromatic twist
- Gluten-free flour blend with xanthan gum (adjust hydration accordingly)
- Sweetener: 1 tablespoon honey or molasses for slight sweetness
Instructions
- Prepare Your Starter: Ensure your sourdough starter is active and bubbly by feeding it 4-6 hours before beginning the dough. A healthy starter guarantees good rise and flavor.
- Mix the Dough: Combine the bread flour and water first, mixing until no dry flour remains. Let this mixture rest for 30 minutes to 1 hour (autolyse) to aid gluten formation. Then, add the active starter and salt, kneading or folding until the dough becomes smooth and elastic.
- Bulk Fermentation: Allow the dough to ferment at room temperature for 4-6 hours. Perform stretch and folds every 30 minutes to develop dough strength and aerate the crumb.
- Shape the Loaf: Gently transfer the dough onto a floured surface and shape it into a tight round boule. Create surface tension with your hands without deflating the dough.
- Proof Overnight: Place the shaped dough into a banneton or a bowl lined with a floured towel, cover it, and refrigerate overnight for slow fermentation and flavor development.
- Preheat the Dutch Oven: Approximately 45 minutes before baking, preheat your oven to 450°F (230°C) with the Dutch oven inside to reach optimal baking temperature.
- Bake Your Bread: Carefully transfer the dough on parchment paper, score the top with a sharp knife or lame, and place it inside the hot Dutch oven with the lid on. Bake covered for 20 minutes, then remove the lid and bake for an additional 20-25 minutes until deep golden brown.
- Cool Completely: Remove the bread from the Dutch oven and let it cool on a wire rack for at least 1 hour to ensure the crumb sets fully and the crust crisps up.
Notes
- Use high-quality bread flour for optimal gluten development and structure.
- Be patient with fermentation to achieve full flavor and texture potential.
- Always score the dough before baking to control expansion and create an artisan look.
- Preheat the Dutch oven thoroughly to mimic professional steam baking conditions for a superior crust.
- Use parchment paper for easier handling and safer transfer of dough.
- Allow your bread to fully cool to avoid a gummy texture when slicing.
Nutrition
- Serving Size: 1 slice (about 60g)
- Calories: 150
- Sugar: 0 g
- Sodium: 200 mg
- Fat: 0.5 g
- Saturated Fat: 0 g
- Unsaturated Fat: 0.5 g
- Trans Fat: 0 g
- Carbohydrates: 30 g
- Fiber: 2 g
- Protein: 5 g
- Cholesterol: 0 mg
Keywords: Dutch oven sourdough, sourdough bread, artisanal bread, homemade sourdough, crusty bread