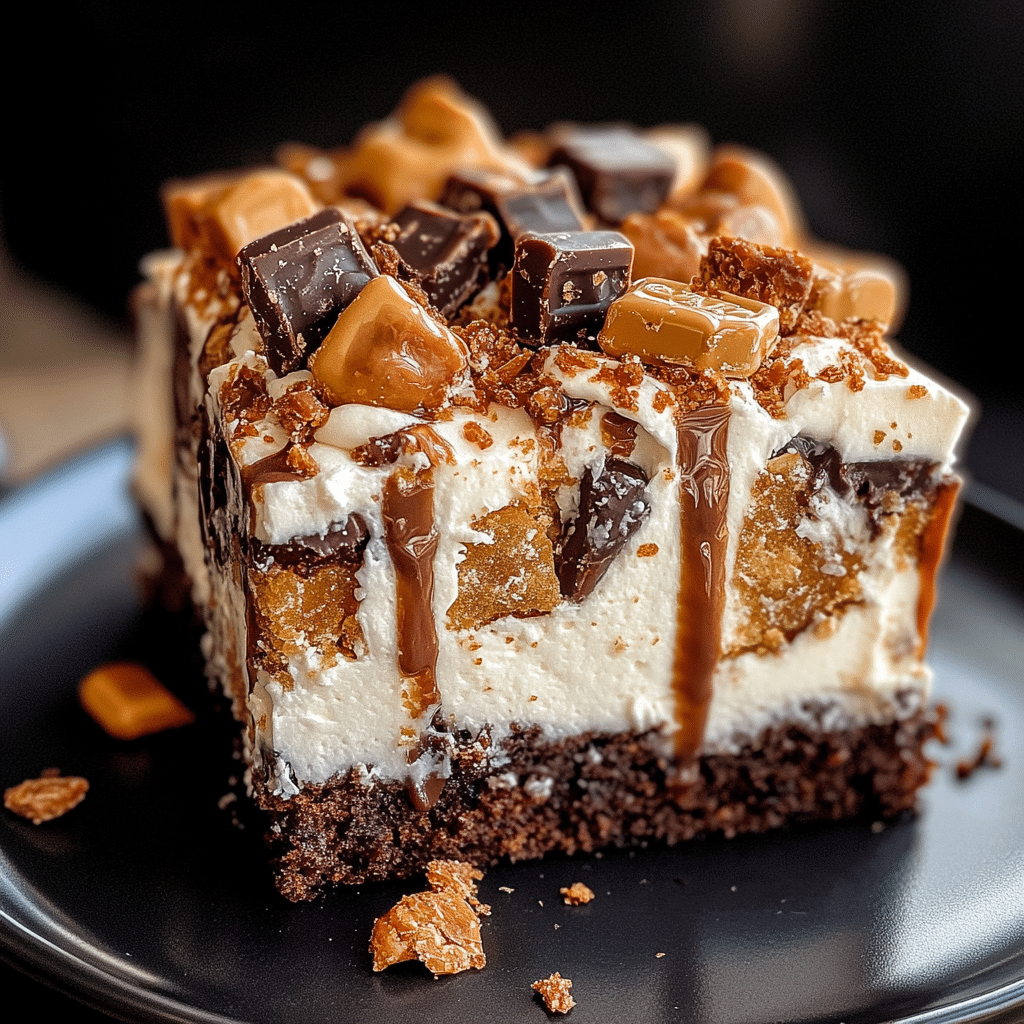
Irresistible Butterfinger Candy Bar Poke Cake Recipe
Craving a dessert that combines crunchy candy bar goodness with moist, creamy cake? You’re in for a treat with this Butterfinger Candy Bar Poke Cake. This delightful recipe takes a simple cake, punches it full of rich, gooey sweetness by poking holes and soaking it in luscious fillings, then tops it with crushed Butterfinger candy bars for the ultimate texture and flavor explosion. Whether you’re making it for a family dinner, a party, or just because, this Butterfinger Candy Bar Poke Cake is guaranteed to satisfy every chocolate lover’s sweet tooth.
Why You’ll Love This Recipe
- Ultimate candy bar delight: Combines crunchy Butterfinger pieces with soft, moist cake for a perfect texture contrast.
- Simple and straightforward: Uses everyday ingredients and easy steps so anyone can bake it with confidence.
- Perfect for any occasion: Whether a birthday or casual weeknight, it fits right in as a show-stopping dessert.
- Creamy and indulgent layers: The poke cake method infuses flavor deep into the cake for every bite to be rich and satisfying.
- Highly customizable: Easy to tweak with different frostings or candy bars to suit your cravings.
Ingredients You’ll Need
Gather these simple ingredients to capture the true essence of a Butterfinger Candy Bar Poke Cake. Each element perfectly balances texture and flavor, ensuring your cake is moist, creamy, and irresistibly sweet.
- Yellow cake mix: Provides a soft, buttery base that’s perfect for soaking up the fillings.
- Butterfinger candy bars: Crushed to add that iconic crispy, peanut buttery crunch on top and inside.
- Sweetened condensed milk: Adds creaminess and sweetness to saturate the cake holes beautifully.
- Peanut butter: Offers a rich, smooth layer that complements the Butterfinger pieces perfectly.
- Chocolate frosting: Adds a luscious, velvety finish to the top for indulgence.
- Whipped topping: Helps lighten the cake’s texture and adds fluffy creaminess.
Variations for Butterfinger Candy Bar Poke Cake
This recipe is extremely forgiving and open to your favorite twists. Play around with the ingredients to suit your dietary needs or flavor loves — it’s a great base for creativity!
- Nut-free option: Replace Butterfingers with crushed chocolate wafers and use a nut-free frosting to keep it safe.
- Chocolate cake base: Swap yellow cake mix for chocolate to amplify the chocolate flavor.
- Caramel drizzle: Add a generous drizzle of caramel sauce on top for extra gooey sweetness.
- Peanut butter frosting: Use peanut butter frosting instead of chocolate for a nutty, richer profile.
- Mini candies: Incorporate mini peanut butter cups or chopped Snickers for a different candy bar twist.

How to Make Butterfinger Candy Bar Poke Cake
Step 1: Bake the cake
Prepare your yellow cake mix as instructed on the package and bake it in a 9×13 inch pan until golden brown and a toothpick comes out clean. Allow it to cool slightly for the next steps.
Step 2: Poke holes in the cake
Using the handle of a wooden spoon or a similar tool, poke holes all over the cake about 1 inch apart while it’s still warm to allow the fillings to seep deeply.
Step 3: Add the sweetened condensed milk
Pour the sweetened condensed milk evenly over the cake, letting it soak into the holes and add that creamy sweetness from within.
Step 4: Prepare the peanut butter layer
In a bowl, combine peanut butter with whipped topping until smooth and spreadable. Gently spread this mixture over the cake to form a rich, creamy layer.
Step 5: Frost the cake
Spread a thick layer of chocolate frosting on top of the peanut butter cream for that luxurious, velvety finish.
Step 6: Top with crushed Butterfinger candy bars
Finally, generously sprinkle crushed Butterfinger pieces all over the frosted cake. Refrigerate for at least one hour before serving to let flavors meld beautifully.
Pro Tips for Making Butterfinger Candy Bar Poke Cake
- Warm cake is key: Poke holes while the cake is warm so the milk soaking layer penetrates better.
- Don’t over mix: Keep peanut butter and whipped topping gently folded to maintain fluffiness.
- Use fresh Butterfingers: For the best crunch and flavor, crush candy bars just before topping the cake.
- Chill well before serving: This intensifies flavors and firms up the creamy layers perfectly.
- Cut with a serrated knife: Helps keep your cake slices neat and intact without crushing layers.
How to Serve Butterfinger Candy Bar Poke Cake
Garnishes
Enhance your cake presentation with extra crushed Butterfinger pieces, a drizzle of melted chocolate, or a few dollops of whipped cream for that inviting final touch.
Side Dishes
Pair this indulgent cake with a simple bowl of fresh berries or vanilla ice cream to balance the rich flavors and add a refreshing complement.
Creative Ways to Present
Serve Butterfinger Candy Bar Poke Cake in clear glass trifle dishes for layered beauty or as individual mini poke cakes using ramekins to impress guests with personalized sweets.
Make Ahead and Storage
Storing Leftovers
Store leftover cake in an airtight container in the refrigerator for up to 3-4 days to keep the creamy layers fresh and the cake moist.
Freezing
You can freeze Butterfinger Candy Bar Poke Cake by wrapping it tightly with plastic wrap and foil; thaw overnight in the refrigerator before serving to maintain texture.
Reheating
This cake is best enjoyed cold or at room temperature; if desired, briefly warm slices in the microwave for about 10 seconds to soften the frosting without melting it completely.
FAQs
Can I use homemade cake instead of cake mix?
Absolutely! A light vanilla or yellow cake baked from scratch works wonderfully and lets you customize sweetness and texture even more.
Is it necessary to poke holes in the cake?
Yes, poking holes allows the condensed milk and peanut butter mix to soak in deeply, creating moist, flavorful layers throughout.
Can I substitute the Butterfinger bars with other candy?
Certainly! You can swap with similar crunchy candy bars like Snickers, Heath, or chopped Reese’s for different flavor profiles.
How long does the poke cake need to chill before serving?
It’s best to chill at least one hour, though letting it rest overnight intensifies the flavors and moistens the cake completely.
Can I make this cake dairy-free?
Yes, using dairy-free frosting, whipped topping substitutes, and nut-free chocolate options can create a delicious allergy-friendly version.
Final Thoughts
There’s something truly special about a Butterfinger Candy Bar Poke Cake that turns any moment into a celebration. The combination of creamy, crunchy, and sweet layers invites you in with every bite. If you’re looking for a dessert that’s easy to make yet impressive enough to wow your friends and family, this recipe should be your go-to indulgence. Give it a try, and get ready to watch it disappear fast!
PrintButterfinger Candy Bar Poke Cake
Butterfinger Candy Bar Poke Cake is a moist, creamy dessert combining a soft yellow cake soaked with sweetened condensed milk, topped with a rich peanut butter whipped cream layer, velvety chocolate frosting, and finished with crunchy crushed Butterfinger candy bars. This indulgent poke cake delivers a perfect balance of textures and flavors, making it an ideal treat for any occasion.
- Prep Time: 20 minutes
- Cook Time: 30-35 minutes
- Total Time: 1 hour 55 minutes (including chilling time)
- Yield: 12 servings 1x
- Category: Dessert
- Method: Baking
- Cuisine: American
- Diet: Contains Gluten, Contains Dairy, Contains Nuts (can be modified for nut-free)
Ingredients
Cake Base
- 1 box yellow cake mix (plus ingredients required on box, usually eggs, oil, and water)
Soaking Layer
- 1 can (14 oz) sweetened condensed milk
Peanut Butter Layer
- 1 cup creamy peanut butter
- 1 cup whipped topping (such as Cool Whip)
Frosting and Topping
- 1 container (about 16 oz) chocolate frosting
- 3–4 Butterfinger candy bars, crushed
Instructions
- Prepare and bake the cake: Follow the instructions on the yellow cake mix box and bake the cake in a 9×13 inch baking pan until golden brown and a toothpick inserted in the center comes out clean. Allow the cake to cool slightly before continuing.
- Poke holes in the cake: While the cake is still warm, use the handle of a wooden spoon or similar tool to poke holes about 1 inch apart all over the surface of the cake. This will allow the filling to soak deeply.
- Add sweetened condensed milk: Pour the sweetened condensed milk evenly over the entire cake, letting it seep into the holes and saturate the cake layers thoroughly.
- Make the peanut butter layer: In a bowl, gently fold together the creamy peanut butter and whipped topping until smooth and spreadable. Spread this mixture evenly over the soaked cake to create a rich, creamy layer.
- Frost the cake: Spread a thick, even layer of chocolate frosting over the peanut butter layer to complete the topping.
- Top with crushed Butterfinger candy bars: Generously sprinkle the crushed Butterfinger pieces all over the frosted cake. Refrigerate the cake for at least one hour before serving to allow flavors to meld and layers to firm up.
Notes
- Poke holes while the cake is warm to ensure the condensed milk soaks in well.
- Fold peanut butter and whipped topping gently to maintain a light, fluffy texture.
- Crush Butterfinger bars just before topping to retain maximum crunch and freshness.
- Chill the cake well before serving to intensify flavors and firm up layers.
- Use a serrated knife to cut slices neatly without crushing the layers.
Nutrition
- Serving Size: 1 slice (1/12th of cake)
- Calories: 450 kcal
- Sugar: 38 g
- Sodium: 320 mg
- Fat: 24 g
- Saturated Fat: 8 g
- Unsaturated Fat: 12 g
- Trans Fat: 0.5 g
- Carbohydrates: 52 g
- Fiber: 2 g
- Protein: 6 g
- Cholesterol: 30 mg
Keywords: Butterfinger cake, poke cake, candy bar cake, peanut butter cake, chocolate frosting cake, dessert, moist cake