
Peanut Butter Blossom Cookies

Few treats are as instantly recognizable or as universally loved as classic peanut butter blossom cookies. These iconic holiday staples strike the perfect balance between a soft, salt-tinged peanut butter base and the rich, melt-in-your-mouth sweetness of a milk chocolate center. Whether they are the star of your annual holiday baking session or a nostalgic throwback to childhood afternoons, these cookies remain a crowd-favorite for their whimsical appearance and timeless flavor profile. The contrast of the granulated sugar coating against the smooth chocolate creates a sensory experience that is hard to beat.
Making these at home is a straightforward process that yields professional-looking results every single time. By mastering a few simple techniques—like proper creaming of the fats and the perfect timing for adding the chocolate “blossom”—you can ensure your soft peanut butter cookies are the highlight of any dessert platter. This recipe is approachable enough for kitchen beginners yet yields a refined texture that will satisfy even the most seasoned cookie connoisseurs.
Why You’ll Love This Recipe
- Perfect Flavor Pairing: The marriage of salty, nutty peanut butter and smooth milk chocolate is a culinary classic for a reason; it hits every taste bud perfectly.
- Ideal for Gifting: These cookies are sturdy enough to be packed into tins, making them the ultimate choice for a Christmas cookie exchange or a thoughtful neighbor gift.
- Engaging Texture: Between the slight crunch of the outer sugar coating and the fudgy center of the Hershey’s Kiss cookies, every bite offers a delightful variety of textures.
- Quick Assembly: With no chilling time strictly required and a very short bake time, you can have a fresh batch of cookies ready for guests in under thirty minutes.
Ingredients You’ll Need
To achieve the perfect texture and flavor, it is essential to understand how each component functions within the dough. These classic peanut butter blossom cookies rely on a specific balance of fats and sugars to stay tender long after they leave the oven.
- Creamy Peanut Butter: This provides the foundational flavor and fat content. It is best to use a standard commercial brand rather than “natural” varieties to ensure the dough remains stable and does not oily.
- Unsalted Butter: Softened to room temperature, butter provides the necessary moisture and richness. It works with the peanut butter to create a tender, melt-in-your-mouth crumb.
- Granulated and Light Brown Sugar: A combination of both sugars is key. The granulated sugar helps the edges crisp slightly, while the brown sugar adds moisture and a subtle hint of molasses.
- All-Purpose Flour: This provides the structure for the cookie. It is important to measure correctly to prevent the cookies from becoming too crumbly or dry.
- Egg: Acting as the primary binding agent, a single large egg adds protein and structure, helping the cookie hold the weight of the chocolate kiss.
- Baking Soda: This leavening agent ensures the cookies rise slightly and achieve that signature soft, chewy texture rather than becoming dense.
- Vanilla Extract: A high-quality vanilla enhances the nuttiness of the peanut butter and bridges the gap between the salty dough and the sweet chocolate.
- Milk Chocolate Kisses: The iconic finishing touch. These are pressed into the warm cookies immediately after baking to create the “blossom” effect.
Variations and Smart Swaps
While the traditional version is a masterpiece of simplicity, there are several ways to customize this recipe to suit different tastes or seasonal themes.
- Alternative Chocolate Centers: If you want to move beyond the traditional milk chocolate, try using dark chocolate, peppermint, or even caramel-filled chocolate candies for a modern twist.
- Crunchy Texture: For those who prefer a bit of a bite, you can substitute half of the creamy peanut butter for a crunchy variety, though the dough may be slightly more crumbly.
- Festive Sugar Coatings: Instead of rolling the dough in plain granulated sugar, use colored sanding sugars (like red or green for the holidays) to add a vibrant pop of color to the holiday baking tray.
- Gluten-Free Option: A high-quality 1-to-1 gluten-free flour blend can be used in place of all-purpose flour. Ensure the blend contains xanthan gum to maintain the proper cookie structure.
How to Make Classic Peanut Butter Blossom Cookies
Step 1: Cream the Butter, Peanut Butter, and Sugars
The secret to a light and tender cookie starts with the creaming process. In a large bowl, beat the softened butter, creamy peanut butter, granulated sugar, and brown sugar together until the mixture is pale and fluffy. This step incorporates air into the fats, which helps the soft peanut butter cookies rise and prevents them from becoming overly dense. Spend at least two to three minutes on this step for the best results.
Step 2: Incorporate the Wet Ingredients
Add the egg and vanilla extract to the creamed mixture, beating well until fully combined. It is helpful to scrape down the sides of the bowl with a spatula to ensure no pockets of butter or sugar remain. This ensures a consistent flavor and texture throughout the entire batch of dough. The mixture should look smooth and slightly glossy at this stage.
Step 3: Mix in the Dry Ingredients
In a separate bowl, whisk together the flour, baking soda, and salt. Gradually add these dry ingredients to the wet mixture, mixing on low speed just until the flour disappears. Overmixing at this stage can develop too much gluten, leading to a tough cookie. You want a soft, pliable dough that holds its shape when rolled but doesn’t feel sticky to the touch.
Step 4: Roll and Coat the Dough
Scoop about one tablespoon of dough and roll it between your palms to form a smooth ball, roughly one inch in diameter. Roll each ball in a small bowl of granulated sugar until evenly coated. This sugar coating is essential for that signature classic peanut butter blossom cookies look, as it creates a beautiful crackled finish during the baking process.
Step 5: Bake to Golden Perfection
Place the dough balls on a prepared baking sheet, spacing them about two inches apart. Bake in a preheated oven just until the edges are set and the tops begin to slightly crack. It is crucial not to overbake these; they should still look slightly soft in the center when you pull them out, as they will continue to firm up on the hot baking sheet.
Step 6: Add the Chocolate Blossom
As soon as the cookies come out of the oven, immediately press a chocolate kiss into the center of each one. The residual heat from the cookie will slightly soften the bottom of the chocolate, allowing it to adhere perfectly. Let the cookies sit on the baking sheet for a few minutes before transferring them to a wire rack to cool completely. This resting period allows the structure to set so the cookies don’t break when moved.
Pro Tips for Success
- Tip: Freeze your chocolate kisses for about 20 minutes before baking. This prevents them from melting too quickly or losing their shape when you press them into the hot cookies.
- Tip: Use a small cookie scoop to ensure every dough ball is the same size. This promotes even baking across the entire tray, so you don’t end up with some burnt and some undercooked.
- Tip: Avoid using “Natural” peanut butter. The separation of oils in natural peanut butter can cause the cookies to spread too thin or become excessively greasy.
- Tip: If the dough feels too soft to roll, chill it in the refrigerator for 15–30 minutes. This makes the dough easier to handle and helps the cookies maintain their rounded shape in the oven.
- Tip: Do not wait for the cookies to “look done” in the center. If you bake them until they are hard, they will become dry and crumbly once cooled. Look for set edges only.
Troubleshooting Common Problems
Why Did My Cookies Spread Too Much?
If your cookies came out flat, the butter may have been too warm when you started, or the oven temperature might be slightly off. Ensure your butter is “cool room temperature” (pliable but not greasy) and that you are not placing dough onto a hot baking sheet from a previous batch. Chilling the dough for 20 minutes can also help combat excessive spreading.
Why Are My Cookies Cracking Excessively?
While some small cracks are normal, large, deep cracks usually indicate that there is too much flour in the dough. When measuring flour, always use the “spoon and level” method rather than scooping directly from the bag, which packs the flour down and leads to using too much. A dry dough will also make it harder for the chocolate kiss to stick.
The Chocolate Kiss Kept Falling Off
This usually happens if the cookies have cooled too much before the chocolate was added. You must work quickly once the tray leaves the oven. If you find they aren’t sticking, you can place the tray back in the warm (but turned off) oven for 30 seconds to help the bottom of the chocolate melt slightly onto the surface of the cookie.
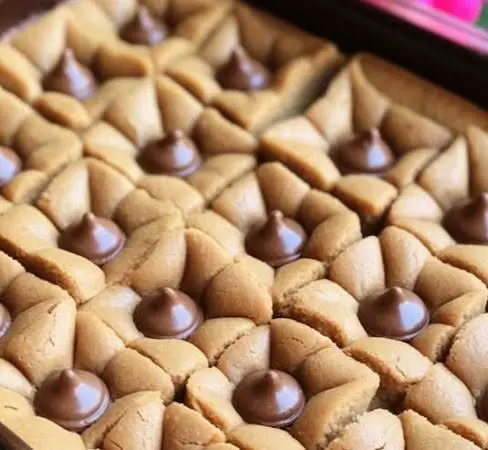
How to Serve Classic Peanut Butter Blossom Cookies
When it comes to serving these treats, presentation is half the fun. They are a natural fit for any Christmas cookie exchange, but they also make a wonderful afternoon snack or dessert platter addition. Because of their unique shape, they look best when arranged in a single layer or slightly staggered on a decorative plate, allowing the “blossom” to be the focal point.
Pair these cookies with a cold glass of milk to complement the peanut butter, or serve them alongside a hot cup of coffee or cocoa during the winter months. If you are serving them at a party, consider surrounding them with other seasonal treats like gingerbread or peppermint bark to create a diverse and inviting dessert display. For an extra touch of indulgence, serve them while the chocolate is still slightly soft and warm from the oven.
Storage and Make-Ahead
Storing Leftovers
Store your cookies in an airtight container at room temperature for up to 5 days. To keep them soft, you can place a small piece of white bread in the container; the cookies will absorb the moisture from the bread. Avoid stacking them before the chocolate has fully re-hardened, or you will end up with a messy pile.
Freezing
These cookies freeze exceptionally well. You can freeze the baked cookies for up to 3 months. For the best quality, freeze them in a single layer on a tray first before transferring them to a freezer-safe bag. You can also freeze the raw dough balls (without the sugar coating) and bake them from frozen, adding a few minutes to the bake time.
Making It Ahead
The dough can be prepared up to 2 days in advance and kept in the refrigerator. When you are ready to bake, let the dough sit at room temperature for about 10 minutes so it is soft enough to roll into balls and coat in sugar. This is a great way to save time during the busy holiday baking season.
Final Thoughts
There is a reason the classic peanut butter blossom cookies have remained a staple of American kitchens for decades. They offer a sense of nostalgia that few other recipes can match, combined with a flavor profile that appeals to both children and adults. By following these editorial tips and paying attention to the small details—like the temperature of your ingredients and the timing of the chocolate—you can create a batch of soft peanut butter cookies that are truly spectacular. Whether you’re baking for a crowd or just for your own family, these cookies are a guaranteed win.
Frequently Asked Questions
Can I use chunky peanut butter instead of creamy?
Yes, you can use chunky peanut butter if you prefer a bit of extra texture. However, the dough will be slightly more fragile, and the cookies may have a more rugged, less uniform appearance. The iconic look of classic peanut butter blossom cookies usually relies on the smooth surface of the creamy variety, but the flavor will still be excellent with chunky.
How do I keep the chocolate kisses from melting and making a mess?
The best way to keep the kisses intact is to freeze them before you start baking. Additionally, make sure the cookies have cooled on the baking sheet for about 5 minutes before you move them. If the chocolate looks very shiny and melted, avoid touching the cookies until the chocolate has completely set and returned to a solid state, which can take an hour or two at room temperature.
Can I make these cookies smaller?
You can certainly make mini versions of these cookies, but you may need to use “mini” chocolate chips or smaller chocolate pieces instead of a full-sized Kiss, as the standard Kiss might overwhelm a smaller dough ball. If you reduce the size of the dough ball, remember to decrease the baking time by 2–3 minutes to prevent the smaller cookies from burning.
Why did my chocolate kisses bloom or turn white?
If your chocolate develops a white, powdery coating, it is known as “fat bloom.” This usually happens when the chocolate is exposed to temperature fluctuations—like being pressed onto a hot cookie and then cooled quickly. While it might not look as pretty, the chocolate is still perfectly safe to eat and the flavor remains unchanged. Storing them in a cool, stable environment helps prevent this.
Do I have to roll the cookies in sugar?
While the sugar coating is traditional for Hershey’s Kiss cookies and provides a nice textural contrast, it is not strictly necessary for the structure of the cookie. If you want to reduce the sweetness slightly, you can skip the rolling step. However, the cookies will have a matte finish rather than the classic sparkling, crackled look that most people associate with this recipe.
Classic Peanut Butter Blossom Cookies

These soft and chewy peanut butter cookies rolled in sugar and topped with a chocolate kiss are a timeless holiday favorite.
- 1/2 cup granulated sugar
- 1/2 cup packed brown sugar
- 1/2 cup creamy peanut butter
- 1/2 cup butter, softened
- 1 large egg
- 1 1/2 cups all-purpose flour
- 3/4 teaspoon baking soda
- 1/2 teaspoon baking powder
- 1/3 cup additional granulated sugar for rolling
- 36 chocolate kiss candies, unwrapped
- 1Preheat oven to 375°F (190°C).
- 2In a large bowl, beat the 1/2 cup sugar, brown sugar, peanut butter, butter, and egg until well blended.
- 3Stir in flour, baking soda, and baking powder until a dough forms.
- 4Shape dough into 1-inch balls. Roll each ball in the additional granulated sugar.
- 5Place 2 inches apart on ungreased cookie sheets.
- 6Bake 8 to 10 minutes or until edges are lightly browned.
- 7Immediately press a chocolate kiss into the center of each cookie; the cookie will crack around the edges.
- 8Remove from cookie sheets to a wire rack; cool completely.
Keywords: peanut butter blossoms, chocolate kiss cookies, christmas cookies, peanut butter dessert


