
Hershey’s Cocoa Fudge

There is something undeniably magical about a classic, stovetop dessert that has stood the test of time for generations. The hersheys old fashioned fudge recipe is the gold standard for many American families, offering a deep, dark chocolate flavor and a unique, crumbly-yet-creamy texture that modern “quick” fudge recipes simply cannot replicate. Unlike versions that rely on marshmallow fluff or condensed milk, this is a true confectioner’s recipe that uses the science of sugar crystallization to create a decadent holiday treat. It is the kind of recipe that fills the kitchen with the aroma of pure cocoa and evokes memories of grandmothers standing over a bubbling pot with a watchful eye.
While the prospect of making candy at home can feel intimidating, mastering this homemade chocolate fudge is a rite of passage for any serious home baker. It requires patience, a bit of precision, and an understanding of how heat transforms simple pantry staples into a sophisticated sweet. In this guide, we will break down the chemistry of the soft-ball stage and provide the sensory cues you need to ensure your fudge sets perfectly every single time. Whether you are making this for a festive gift or a cozy weekend project, the results are well worth the effort of doing things the old-fashioned way.
Why This Recipe Is a Keeper
- Pure Chocolate Flavor: Because it uses unsweetened cocoa powder rather than melted chips, you get a concentrated, dark chocolate profile that isn’t masked by excess stabilizers.
- Superior Texture: This recipe produces a traditional “short” texture that melts on the tongue, a distinct characteristic of a well-executed stovetop dessert.
- Pantry Staples: You likely already have every single ingredient in your kitchen right now, making it a convenient option for last-minute cravings or gifting.
- Authentic Heritage: Following this hersheys old fashioned fudge recipe connects you to decades of American culinary tradition, delivering a result that tastes like true nostalgia.
Ingredients You’ll Need
The beauty of this recipe lies in its simplicity. Because there are so few components, the quality and role of each ingredient are paramount to the success of the final candy. Here is a look at what you will need to gather before you turn on the stove.
- Granulated Sugar: This is the structural backbone of the fudge. It provides sweetness and, when boiled with liquid, creates the crystalline structure that allows the fudge to set.
- Hershey’s Cocoa: This unsweetened cocoa powder provides the intense chocolate foundation. It is acidic, which reacts slightly with the other ingredients to balance the sweetness.
- Whole Milk: The fat content in whole milk is essential for a creamy mouthfeel. Avoid using skim or low-fat milk, as the lack of fat can lead to a grainier, less stable fudge.
- Unsalted Butter: Added at the end of the process, butter provides a glossy sheen and a rich, velvety finish to the homemade chocolate fudge.
- Vanilla Extract: A splash of high-quality vanilla acts as a flavor enhancer, rounding out the bitterness of the cocoa and the sharpness of the sugar.
- Salt: Just a pinch is necessary to cut through the sugar and brighten the chocolate notes.
Easy Ways to Change It Up
Once you have mastered the base hersheys old fashioned fudge recipe, you can begin to experiment with different textures and aromatic additions to suit your personal preferences.
- Crunchy Nut Variation: Stir in half a cup of chopped toasted walnuts or pecans just as the fudge begins to lose its gloss during the beating stage. The earthy crunch perfectly offsets the rich chocolate.
- Mocha Fudge: Replace a tablespoon of the milk with a tablespoon of very strong brewed espresso or add a teaspoon of instant espresso powder to the sugar and cocoa mixture.
- Sea Salt Topping: For a modern twist, sprinkle a coarse flaky sea salt over the top of the fudge immediately after spreading it into the pan. This creates a beautiful contrast with the deep sweetness.
- Peppermint Holiday Twist: Swap the vanilla extract for half a teaspoon of peppermint extract and top the wet fudge with crushed candy canes for a festive holiday treat.
How to Make the Best Hershey’s Old Fashioned Fudge
Success with this recipe depends more on technique than anything else. Follow these steps carefully, paying close attention to the temperatures and visual changes in the pot.
Step 1: Combine the Dry Ingredients and Milk
Begin by whisking together your sugar, cocoa powder, and salt in a heavy, deep saucepan. It is important to use a heavy-bottomed pot to ensure even heat distribution and prevent the sugar from scorching. Slowly stir in the milk until the mixture is smooth. Before you turn on the heat, make sure you have your candy thermometer ready and your 8-inch square pan buttered or lined with parchment paper. Preparation is key in candy making because things happen quickly once the temperature rises.
Step 2: Boil to the Precise Soft-Ball Stage
Place the saucepan over medium heat and stir constantly until the mixture comes to a full, rolling boil. Once it starts boiling, stop stirring immediately. This is the most critical rule of the hersheys old fashioned fudge recipe. Stirring during the boil can cause sugar crystals to form on the sides of the pan, which will later turn your fudge grainy. Attach your candy thermometer and let the mixture cook undisturbed until it reaches 234°F. This is known as the soft-ball stage, where the sugar concentration is exactly right for a firm yet soft set.
Step 3: The Crucial Cooling Period
Remove the pan from the heat as soon as it hits the target temperature. Drop the butter and vanilla onto the surface of the hot liquid, but do not stir them in. Move the pan to a wire rack and let it cool naturally until the temperature drops to 110°F (lukewarm). This cooling phase is vital because it prevents the formation of large, crunchy sugar crystals. Patience here ensures that when you eventually beat the fudge, the crystals will remain microscopic, resulting in a smooth, professional-grade stovetop dessert.
Step 4: Beat for the Perfect Matte Finish
Once the mixture has cooled to 110°F, it is time to work. Using a wooden spoon, beat the mixture vigorously. You will notice the fudge transform from a shiny, liquid-like syrup into a thick, pale, and creamy consistency. Continue beating until the fudge loses its glossy sheen and starts to look matte (dull). This change in appearance indicates that the fudge is beginning to set. You must work quickly at this point, as the window between “perfectly beaten” and “set in the pot” is quite small.
Step 5: Spread and Set
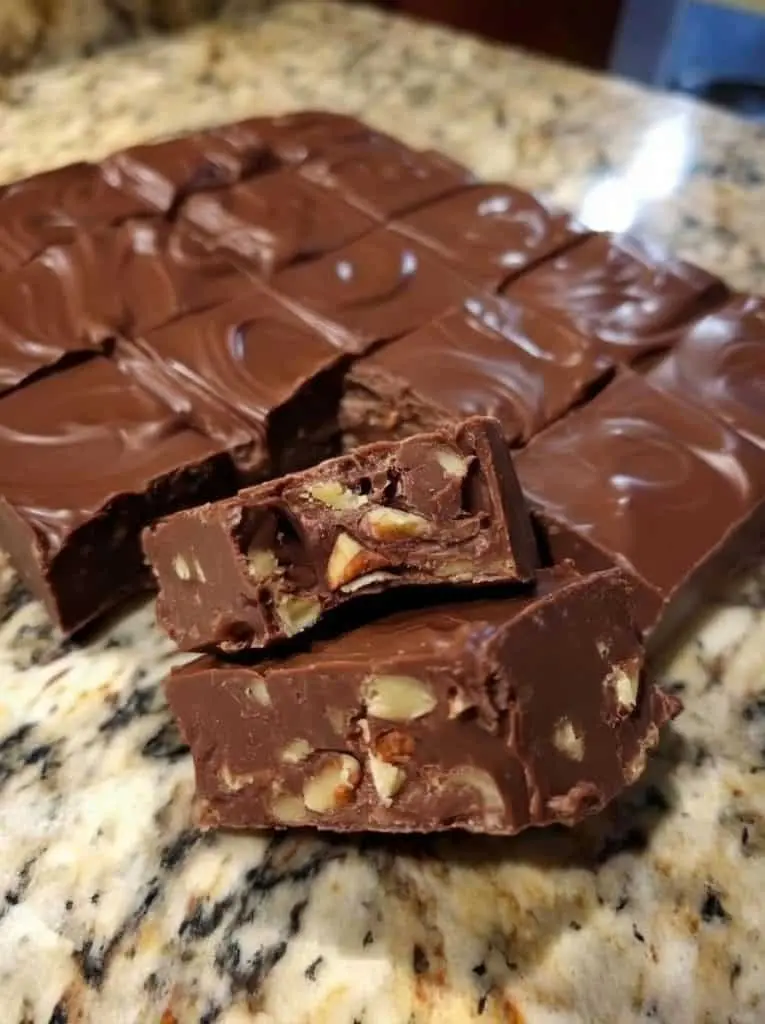
Immediately spread the thickened fudge into your prepared pan. Use a spatula to smooth the top, though a few rustic ripples are part of the charm of an old-fashioned recipe. Let the fudge sit at room temperature for at least an hour until it is completely firm. Once set, use a sharp, thin knife to cut the fudge into small, decadent squares. Because this homemade chocolate fudge is so rich, small portions are usually plenty for most guests.
Pro Tips for Success
- Calibrate Your Thermometer: Before starting, test your candy thermometer in boiling water. It should read 212°F. If it doesn’t, adjust your target fudge temperature by the same number of degrees to ensure accuracy.
- The No-Stir Rule: Resist the urge to stir the boiling mixture or scrape the sides of the pan. Any undissolved sugar crystals dropped back into the pot can trigger a chain reaction that makes the entire batch grainy.
- Avoid Humid Days: Sugar is hygroscopic, meaning it absorbs moisture from the air. Making fudge on a very rainy or humid day can prevent it from setting properly, leading to a soft or sticky result.
- Use a Wooden Spoon: A wooden spoon is sturdier for the heavy beating required in Step 4 and doesn’t conduct heat as quickly as metal, giving you better control over the texture.
- Pan Size Matters: Using a pan that is too large will result in very thin fudge that dries out quickly. Stick to an 8-inch square pan for the ideal thickness.
Troubleshooting Common Problems
Why Is My Fudge Grainy?
Grainy fudge is usually caused by sugar crystals forming prematurely. This happens if you stir the mixture while it is boiling or if you fail to let the mixture cool all the way to 110°F before you start beating it. To prevent this, ensure the sugar is fully dissolved before the boil begins and keep your spoon out of the pot during the cooking process.
Why Did My Fudge Never Set?
If your fudge stays soft or resembles a thick sauce, it likely didn’t reach the full 234°F soft-ball stage. Even being off by two or three degrees can affect the structural integrity of the candy. Always use a reliable thermometer rather than relying solely on visual timing, as stove temperatures vary greatly.
Why Is the Fudge Too Hard to Stir?
If the fudge becomes impossible to beat or sets instantly in the pan, it was either overcooked (past 234°F) or beaten for too long. If this happens, you can sometimes “rescue” it by adding a tablespoon of milk and gently reheating it to dissolve the crystals, then starting the cooling process over, though the texture may be slightly altered.
How to Serve This Classic Treat
This hersheys old fashioned fudge recipe produces a very rich and intense chocolate experience, so it is best served in small portions. A 1-inch square is often the perfect size for a single serving. For a beautiful presentation, place individual squares in fluted paper candy liners; this not only looks professional but also prevents the fudge from sticking to other pieces on a serving platter.
Pair this fudge with a cup of hot black coffee or a glass of cold milk to balance the deep sweetness. It also makes a fantastic addition to a holiday treat board alongside salty nuts, dried apricots, and crisp shortbread cookies. If you are gifting the fudge, wrap it in parchment paper before placing it in a tin or decorative box to maintain its texture and prevent it from drying out.
Storage and Make-Ahead
Storing Leftovers
To keep your fudge fresh, store it in an airtight container at room temperature. Place a sheet of wax paper or parchment between layers to prevent sticking. When stored properly, the fudge will maintain its peak texture for about 1 to 2 weeks. Avoid storing it in the open air, as it will eventually become dry and crumbly.
Refrigeration and Freezing
While you can store fudge in the refrigerator to extend its life by another week, it can sometimes alter the texture or cause the sugar to “bloom.” If you must freeze it, wrap the entire block or individual squares tightly in plastic wrap and then place them in a heavy-duty freezer bag. Thaw the fudge slowly in the refrigerator before bringing it to room temperature to serve.
Making It Ahead
This is an excellent make-ahead recipe because it actually benefits from a few hours of “resting” time to fully set its structure. You can easily make a batch 24 to 48 hours before you plan to serve it or gift it, making it a stress-free addition to your holiday baking schedule.
Final Thoughts
Mastering the hersheys old fashioned fudge recipe is a rewarding experience that yields a far superior product to any store-bought alternative. While it requires a bit of focus and a reliable candy thermometer, the result is a timeless confection that captures the true essence of homemade chocolate. By following the scientific principles of cooling and beating, you can create a holiday treat that will be requested by friends and family for years to come. There is simply no substitute for the deep, complex flavor of real cocoa fudge made with love on a stovetop.
Frequently Asked Questions
Can I use a different brand of cocoa powder?
While this recipe is designed specifically for the acidity and fat content of Hershey’s unsweetened cocoa, you can use other natural cocoa powders. However, avoid using “Dutch-processed” cocoa for this specific recipe, as the neutralized acidity can interfere with the way the sugar crystals form and may result in a fudge that does not set with the traditional texture.
What if I don’t have a candy thermometer?
You can use the “cold water test” if you don’t have a candy thermometer. Drop a small amount of the boiling syrup into a cup of very cold water. If it forms a ball that is soft and can be flattened between your fingers when removed from the water, it has reached the soft-ball stage. However, for the most consistent results in this hersheys old fashioned fudge recipe, a digital thermometer is highly recommended.
Can I double this recipe?
It is generally recommended not to double candy recipes like this one. The cooking and cooling times change significantly when the volume is increased, which can lead to uneven results or a fudge that fails to set. If you need a large amount of fudge, it is safer and more reliable to make two separate batches in the same saucepan.
Why did my butter separate from the fudge?
If you see a layer of oil or melted butter on top of your fudge, it usually means the mixture was beaten while it was still too hot, or it was overcooked. To prevent this, ensure you wait until the candy thermometer reads exactly 110°F before you begin the beating process. This allows the fats and sugars to emulsify properly as the crystal structure forms.
How can I make my fudge creamier?
The creaminess of this homemade chocolate fudge depends on the size of the sugar crystals. To get the smoothest result, ensure you do not stir during the boil and do not skip the cooling phase. If you want an even richer fudge, ensure you are using whole milk or even substituting a small portion of the milk with heavy cream, though this may slightly alter the traditional “short” texture of the classic Hershey’s recipe.
Hershey’s Cocoa Fudge

A classic, rich, and creamy homemade chocolate fudge made with HERSHEY'S Cocoa. This old-fashioned recipe provides a smooth, velvety texture that is perfect for holidays or a special treat.
- 3 cups sugar
- 2/3 cup HERSHEY'S Cocoa
- 1/8 teaspoon salt
- 1 1/2 cups milk
- 1/4 cup butter
- 1 teaspoon vanilla extract
- 1Line an 8-inch square pan with foil; butter the foil.
- 2Stir together sugar, cocoa and salt in a heavy 4-quart saucepan; stir in milk.
- 3Cook over medium heat, stirring constantly, until mixture comes to a full rolling boil.
- 4Boil without stirring until thermometer reaches 234°F (soft-ball stage).
- 5Remove from heat; add butter and vanilla. Do not stir.
- 6Cool at room temperature to 110°F (lukewarm). Beat with wooden spoon until fudge thickens and loses its gloss.
- 7Immediately spread into prepared pan. Cool completely; cut into squares.
Keywords: Hershey's, cocoa, fudge, chocolate, dessert, homemade candy


