
My Mom’s Fudge

There is something undeniably nostalgic about a tray of best homemade chocolate fudge recipe cooling on the counter. Unlike the gritty or overly sweet versions often found in souvenir shops, a truly great fudge should be velvety, rich, and possess a melt-in-your-mouth quality that lingers. Achieving that perfect balance between a firm “snap” when bitten and a creamy chocolate fudge texture inside is a hallmark of an expert home baker. This recipe focuses on traditional flavors while utilizing a few modern techniques to ensure your candy sets up perfectly every single time, making it the ultimate addition to your dessert repertoire.
Mastering this easy fudge recipe is less about complicated chemistry and more about patience and high-quality ingredients. By understanding how sugar crystals behave and why certain fats are essential for a glossy finish, you can move beyond basic instructions and start creating professional-level confections in your own kitchen. Whether you are preparing a holiday treat for friends or simply satisfying a deep chocolate craving, this method provides a reliable foundation for a decadent result that rivals any high-end candy shop.
Why This Recipe Is a Keeper
- Unmatched Texture: By using a specific combination of fats and sugars, this recipe produces a creamy chocolate fudge that is never grainy or crumbly, even after several days of storage.
- Gifting Potential: This fudge is sturdy enough to be sliced into perfect squares and packaged in tins, making it a spectacular holiday treat for neighbors, teachers, or coworkers.
- Customizable Base: While the deep chocolate flavor shines on its own, the base is stable enough to support various mix-ins like toasted walnuts, sea salt, or crushed peppermint.
- Consistent Results: Unlike old-fashioned recipes that require precise weather conditions, this method is designed to be resilient, ensuring your fudge sets up firmly without becoming rock hard.
Ingredients You’ll Need
The success of the best homemade chocolate fudge recipe relies on the interaction between sugar, dairy, and chocolate. Using premium ingredients will directly impact the depth of flavor and the silkiness of the final product.
- Granulated Sugar: This provides the structural sweetness. During the boiling process, the sugar dissolves and re-crystallizes into microscopic structures that give the fudge its characteristic body.
- Unsalted Butter: Butter adds a necessary richness and a beautiful glossy sheen to the finished squares. Using unsalted allows you to control the exact level of seasoning in your candy.
- Evaporated Milk: Not to be confused with condensed milk, evaporated milk provides concentrated dairy solids that contribute to a creamy chocolate fudge texture without adding excessive sugar too early.
- Semi-Sweet Chocolate Chips: A high-quality chip or chopped chocolate bar with roughly 60% cacao offers a balanced sweetness. It melts smoothly and provides the primary flavor profile for this easy fudge recipe.
- Marshmallow Fluff: This is a secret weapon for many home candy makers. It acts as a stabilizer, preventing the sugar from forming large crystals and ensuring the fudge remains soft and spreadable.
- Pure Vanilla Extract: A generous splash of vanilla rounds out the bitterness of the chocolate and enhances the natural caramel notes created by the boiling sugar and milk.
- Fine Sea Salt: A small amount of salt is essential to cut through the intense sweetness and make the chocolate flavor “pop” on the palate.
Simple Swaps and Variations
One of the best parts of making a holiday treat is tailoring it to your personal preferences. Once you have mastered the base technique, you can experiment with these simple variations.
- Nutty Crunch: Fold in one cup of toasted chopped pecans or walnuts just before pouring the mixture into the pan. The earthiness of the nuts perfectly complements the creamy chocolate fudge.
- Dark Chocolate Sea Salt: Swap the semi-sweet chips for bittersweet chocolate (70% cacao) and sprinkle a generous pinch of flaky sea salt over the top while the fudge is still slightly tacky.
- Mocha Twist: Stir in two teaspoons of espresso powder with the chocolate chips. The coffee doesn’t make it taste like a latte, but it significantly intensifies the richness of the chocolate.
- Peppermint Bark Style: Replace the vanilla extract with peppermint extract and top the cooling fudge with crushed candy canes for a festive and colorful presentation.
How to Make the Best Homemade Chocolate Fudge Recipe
Step 1: Prepare Your Pan and Hardware
Before you turn on the stove, you must have your 8×8-inch baking pan lined with parchment paper or heavy-duty aluminum foil. Ensure the paper hangs over the edges to create “handles” for easy removal later. Because candy making moves quickly once the temperature is reached, having your chocolate chips, marshmallow fluff, and vanilla measured and ready in a separate bowl is vital. This prevents the sugar base from overcooking while you scramble for ingredients.
Step 2: Combine the Sugar and Dairy Base
In a heavy-bottomed saucepan, combine the granulated sugar, unsalted butter, and evaporated milk. The heavy-bottomed pan is important because it distributes heat evenly, preventing the milk from scorching at the bottom. Stir the mixture over medium heat until the butter has completely melted and the sugar has dissolved. You want a uniform, pale liquid before the mixture reaches a boil to ensure the best homemade chocolate fudge recipe has no lingering granules.
Step 3: Boil to the Soft Ball Stage
Bring the mixture to a full rolling boil, stirring constantly to prevent sticking. You need to cook this mixture for approximately 4 to 5 minutes. If you are using a candy thermometer, you are looking for the “soft ball” stage, which is about 234°F (112°C). This specific temperature ensures that enough water has evaporated so the fudge will set, but not so much that it becomes brittle. The mixture should look slightly thickened and have a light golden hue.
Step 4: Incorporate the Chocolate and Stabilizers
Remove the pan from the heat immediately once the temperature is reached. Quickly add the chocolate chips, marshmallow fluff, vanilla, and salt. Use a sturdy wooden spoon or silicone spatula to beat the mixture vigorously. The residual heat from the sugar syrup will melt the chocolate. Continue stirring until the mixture is completely smooth, glossy, and the creamy chocolate fudge starts to lose a bit of its sheen, indicating it is ready to be poured.
Step 5: Pour and Set the Fudge
Transfer the warm mixture into your prepared baking pan, smoothing the top with an offset spatula. Do not scrape the very bottom of the pot if there are any dark or overcooked bits, as these can ruin the texture of your easy fudge recipe. Allow the fudge to sit at room temperature for at least two hours, then transfer it to the refrigerator for another two hours. Patience is key here; cutting into the fudge too early will result in messy, misshapen squares.
Pro Tips for the Best Results
- Tip: Avoid making fudge on a very humid or rainy day. Sugar is hygroscopic, meaning it absorbs moisture from the air, which can prevent your holiday treat from setting properly.
- Tip: Use a wooden spoon rather than a metal one. Metal conducts heat and can cause the temperature of the fudge to fluctuate during the critical stirring phase.
- Tip: Do not over-boil the sugar mixture. Even thirty extra seconds can turn a creamy chocolate fudge into something that is crumbly and dry.
- Tip: If your fudge seems oily, it likely separated because the heat was too high. You can sometimes save it by adding a teaspoon of very hot water and stirring vigorously.
- Tip: For the cleanest cuts, lift the entire block of fudge out of the pan using the parchment handles and use a long, sharp knife dipped in hot water and wiped dry between every slice.
Troubleshooting Common Problems
Why is my fudge grainy?
Graininess is caused by large sugar crystals forming in the mixture. This usually happens if the sugar wasn’t fully dissolved before boiling started or if sugar crystals from the side of the pot were stirred into the finished product. To prevent this, you can use a wet pastry brush to wash down any sugar crystals on the sides of the saucepan during the initial melting phase.
Why did my fudge fail to set?
If your best homemade chocolate fudge recipe remains soft or spoonable, it likely didn’t reach a high enough temperature during the boiling stage. Without reaching 234°F, there is too much moisture left in the dairy. You can try to repurpose unset fudge as a delicious chocolate sauce for ice cream or a filling for truffles.
Why is there a layer of oil on top?
This typically occurs when the chocolate is added to a mixture that is too hot, or if the mixture is stirred too aggressively after the chocolate has melted, causing the fats to separate. Ensure you remove the pan from the heat source before adding the chips and stir just until combined and smooth.
How to Serve Your Fudge
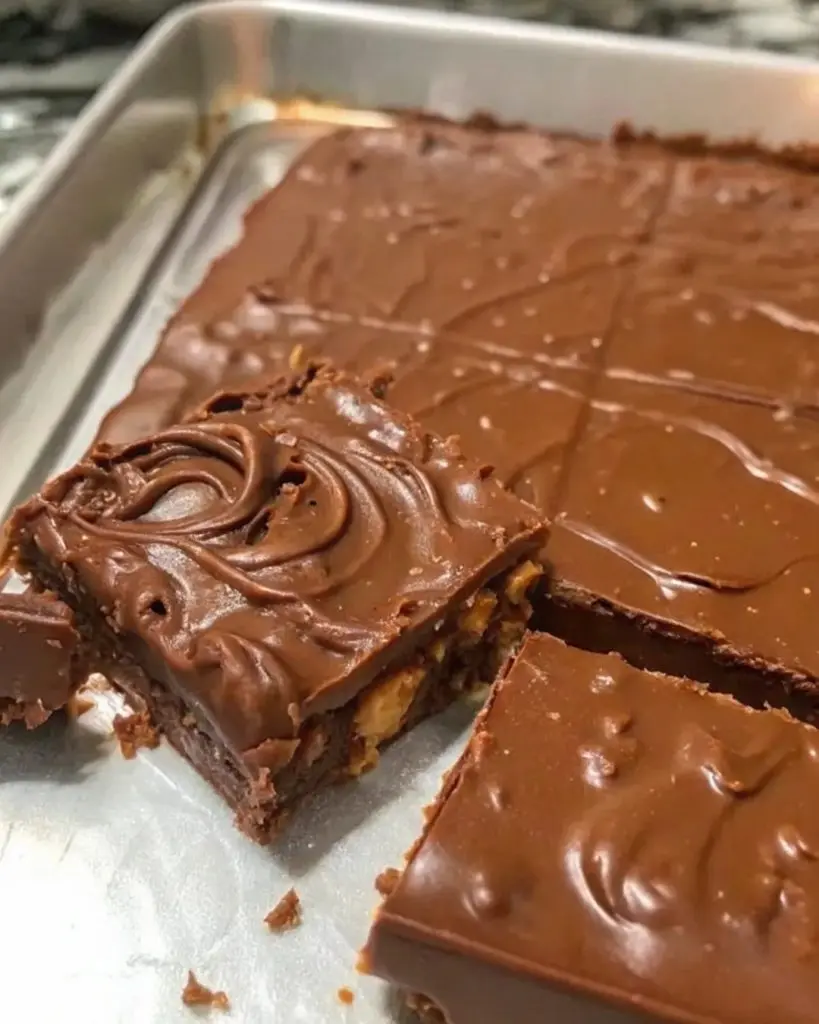
When it comes to serving the best homemade chocolate fudge recipe, presentation is just as important as taste. Because this fudge is incredibly rich, small portions are best. A standard 1-inch square is usually the perfect serving size for a decadent holiday treat. To make a beautiful display, try alternating squares of plain chocolate fudge with pieces that have been topped with sea salt or nuts for visual contrast.
If you are serving this as part of a larger dessert spread, consider pairing it with tart elements to balance the sweetness. Fresh raspberries, sliced strawberries, or a glass of cold milk are classic accompaniments. For an adult gathering, a small glass of tawny port or a robust espresso creates a sophisticated pairing that highlights the complex notes of the chocolate. Serving the fudge at room temperature is ideal, as it allows the creamy chocolate fudge texture to be fully appreciated by your guests.
Storage and Make-Ahead
Storing Leftovers
To keep your fudge fresh, store it in an airtight container with layers separated by parchment paper. It can be kept at room temperature for up to one week. If you prefer a firmer texture, you can store it in the refrigerator for up to three weeks, though it should be brought to room temperature before serving for the best flavor profile.
Freezing
This easy fudge recipe freezes remarkably well. Wrap the entire block or individual squares tightly in plastic wrap, then place them in a freezer-safe bag. It will stay fresh for up to three months. To thaw, move the fudge to the refrigerator overnight. This make-ahead capability is perfect for the busy holiday season.
Final Thoughts
Mastering the best homemade chocolate fudge recipe is a rewarding skill that brings joy to any occasion. By focusing on the quality of your chocolate and the precision of your cooking temperature, you can create a creamy chocolate fudge that stands out from the crowd. This holiday treat is a testament to the fact that simple ingredients, when treated with care and technique, can produce something truly extraordinary. Once you taste the difference that homemade makes, you may never go back to store-bought fudge again.
Frequently Asked Questions
Can I use chocolate bars instead of chips?
Yes, you can absolutely use high-quality chocolate bars. In fact, many professional candy makers prefer them because they often contain fewer stabilizers than chips, leading to an even smoother melt. Just be sure to chop the bars into very small, uniform pieces so they melt quickly and evenly when added to the hot sugar base.
Do I really need a candy thermometer?
While experienced bakers can sometimes tell by the “look” of the bubbles, using a candy thermometer is the best way to ensure success for this easy fudge recipe. Even a few degrees of difference can change the texture from soft and creamy to hard and crumbly. If you don’t have one, the “cold water test” can be used to check for the soft ball stage, but a thermometer is much more reliable.
Is evaporated milk the same as sweetened condensed milk?
No, they are very different products and cannot be swapped 1:1. Sweetened condensed milk has a massive amount of sugar added to it, whereas evaporated milk is simply milk that has had about 60% of its water removed. Using condensed milk in this best homemade chocolate fudge recipe would result in a fudge that is cloyingly sweet and likely wouldn’t set properly with these specific ratios.
How do I get perfectly clean squares when cutting?
The secret to clean lines is temperature and a clean blade. Make sure the fudge is fully chilled before attempting to cut it. Use a large chef’s knife, dip it in a tall glass of hot water, wipe it completely dry with a towel, and make one long, smooth downward stroke. Repeat the cleaning and heating of the knife for every single cut to prevent the fudge from sticking and tearing.
Can I make this recipe vegan?
Converting this specific best homemade chocolate fudge recipe to a vegan version requires several substitutions, including vegan butter, coconut milk (as a substitute for evaporated milk), and vegan-certified marshmallow fluff or a substitute. While possible, the fat content and sugar chemistry change significantly, so it is often better to follow a recipe specifically formulated for plant-based ingredients to ensure a creamy chocolate fudge result.
My Mom’s Classic Chocolate Fudge

A rich, velvety chocolate fudge that is incredibly easy to make. This family favorite requires only a few ingredients and is perfect for any holiday dessert platter or as a thoughtful homemade gift.
- 3 cups semi-sweet chocolate chips
- 1 can (14 oz) sweetened condensed milk
- 1/4 cup unsalted butter, cubed
- 1 teaspoon pure vanilla extract
- 1/4 teaspoon salt
- 1 cup chopped walnuts or pecans (optional)
- 1Line an 8-inch square baking pan with parchment paper or aluminum foil, leaving an overhang on the sides for easy removal.
- 2In a medium-sized heavy saucepan, combine the chocolate chips, sweetened condensed milk, and butter over low heat.
- 3Stir continuously with a rubber spatula until the chocolate is completely melted and the mixture is smooth.
- 4Remove from the heat and stir in the vanilla extract, salt, and chopped nuts if desired.
- 5Pour the fudge mixture into the prepared pan and spread it evenly into the corners.
- 6Refrigerate for at least 2 to 3 hours, or until the fudge is firm.
- 7Use the parchment paper to lift the fudge out of the pan and cut into small squares.
Keywords: chocolate fudge, homemade fudge, easy dessert, holiday candy, no-bake treats


