
Homemade Cinnamon Rolls

There is nothing quite like the aroma of fresh yeast, warm butter, and spicy cinnamon wafting through the house on a slow weekend morning. Finding the best homemade cinnamon rolls recipe is often a culinary rite of passage for home bakers, as it combines the technical satisfaction of working with dough with the pure, nostalgic joy of a gooey, sweet treat. These aren’t your standard grocery store rolls; we are talking about oversized, pillow-soft buns with a deep caramelization on the bottom and a thick, velvety slather of frosting on top.
The secret to a truly spectacular roll lies in the balance between the richness of the dough and the punch of the filling. Many recipes produce rolls that are either too dry or overly bready, but by focusing on high-quality fats and a controlled proofing process, you can achieve that sought-after “melt-in-your-mouth” texture. Whether you are prepping for a holiday brunch or just want to master the art of the soft fluffy dough, this guide will walk you through every nuance of the process to ensure success every single time.
Why This Recipe Is a Keeper
- Unbeatable Texture: By using a enriched brioche dough base, these rolls stay soft for days rather than turning into bricks the moment they cool down.
- Gooey Centers: The ratio of brown sugar to cinnamon is calibrated to create a lava-like filling that seeps into the spirals without running out the bottom.
- Customizable Sweetness: The tangy cream cheese frosting balances the sugar, allowing you to enjoy a decadent pastry without it feeling cloying.
- Make-Ahead Friendly: This recipe is designed to work with an overnight rise, meaning you can do the heavy lifting the night before and just bake in the morning.
Ingredients You’ll Need
To achieve bakery-quality results at home, the quality of your pantry staples matters. We aren’t just looking for sweetness; we are looking for structural integrity and complex flavor. Here is a breakdown of the key components that make this the best homemade cinnamon rolls recipe in your repertoire.
- Bread Flour: While all-purpose flour works, bread flour has a higher protein content which creates the gluten structure needed to support all that butter and sugar, resulting in a chewy cinnamon roll texture.
- Whole Milk: The fat in whole milk tenderizes the crumb. Ensure it is warmed to about 110°F to properly activate the yeast without killing it.
- Active Dry Yeast: This provides the lift and that classic fermented flavor. If you prefer a faster rise, instant yeast can be substituted, though the flavor development is slightly different.
- Unsalted Butter: You will use this in the dough, the filling, and the frosting. High-quality European-style butter offers a better fat-to-water ratio for richer rolls.
- Brown Sugar: The molasses in brown sugar is essential for that sticky, dark filling. It creates a much more complex syrup than granulated sugar alone.
- Ground Cinnamon: Look for Saigon cinnamon if possible; it has a higher oil content and a much more intense, spicy-sweet aroma.
- Heavy Cream: A modern “pro-tip” involves pouring a bit of warm heavy cream over the rolls just before baking to create gooey cinnamon rolls that never dry out in the oven.
- Cream Cheese: For the frosting, use full-fat brick-style cream cheese. It provides the necessary body and tang to cut through the richness of the pastry.
Variations and Smart Swaps
Fruit-Filled Variations: If you want to move away from traditional cinnamon, try spreading a thin layer of raspberry jam or lemon curd over the buttered dough before rolling. This creates a bright, tart alternative to the spice-heavy classic.
Nutty Additions: For a bit of crunch, finely chopped pecans or walnuts can be sprinkled over the cinnamon-sugar layer. Toasting the nuts beforehand will deepen their flavor and prevent them from becoming soggy during the bake.
Maple-Bacon Twist: To lean into the savory-sweet trend, add a teaspoon of maple extract to the frosting and top the finished rolls with crumbled, crispy bacon. It’s an assertive flavor profile that works beautifully for a special weekend brunch.
Dairy-Free Option: You can substitute the milk with oat milk and the butter with a high-quality vegan butter stick. While the texture will be slightly less “brioche-like,” the rolls will still be incredibly soft and flavorful.
How to Make the Best Homemade Cinnamon Rolls
Step 1: Activate the Yeast and Mix the Dough
Start by whisking your warm milk with a bit of sugar and your yeast. Let it sit for about five to ten minutes until a thick, frothy foam forms on the surface. This “blooming” process confirms your yeast is alive. Once foamy, add your melted butter, egg, and the rest of the sugar. Gradually incorporate the flour until a shaggy mass forms. If you are using a stand mixer, use the dough hook to knead the mixture for about 5–7 minutes until the dough is smooth, slightly tacky, but pulls away cleanly from the sides of the bowl. This development of gluten is what ensures your soft fluffy dough can hold its shape.
Step 2: The First Rise
Place your kneaded dough into a lightly greased bowl and cover it with plastic wrap or a damp kitchen towel. You want to leave this in a warm, draft-free spot until it has doubled in size, which usually takes about 60 to 90 minutes. This bulk fermentation is crucial because it allows the yeast to produce carbon dioxide, which creates the air pockets that make the rolls light. If your kitchen is cold, you can place the bowl in an oven that is turned off but has the light on.
Step 3: Rolling and Filling
Punch down the risen dough to release the air and turn it out onto a lightly floured surface. Roll the dough into a large rectangle, approximately 12×18 inches. Spread your softened (not melted) butter across the entire surface, leaving a small margin at the top edge. Sprinkle your cinnamon-sugar mixture generously over the butter. Starting from the long edge closest to you, roll the dough into a tight log. A tight roll is the secret to those beautiful, distinct spirals you see in professional bakeries.
Step 4: Cutting and the Second Proof
Use a piece of unflavored dental floss or a very sharp serrated knife to cut the log into 12 even rolls. Using floss prevents the dough from being squashed, preserving the circular shape. Place the rolls in a greased 9×13 baking dish. Cover them again and let them rise for another 30–45 minutes. They should look puffy and be touching each other. This second rise is the “proofing” stage; skipping this will result in dense, heavy rolls. If you are using the heavy cream trick, pour the warmed cream around the base of the rolls just before they head into the oven.
Step 5: Baking to Golden Perfection
Bake the rolls in a preheated oven at 350°F for about 20 to 25 minutes. You are looking for a light golden brown color on the tops. Avoid overbaking, as this is the primary cause of dry cinnamon rolls. The internal temperature should reach about 190°F if you’re using a meat thermometer. While the rolls bake, whip together your cream cheese, butter, powdered sugar, and vanilla until completely smooth and aerated.
Step 6: Frosting While Warm
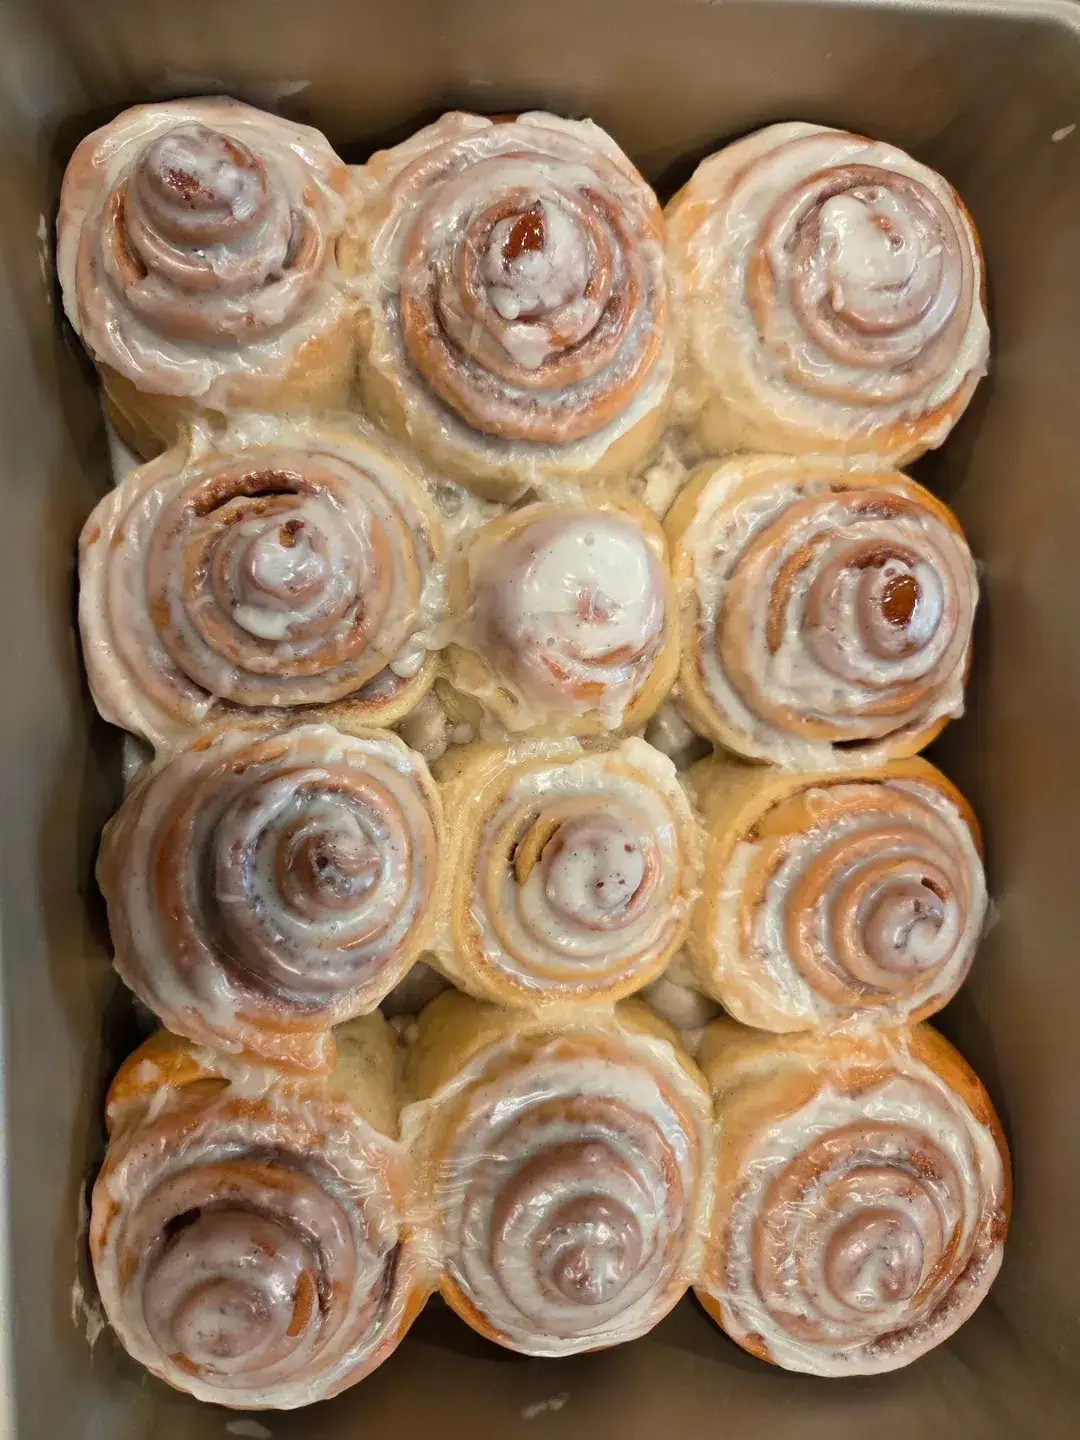
One of the most important steps in the best homemade cinnamon rolls recipe is the frosting technique. Apply about half of the cream cheese icing while the rolls are still hot, fresh out of the oven. This allows some of the frosting to melt down into the spirals, infusing the dough with moisture. Once the rolls have cooled for another 10 minutes, spread the remaining frosting on top for that classic thick, decorative finish.
Pro Tips for Success
- Use Room Temperature Ingredients: Ensure your eggs and butter for the filling are at room temperature. Cold eggs can shock the yeast, and cold butter won’t spread evenly, potentially tearing your delicate dough.
- Don’t Over-Flour: It is tempting to keep adding flour if the dough feels sticky, but too much flour leads to a tough, dry roll. Use just enough so the dough is manageable.
- Measure by Weight: For the most consistent results with the best homemade cinnamon rolls recipe, use a kitchen scale to measure your flour in grams. Volume measurements with cups can vary wildly.
- The Floss Trick: As mentioned, using dental floss to “snip” the rolls from the log prevents the dough from compressing, which keeps the interior layers airy and light.
- Check Your Yeast: If your yeast doesn’t foam during the blooming stage, throw it out and start over. Using expired yeast is the most common reason for flat, hard rolls.
Troubleshooting Common Problems
Why Didn’t My Dough Rise?
The most common culprit is the temperature of the milk. If it’s too hot (over 120°F), it kills the yeast. If it’s too cold, the yeast stays dormant. Another possibility is that your yeast is simply old. Always check the expiration date on the packet before starting your bake.
Why Are My Rolls Dry and Hard?
This usually happens for two reasons: overbaking or adding too much flour during the kneading process. The rolls should be removed from the oven when they are just barely golden. They will continue to cook slightly from the residual heat in the pan.
Why Did the Filling All Run Out?
If your butter was too melted when you spread it, or if your rolls didn’t have a tight enough spiral, the filling can leak out and pool at the bottom of the pan. Ensure the butter is “spreadable” like room-temperature cream cheese, and roll the log firmly.
How to Serve Your Homemade Rolls
For the ultimate experience, serve these rolls while they are still warm enough for the frosting to be slightly glossy. They are a complete meal on their own for a decadent breakfast, but they also pair beautifully with a side of salty protein like thick-cut bacon or breakfast sausage to balance the sweetness.
If you are serving a crowd, consider a “topping bar” approach. Place the frosted rolls on a large platter and offer small bowls of toasted pecans, fresh berries, or a drizzle of salted caramel. For drinks, a strong, dark roast coffee or a cold glass of milk is the traditional choice, as the bitterness of the coffee or the neutrality of the milk cuts through the rich cream cheese icing perfectly.
Storage and Make-Ahead
Storing Leftovers
If you have leftovers, keep them in an airtight container at room temperature for up to two days. For longer storage, keep them in the refrigerator for up to five days. Note that the fridge can dry out bread products, so always give them a quick zap in the microwave before eating.
Making It Ahead
You can prepare the rolls up through the cutting stage, place them in the baking dish, cover tightly, and refrigerate overnight. In the morning, let them sit at room temperature for about 45–60 minutes to take the chill off and finish their second rise before baking. This is the most popular way to enjoy the best homemade cinnamon rolls recipe without waking up at 4:00 AM.
Freezing Instructions
Baked rolls (unfrosted) can be frozen for up to three months. Wrap them individually in plastic wrap and then foil. To serve, thaw at room temperature and warm in a 300°F oven for 10 minutes before frosting. You can also freeze the unbaked rolls after the second rise, though the yeast may lose some potency over time.
Final Thoughts
Mastering the best homemade cinnamon rolls recipe is a rewarding journey that turns a few humble pantry staples into a world-class breakfast. While the process takes time, the majority of it is hands-off, letting the yeast do the work while you enjoy the anticipation. The key is patience—don’t rush the rises, and don’t skimp on the quality of your cinnamon or butter. Once you pull that pan of golden, bubbling rolls out of the oven and smell the sweet spice, you’ll realize that the effort was worth every second. These overnight cinnamon rolls are sure to become a requested staple for every special occasion in your home.
Frequently Asked Questions
Can I use all-purpose flour instead of bread flour?
Yes, you can absolutely use all-purpose flour. The rolls will be slightly softer and less “bready” or chewy than those made with bread flour. If using all-purpose, you might need a tablespoon or two more flour to get the dough to the right consistency, as it doesn’t absorb liquid quite as efficiently as bread flour.
How do I know when the rolls are done baking?
The tops should be a light, golden brown. If you have an instant-read thermometer, aim for an internal temperature of 190°F (88°C). If they start browning too quickly on top but still feel doughy in the center, you can tent the pan with aluminum foil for the last five minutes of baking.
Why do you add heavy cream before baking?
Adding warm heavy cream to the pan is a viral baking hack that mimics high-end commercial rolls. The cream steams the bottom of the rolls as they bake, preventing a hard crust from forming and creating a “cinnamon-syrup” at the base. It results in a much more gooey cinnamon roll that stays moist for a longer period.
Can I make these rolls without a stand mixer?
Absolutely! You can knead the dough by hand on a floured surface. It will take about 10–12 minutes of vigorous kneading to reach the same level of gluten development that a stand mixer achieves in 5–7 minutes. It’s a great workout and allows you to really feel the texture of the dough change as it becomes elastic.
What is the best way to reheat a cinnamon roll?
The microwave is actually the best tool for this. Place a single roll on a plate and heat for 15–20 seconds. The steam from the microwave softens the bread fibers and melts the frosting just enough to restore that fresh-from-the-oven quality. Avoid reheating in the oven for too long, as it can dry the rolls out.


