
Frozen Fruit Salad

There is something undeniably nostalgic about a creamy, chilled fruit dish served at a family gathering or a summer potluck. This easy frozen fruit salad recipe captures that classic American charm, offering a refreshing blend of vibrant fruits suspended in a velvety, sweet base. Unlike a standard fruit salad that can become watery over time, this version is frozen into a sliceable masterpiece, making it both a sophisticated side dish and a light, creamy fruit dessert that cleanses the palate after a heavy meal.
The beauty of this recipe lies in its contrasting textures: the icy crunch of the frozen fruit meets the smooth, marshmallow-like consistency of the cream. It is an incredibly approachable dish that requires no actual cooking, making it a refreshing summer treat that you can whip up in minutes and leave to set in the freezer until you are ready to serve. Whether you are hosting a holiday brunch or a backyard barbecue, this dish provides a burst of sweetness that both kids and adults will reach for again and again.
Why This Recipe Is a Keeper
- Make-Ahead Convenience: Because this is a make-ahead dessert, you can prepare it days in advance, freeing up your kitchen time on the day of your event or holiday dinner.
- Customizable Fruit Mix: You can easily adapt the recipe to include your favorite canned or fresh fruits, ensuring the flavor profile matches your family’s specific preferences.
- Unique Texture: The combination of whipped topping and a creamy binder creates a semi-freddo-like texture that is far more decadent than a traditional fruit bowl.
- Crowd-Pleasing Appeal: With its bright colors and sweet, familiar flavors, it often serves as a holiday side dish that bridges the gap between a salad and a dessert perfectly.
Ingredients You’ll Need
To achieve the perfect balance of creaminess and structure, choosing the right ingredients is essential. Each component plays a specific role in ensuring the salad stays stable while frozen and remains easy to slice once it hits the table.
- Whipped Topping: This provides the airy, light volume necessary for the salad’s structure. It holds its shape better than traditional whipped cream when frozen and thawed.
- Creamy Binder (Sour Cream or Cream Cheese): These ingredients add a necessary tang to balance the sugar, preventing the dish from becoming cloyingly sweet while adding a rich mouthfeel.
- Crushed Pineapple: The pineapple provides a tropical acidity and consistent moisture throughout the mix; just ensure it is drained thoroughly to avoid large ice crystals.
- Maraschino Cherries: These add a pop of bright red color and a nostalgic, candy-like sweetness that is synonymous with classic easy frozen fruit salad recipe variations.
- Mandarin Oranges: These delicate citrus segments provide a soft texture and a burst of juice that complements the creamy base beautifully.
- Mini Marshmallows: These add a chewy, pillowy texture that stays soft even when the rest of the salad is firmly frozen.
- Chopped Nuts (Optional): Pecans or walnuts provide a much-needed crunch and an earthy flavor that grounds the sweeter elements of the dish.
Variations and Smart Swaps
Tropical Twist: Replace the mandarin oranges with diced mango or shredded coconut for a beachy flavor profile that pairs beautifully with the pineapple base.
Nut-Free Version: If you are serving a crowd with allergies, simply omit the pecans or walnuts and replace them with extra marshmallows or pomegranate seeds for a similar textural contrast.
Dairy-Free Adaptation: Use a coconut-based whipped topping and a dairy-free sour cream or yogurt alternative to make this creamy fruit dessert accessible to everyone at your table.
Fresh Fruit Swap: While canned fruits are convenient and consistent, you can use fresh sliced strawberries or blueberries. Just be mindful that fresh fruit has a higher water content and may freeze harder than canned varieties.
How to Make This Easy Frozen Fruit Salad Recipe
Step 1: Drain the Fruit Thoroughly
The most important part of the preparation is ensuring your canned fruits—pineapple, oranges, and cherries—are drained as much as possible. Place them in a fine-mesh sieve for at least 10 to 15 minutes. Removing the excess juice prevents the salad from becoming an icy block, ensuring it retains its signature creamy, scoopable texture even after hours in the freezer.
Step 2: Create the Creamy Foundation
In a large mixing bowl, combine your whipped topping with your chosen binder, such as softened cream cheese or sour cream. Whisk these together until the mixture is completely smooth and free of lumps. This base acts as the “glue” for the fruit, and ensuring it is well-blended will result in a more professional, uniform appearance once the salad is sliced.
Step 3: Fold in the Fruit and Mix-ins
Gently fold the drained fruit, marshmallows, and nuts into the creamy base using a rubber spatula. Use a light hand during this process to avoid breaking the delicate mandarin oranges or deflating the whipped topping. You want the fruit evenly distributed so that every single slice contains a bit of everything, creating a beautiful mosaic of colors.
Step 4: Mold and Freeze Until Set
Transfer the mixture into a loaf pan lined with plastic wrap or a decorative silicone mold. Smooth the top with your spatula and tap the pan gently on the counter to remove any air pockets. Cover the top and place it in the coldest part of your freezer for at least 6 hours, though overnight is best. This duration allows the flavors to meld and the structure to firm up enough for clean slicing.
Pro Tips for Success
- Tip: Always line your pan with plastic wrap, leaving an overhang on the sides. This allows you to lift the entire salad out of the pan easily before slicing.
- Tip: If using maraschino cherries, pat them dry with a paper towel after draining. This prevents the red juice from bleeding into the white cream and turning the whole salad pink.
- Tip: For the cleanest slices, dip a sharp knife into hot water and wipe it dry between every single cut.
- Tip: Let the salad sit at room temperature for about 10 to 15 minutes before serving. This slight “tempering” makes the texture much creamier and easier to eat.
How to Serve This Dish
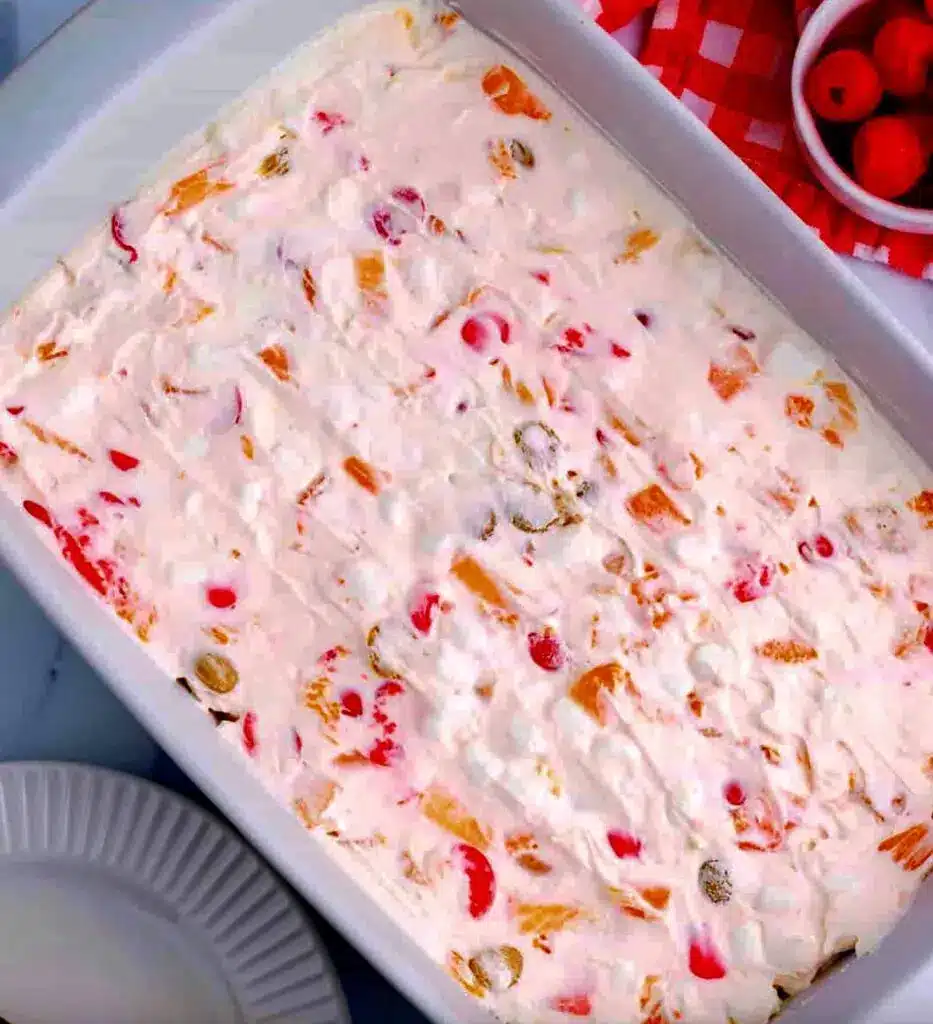
This easy frozen fruit salad recipe is incredibly versatile in how it can be presented. For a casual lunch, you can scoop it into individual ramekins or small glass bowls, allowing it to look like a gourmet ice cream treat. If you are serving it as a holiday side dish, unmold it onto a chilled platter and slice it into thick, elegant rectangles that show off the colorful fruit interior.
Garnishing can elevate the dish from a simple pantry staple to a centerpiece. A few fresh mint leaves, a sprinkle of extra toasted pecans, or a single fresh cherry on top adds a touch of sophistication. It pairs wonderfully with grilled meats like ham or chicken, as the cold, sweet fruit cuts through the savory richness of the main course. For a more dessert-focused presentation, serve a slice alongside a simple butter cookie or a piece of pound cake.
Storage and Make-Ahead
Storing Leftovers
If you have leftovers, return them to the freezer as quickly as possible. Wrap the remaining portion tightly in plastic wrap and then a layer of aluminum foil to prevent freezer burn. It will stay fresh and flavorful for up to two weeks, though the texture is best within the first few days.
Making It Ahead
Since this is a dedicated make-ahead dessert, you can prepare the entire recipe up to three days before your event. This actually improves the dish, as the marshmallows have more time to soften into the cream, and the flavors of the pineapple and citrus fully infuse the base.
Final Thoughts
Bringing this easy frozen fruit salad recipe to the table is a guaranteed way to spark conversation and satisfy cravings. Its simplicity is its greatest strength, proving that you don’t need a long list of fresh ingredients or hours of stovetop prep to create something truly memorable. The combination of chilled cream and bright fruit offers a timeless appeal that fits perfectly into modern meal planning. Give this recipe a try for your next gathering, and you might just find it becomes a new family tradition that everyone looks forward to year after year.
Frequently Asked Questions
Can I use fresh fruit instead of canned?
Yes, you can use fresh fruit, but you must be careful with the water content. Fresh fruits like grapes or berries work well, but stone fruits or melons might release too much moisture and create large ice crystals. Canned fruit is often preferred for this specific recipe because the texture remains consistent even after being frozen and slightly thawed.
How long does the salad need to freeze?
For the best results, you should freeze the salad for a minimum of 6 to 8 hours. If you try to serve it too early, the center may still be soft, making it difficult to slice or unmold. Freezing it overnight is the safest way to ensure the easy frozen fruit salad recipe has set completely through to the middle.
Why is my frozen fruit salad too hard to slice?
If the salad is frozen solid, it simply needs a few minutes to sit on the counter. Because of the sugar and fat content in the whipped topping, it won’t stay rock-hard forever. Give it about 10 to 15 minutes at room temperature, and you will find that the knife glides through easily, revealing that perfect creamy fruit dessert texture.
Can I use Greek yogurt instead of sour cream?
You can certainly swap sour cream for Greek yogurt if you prefer a bit more protein and a slightly sharper tang. Use a full-fat Greek yogurt for the best results, as low-fat or fat-free versions have a higher water content which can lead to a grainier, icier texture once the salad is fully frozen.
Is this recipe gluten-free?
Most versions of this easy frozen fruit salad recipe are naturally gluten-free, as they rely on fruit, dairy, and whipped topping. However, always check the labels on your specific brand of whipped topping and marshmallows to ensure no gluten-containing stabilizers or thickeners have been added during manufacturing.
Creamy Frozen Fruit Salad

This refreshing and creamy frozen fruit salad is a classic summer staple. Combining cream cheese, whipped topping, and a variety of canned fruits, it provides a sweet and cool treat that is perfect for any gathering.
- 1 (8 oz) package cream cheese, softened
- 1/2 cup granulated sugar
- 1 (15 oz) can fruit cocktail, drained
- 1 (20 oz) can crushed pineapple, drained
- 1/2 cup maraschino cherries, halved
- 2 cups miniature marshmallows
- 1 (8 oz) container whipped topping, thawed
- 1In a large mixing bowl, beat the softened cream cheese and sugar together until the mixture is smooth and creamy.
- 2Stir in the drained fruit cocktail, crushed pineapple, maraschino cherries, and miniature marshmallows until everything is evenly distributed.
- 3Gently fold in the whipped topping with a rubber spatula until no white streaks remain.
- 4Pour the mixture into a 9x13-inch baking dish and spread it evenly, or spoon it into individual muffin tins for single servings.
- 5Cover the dish with plastic wrap and freeze for at least 4 to 6 hours, or until firm.
- 6Before serving, let the salad sit at room temperature for about 10-15 minutes to make it easier to slice.
Keywords: frozen fruit salad, creamy dessert, summer recipe, fruit salad with marshmallows


