Butterfinger Cookie Bars
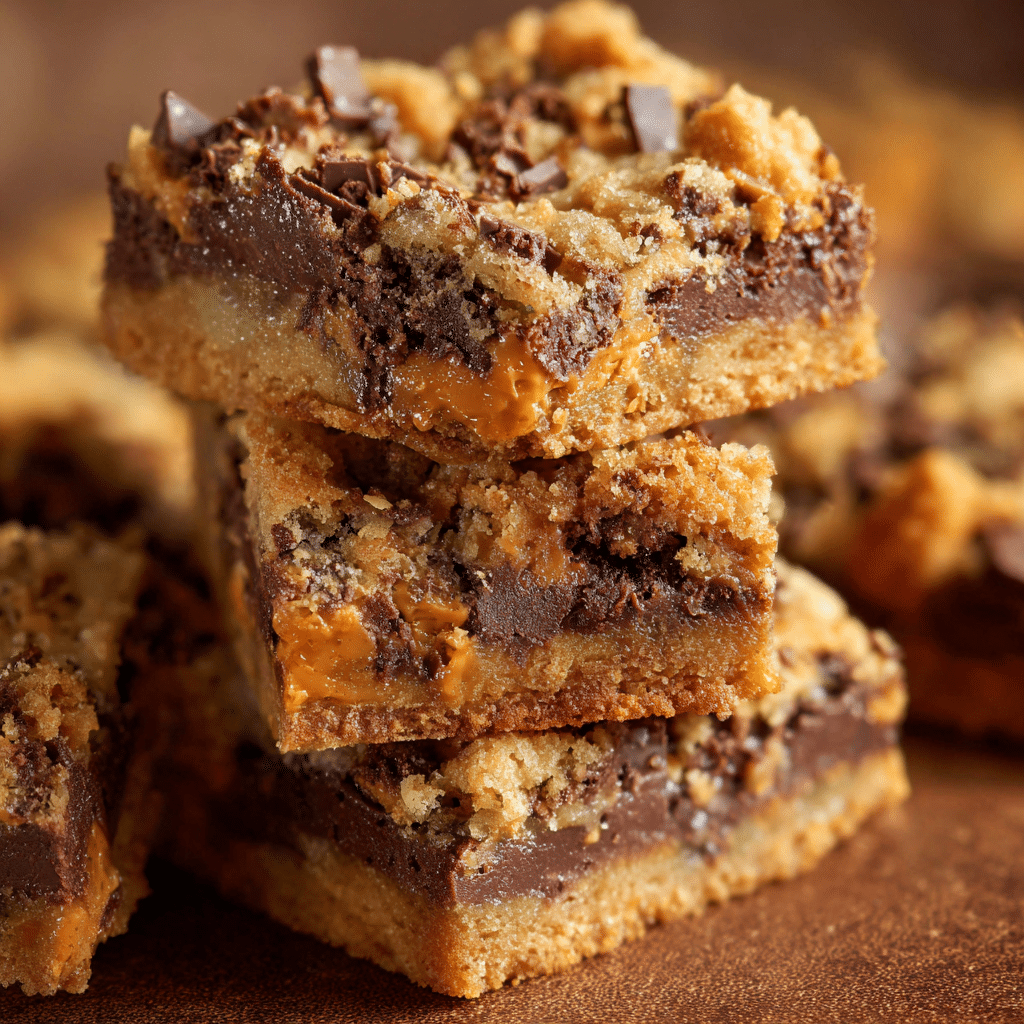
If you’re craving a crunchy, chewy, and utterly delicious treat, these Butterfinger Cookie Bars are exactly what you need. Packed with rich chocolate, smooth peanut butter, and the irresistible crunch of Butterfinger candy pieces, this is a perfect balance of sweet and salty flavors in every bite. These Butterfinger Cookie Bars are easy to whip up and guarantee a crowd-pleasing dessert or snack you’ll want to make again and again.
Why You’ll Love This Recipe
- Crunchy and Chewy Texture: Combines buttery cookie bars with crisp Butterfinger bits for a satisfying bite.
- Sweet and Salty Balance: The peanut butter and chocolate create the ultimate flavor harmony.
- Easy to Make: Simple ingredients and steps come together quickly for a no-fuss dessert.
- Perfect for Sharing: Great for parties, potlucks, or a cozy treat with family and friends.
- Customizable: Easily add nuts or swap ingredients for dietary preferences.
Ingredients You’ll Need
Each ingredient plays a crucial role in delivering the perfect texture and rich flavor of these Butterfinger Cookie Bars. From the creamy peanut butter to the crunchy Butterfinger candy, every component works together to create a memorable dessert.
- All-Purpose Flour: Provides the structure for the cookie bars, ensuring they’re firm yet tender.
- Butter: Adds richness and a buttery flavor that sets the base for these bars.
- Sugar (Brown and Granulated): Brown sugar offers moisture and chewiness, while granulated sugar contributes a slight crispness.
- Peanut Butter: Smooth peanut butter infuses the bars with creamy, salty depth that complements the chocolate.
- Eggs: Act as a binder, giving the bars their chewy consistency.
- Baking Soda and Baking Powder: Help the bars rise perfectly without becoming cakey.
- Vanilla Extract: Enhances all flavors and adds warmth.
- Chocolate Chips or Chunks: Melts into pockets of gooey delight.
- Crushed Butterfinger Candy: The star ingredient for that signature crunch and flavor burst.
Variations for Butterfinger Cookie Bars
One of the best parts about Butterfinger Cookie Bars is how easily you can make them your own. Whether you want to satisfy dietary needs or experiment with flavors, this recipe adapts wonderfully to your kitchen creativity.
- Nut-Free Option: Substitute the peanut butter with sunflower seed butter for those with nut allergies.
- Extra Chocolate: Add white or dark chocolate chips along with milk chocolate for a layered chocolate effect.
- Salted Caramel Twist: Drizzle salted caramel over bars before baking for a gooey surprise.
- Crunch Boost: Mix in chopped nuts like pecans or almonds for additional texture.
- Gluten-Free Version: Use a 1:1 gluten-free flour blend without altering the rest of the recipe.

How to Make Butterfinger Cookie Bars
Step 1: Prepare the Batter
Start by creaming together the softened butter, brown sugar, and granulated sugar until light and fluffy. Mix in the peanut butter, then beat in the eggs and vanilla extract until fully combined.
Step 2: Combine Dry Ingredients
In a separate bowl, whisk together the all-purpose flour, baking soda, and baking powder. Gradually add this dry mixture to the creamy peanut butter blend. Stir just until incorporated to avoid overmixing.
Step 3: Fold in Chocolate and Butterfinger Pieces
Gently fold in the chocolate chips or chunks along with crushed Butterfinger candy pieces. These add both gooey chocolate pockets and crunchy bursts throughout the bars.
Step 4: Bake the Cookie Bars
Spread the batter evenly into a parchment-lined baking pan. Bake at 350°F (175°C) for approximately 25 to 30 minutes, or until the edges turn golden and a toothpick inserted in the center comes out mostly clean with a few moist crumbs.
Step 5: Cool and Cut
Allow the cookie bars to cool completely in the pan before cutting into squares. This helps the bars set perfectly and makes cleanup a breeze.
Pro Tips for Making Butterfinger Cookie Bars
- Use Room Temperature Ingredients: Ensures better mixing and smoother batter texture.
- Don’t Overmix Flour: Mix just until combined to keep bars tender and chewy.
- Crush Butterfinger Candy by Hand: For uneven, crunchy chunks that enhance texture.
- Line Your Pan: Parchment paper helps lift bars out easily and protects edges from burning.
- Watch the Bake Time: Slightly underbaking leads to chewier bars, so check early!
How to Serve Butterfinger Cookie Bars
Garnishes
Sprinkle extra crushed Butterfinger over the tops while still warm for an inviting, crunchy finish. For added flair, dust a light sprinkle of powdered sugar or drizzle with melted peanut butter or chocolate.
Side Dishes
Serve these bars with a scoop of vanilla ice cream or a glass of cold milk for a classic pairing. A dollop of whipped cream or fresh berries can add a refreshing contrast to the sweet richness.
Creative Ways to Present
Cut peanut butter Bars into mini bite-sized portions for parties or kid-friendly snacks. You can also layer them in dessert parfait cups with whipped cream and chocolate sauce for an impressive presentation.
Make Ahead and Storage
Storing Leftovers
Keep leftover Butterfinger Cookie Bars in an airtight container at room temperature for up to 4 days. This keeps their chewy texture intact without drying out.
Freezing
Wrap bars tightly in plastic wrap and aluminum foil before freezing. They’ll keep well for up to 3 months. Thaw at room temperature before serving.
Reheating
Warm bars in the microwave for 10-15 seconds to return gooey softness, or heat briefly in a low oven around 275°F (135°C) for a fresh-out-of-the-oven feel.
FAQs
Can I use natural peanut butter for this recipe?
Yes, natural peanut butter works great but might make the bars slightly less creamy and more crumbly, so choose a smooth variety for best results.
What if I don’t have Butterfinger candy?
You can substitute with other crunchy chocolate peanut butter candies like Reese’s Pieces or chopped peanut brittle for a similar texture and flavor.
Are Butterfinger Cookie Bars gluten-free?
Traditional recipes use all-purpose flour, which contains gluten. Use a gluten-free flour blend to make them safe for gluten-free diets.
Can I make these bars vegan?
With some ingredient swaps like vegan butter, flax eggs, and dairy-free chocolate chips, you can adapt this recipe to be vegan-friendly.
How long do Butterfinger Cookie Bars stay fresh?
Stored properly at room temperature in an airtight container, they stay fresh and delicious for up to 4 days.
Final Thoughts
These Butterfinger Cookie Bars are truly a showstopper, combining texture and flavor in a way that’s hard to resist. Whether it’s a cozy night in or an event with friends, this recipe is your ticket to delivering smiles by the dozen. Don’t hesitate to try these bars today and experience the perfect sweet and salty treat you’ll fall in love with instantly!
Related Posts
PrintButterfinger Cookie Bars

These Butterfinger Cookie Bars deliver the perfect crunchy and chewy texture, combining rich chocolate, smooth peanut butter, and the signature crunch of Butterfinger candy pieces. Easy to make and ideal for sharing, they offer a delicious sweet and salty flavor harmony that’s perfect for any occasion.
- Prep Time: 15 minutes
- Cook Time: 25-30 minutes
- Total Time: 40-45 minutes
- Yield: 16 bars 1x
- Category: Dessert
- Method: Baking
- Cuisine: American
- Diet: Gluten Free (if using gluten-free flour blend)
Ingredients
Dry Ingredients
- 2 cups all-purpose flour (or 1:1 gluten-free flour blend for gluten-free version)
- 1/2 teaspoon baking soda
- 1/2 teaspoon baking powder
Wet Ingredients
- 1/2 cup (1 stick) unsalted butter, softened
- 1/2 cup smooth peanut butter (or sunflower seed butter for nut-free option)
- 1 cup brown sugar, packed
- 1/4 cup granulated sugar
- 2 large eggs, room temperature
- 1 teaspoon vanilla extract
Add-ins
- 1 cup chocolate chips or chunks (milk, white, or dark chocolate as preferred)
- 1 cup crushed Butterfinger candy pieces
Instructions
- Prepare the Batter: Cream together the softened butter, brown sugar, and granulated sugar until light and fluffy. Mix in the peanut butter, then beat in the eggs and vanilla extract until fully combined.
- Combine Dry Ingredients: In a separate bowl, whisk together the all-purpose flour, baking soda, and baking powder. Gradually add this dry mixture to the creamy peanut butter blend. Stir just until incorporated to avoid overmixing.
- Fold in Chocolate and Butterfinger Pieces: Gently fold in the chocolate chips or chunks along with the crushed Butterfinger candy pieces to create pockets of gooey chocolate and crunchy bursts throughout the bars.
- Bake the Cookie Bars: Spread the batter evenly into a parchment-lined baking pan. Bake at 350°F (175°C) for approximately 25 to 30 minutes, or until the edges turn golden and a toothpick inserted in the center comes out mostly clean with a few moist crumbs.
- Cool and Cut: Allow the cookie bars to cool completely in the pan before cutting into squares. This helps the bars set perfectly and makes cleanup easier.
Notes
- Use room temperature ingredients to ensure better mixing and smoother batter texture.
- Don’t overmix the flour to keep bars tender and chewy.
- Crush Butterfinger candy by hand for uneven, crunchy chunks that enhance texture.
- Line your pan with parchment paper to easily lift bars out and protect edges from burning.
- Watch the bake time closely; slightly underbaking leads to chewier bars.
Nutrition
- Serving Size: 1 bar
- Calories: 280 kcal
- Sugar: 20 g
- Sodium: 150 mg
- Fat: 15 g
- Saturated Fat: 6 g
- Unsaturated Fat: 7 g
- Trans Fat: 0 g
- Carbohydrates: 30 g
- Fiber: 2 g
- Protein: 5 g
- Cholesterol: 40 mg
Keywords: Butterfinger, cookie bars, peanut butter, chocolate, crunchy, chewy, dessert, easy recipe, snack